Connect with us

Product Care & Storage

How Long Homemade Apple Butter Stays Good: A Guide

Published

on

An image that showcases a glass jar filled with rich, velvety homemade apple butter, glistening under soft natural light

As someone who loves apple butter, I frequently question how long homemade apple butter lasts. But fret not, my fellow apple enthusiasts, as I have thoroughly researched this topic and found the answers.

In this article, I will explore the factors that affect the shelf life of apple butter, proper storage techniques, and even some safety precautions for preserving this delectable spread.

So, let’s dive in and discover how to extend the lifespan of our beloved homemade apple butter!

Key Takeaways

  • Homemade apple butter typically lasts 2-3 months when stored properly.
  • Storing apple butter in airtight containers in a cool, dark place helps preserve its quality and flavor.
  • Preservatives or natural alternatives like lemon juice can be used to extend the shelf life of apple butter.
  • Quality ingredients and careful selection ensure the best taste and texture in apple butter.

Shelf Life of Homemade Apple Butter

Homemade apple butter is typically good for about 2-3 months when stored properly. There are several factors that can affect the spoilage of apple butter.

Advertisement

One of the main factors is the presence of air. Oxygen can cause the apple butter to oxidize and spoil faster. It is important to store the apple butter in airtight containers to prevent this.

Another factor is temperature. Apple butter should be stored in a cool and dark place, away from direct sunlight and heat sources. High temperatures can speed up the spoilage process.

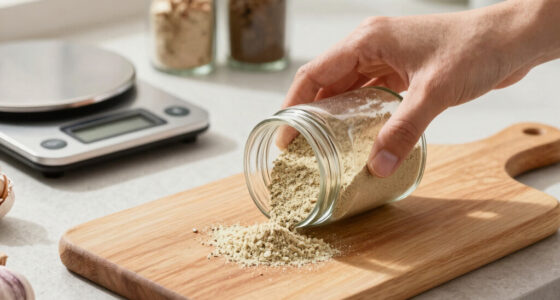
The best storage containers for apple butter are glass jars with tight-fitting lids. These containers are non-reactive and provide a good seal to keep air out.

Proper storage is key in ensuring the longevity of homemade apple butter.

Factors Affecting the Shelf Life of Apple Butter

When it comes to the shelf life of apple butter, there are several factors to consider.

Advertisement

First, the storage conditions play a crucial role in determining how long the apple butter will last.

Additionally, the use of preservatives can significantly extend the lifespan of the product.

Lastly, the quality of ingredients used in making the apple butter also matters as it can affect the overall longevity of the product.

Storage Conditions Impact Shelf Life

Proper storage conditions can greatly impact the shelf life of apple butter. The temperature at which it is stored plays a crucial role in its spoilage. Apple butter should be stored in a cool, dry place, away from direct sunlight and heat sources.

High temperatures can cause the butter to spoil quickly, leading to a shorter shelf life. It is best to store apple butter in airtight containers to prevent exposure to air and moisture. Glass jars with tight-fitting lids or plastic containers with secure seals work well for this purpose. These containers help preserve the freshness and flavor of the apple butter for a longer period.

Advertisement

Preservatives Extend Product Lifespan

Preservatives can help extend the lifespan of commercially-produced apple butter. In store-bought apple butter, preservatives are commonly used to prevent spoilage and maintain freshness. Here are some key points to consider about preservatives in store-bought apple butter:

  • Preservatives play a crucial role in prolonging the shelf life of apple butter by inhibiting the growth of bacteria, yeast, and mold.
  • Common preservatives found in store-bought apple butter include sorbic acid, potassium sorbate, and sodium benzoate.
  • While preservatives are effective in extending the lifespan of apple butter, some people prefer to avoid them due to potential health concerns.

However, if you prefer a more natural approach to preserving apple butter, there are alternatives to consider:

  • Using natural preservatives like lemon juice or apple cider vinegar can help inhibit microbial growth.
  • Proper canning techniques, such as hot water bath canning, can also effectively preserve apple butter without the need for additives.
  • Storing apple butter in airtight containers and refrigerating it can help maintain its quality and freshness for a longer period.

Ultimately, the choice between using preservatives or natural alternatives for preserving apple butter depends on personal preferences and dietary considerations. Transitioning into the subsequent section, it is worth noting that the quality of ingredients used in homemade apple butter also plays a significant role in its longevity.

Quality of Ingredients Matters

To ensure your store-bought apple butter has the best taste and texture, it is important to carefully select high-quality ingredients. The quality of ingredients greatly affects the overall quality of the apple butter.

When making homemade apple butter, you have the advantage of handpicking the freshest apples and other ingredients. This allows you to control the flavor and ensure that only the best goes into your recipe.

Store-bought apple butter, on the other hand, may contain preservatives and additives to prolong its shelf life. While these preservation techniques extend its lifespan, they can also impact the taste and texture.

Storing Homemade Apple Butter

If you want to keep your homemade apple butter fresh, make sure you store it in a cool, dark place. Storing apple butter long term requires proper storage techniques to maintain its flavor and texture. Here are some tips to help you store your homemade apple butter effectively:

Advertisement
  • Use clean, airtight jars: Reusing apple butter jars is a great way to store your homemade apple butter. Just make sure to clean them thoroughly before filling them with fresh batches.

  • Label the jars: Properly labeling the jars with the date of preparation will help you keep track of the freshness and ensure you use the oldest batch first.

  • Store in a cool, dark place: Exposure to heat and light can cause the apple butter to spoil quickly. Find a cool, dark place in your pantry or cupboard to store the jars.

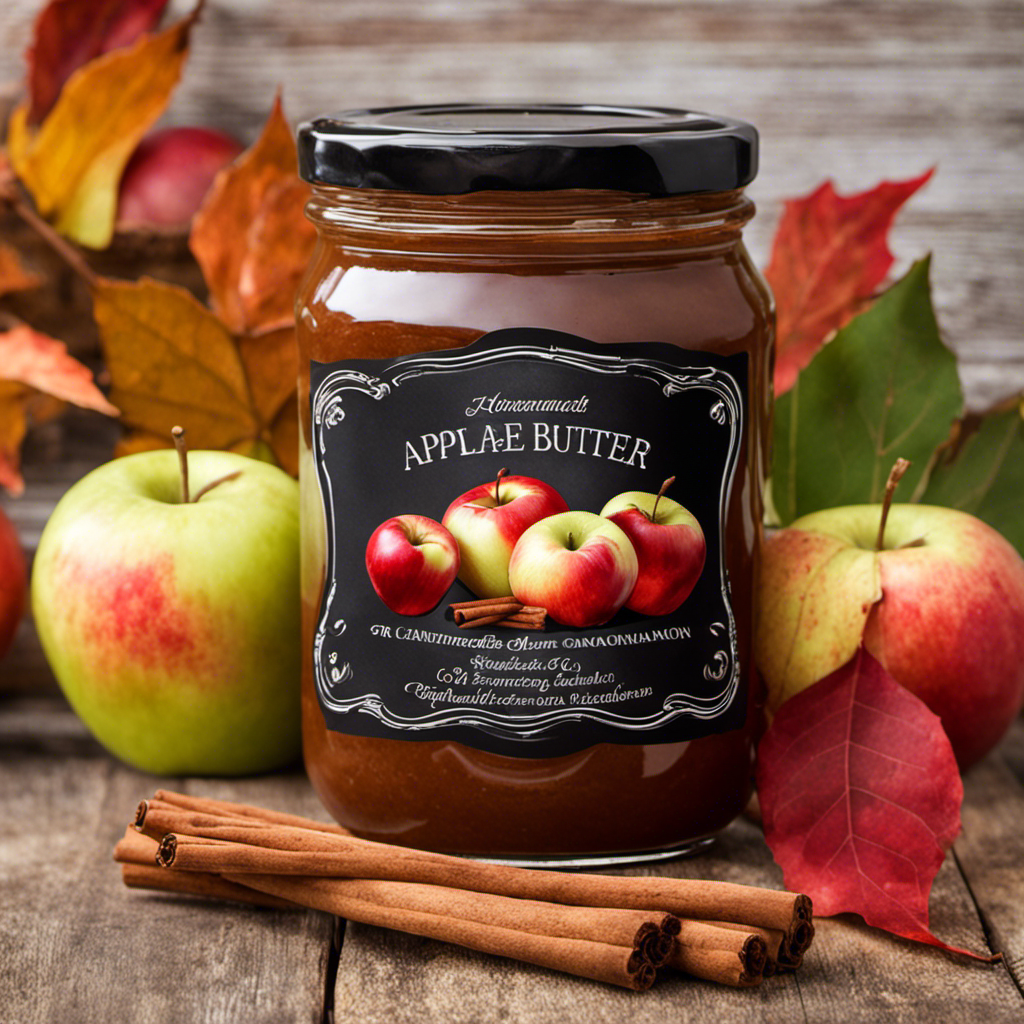
Properly Sealing and Labeling Apple Butter Jars

When properly sealed and labeled, jars of apple butter can be stored for an extended period. Properly labeling homemade apple butter and following best practices for sealing apple butter jars are crucial to ensure its longevity. Here are some tips for sealing and labeling apple butter jars effectively:

Sealing Apple Butter Jars Labeling Apple Butter Jars
Use clean and sterilized jars Include the date of preparation
Fill the jars leaving 1/4 inch headspace Write the contents and flavor
Wipe the jar rims before sealing Add any special ingredients
Apply hot lids and screw bands tightly Mention any dietary restrictions
Process in a boiling water bath Indicate if it’s homemade or store-bought
Allow jars to cool and check for seals Include your name or initials

Following these best practices will help maintain the quality and safety of your homemade apple butter. Enjoy the delicious taste of apple butter all year round by properly sealing and labeling your jars.

Refrigerating Apple Butter: How Long Does It Last

Refrigerating apple butter can help extend its shelf life. When it comes to storing homemade apple butter, refrigeration is key. Here are a few things to keep in mind:

  • Temperature: Store apple butter in the refrigerator at a temperature below 40°F (4°C) to prevent spoilage and maintain freshness.

  • Container: Transfer the apple butter into a clean, airtight jar or container before refrigerating to keep it fresh and prevent any cross-contamination.

  • Duration: Refrigerated apple butter can last for up to 2 to 3 months if stored properly.

Freezing Homemade Apple Butter

After learning about how long homemade apple butter can last in the refrigerator, I want to explore another option: freezing apple butter.

Freezing is a great way to extend the shelf life of apple butter even further. To freeze apple butter, you’ll need to transfer it to a suitable container. The best containers for freezing apple butter are airtight containers or freezer-safe glass jars. Make sure to leave some headspace in the container to allow for expansion during freezing.

Advertisement

It’s also a good idea to label the containers with the date of freezing for easy reference later on. When you’re ready to enjoy your frozen apple butter, simply thaw it in the refrigerator overnight or at room temperature.

Freezing is a convenient method to preserve the deliciousness of homemade apple butter for an extended period.

Safety Precautions for Preserving Apple Butter

To ensure the safety of preserving apple butter, it’s important to follow proper guidelines and techniques. Here are some key safety precautions to consider:

  • Wash your hands thoroughly before handling any ingredients or equipment to prevent bacterial growth.
  • Use clean, sterilized jars and lids for canning to avoid contamination.
  • Follow proper canning techniques, including using a water bath or pressure canner to kill any bacteria that may be present.

By taking these precautions, you can effectively prevent bacterial growth and extend the shelf life of your homemade apple butter.

However, it’s important to note that even with proper preservation techniques, apple butter may still spoil over time. In the next section, we will discuss the signs of spoiled apple butter and how to identify them.

Signs of Spoiled Apple Butter

When it comes to apple butter, it’s important to know how to identify if it has gone bad. There are a few key indicators to look out for, such as changes in color, texture, and smell.

Advertisement

It’s crucial to be able to recognize these signs to ensure safe consumption of apple butter.

Identifying Spoiled Apple Butter

If your homemade apple butter has an off smell or mold, it’s likely spoiled. Identifying signs of spoiled apple butter is crucial to ensuring safe consumption. Here are some indicators to look out for:

  • Color: If the apple butter has turned darker or has developed a greenish tint, it may be spoiled.
  • Texture: Spoiled apple butter can become watery or develop a slimy texture.
  • Taste: If the apple butter tastes sour or has an off-flavor, it is a clear sign of spoilage.

To ensure safe consumption, follow these guidelines:

  • Check the expiration date: Homemade apple butter usually lasts for around 2-3 months when stored properly in a cool, dry place.
  • Inspect the jar: If the lid is bulging or damaged, it may indicate bacterial growth.
  • Trust your senses: If the apple butter smells strange or looks abnormal, it’s best to discard it.

Safe Consumption Indicators

By checking the expiration date and inspecting the jar, you can determine if your homemade apple butter is safe to consume.

When it comes to apple butter storage, it’s important to keep it in a cool, dry place away from direct sunlight. This will help maintain its quality and extend its shelf life.

Once opened, homemade apple butter can be stored in the refrigerator for up to 2 to 3 weeks. However, it’s crucial to look for any signs of spoilage before consuming.

If the apple butter has an off odor, unusual texture, or mold growth, it’s best to discard it. Additionally, if the jar is swollen or the lid is bulging, it could be a sign of bacterial growth, and the apple butter should not be consumed.

Advertisement

Extending the Shelf Life of Homemade Apple Butter

To extend the shelf life of homemade apple butter, it’s important to properly store it in airtight containers. Here are some homemade preservation techniques that can help prolong the freshness of your apple butter:

  • Choose high-quality apples: Selecting fresh and ripe apples will result in a better quality apple butter that lasts longer.

  • Cook it thoroughly: Ensure that your apple butter is cooked to the right consistency, as this helps to kill any bacteria or microorganisms that could cause spoilage.

  • Sterilize the containers: Before filling them with apple butter, sterilize the containers to eliminate any potential contaminants.

Frequently Asked Questions

Can Homemade Apple Butter Be Stored at Room Temperature?

Yes, you can store homemade apple butter at room temperature, but it’s best to store it in the fridge. The shelf life of homemade apple butter is about 2 weeks when refrigerated.

Can I Reuse the Jars for Storing Apple Butter?

I can reuse jars for storing apple butter, but it’s important to consider the shelf life. Homemade apple butter is good for up to one year when stored properly in sealed jars.

Can Apple Butter Be Preserved Without Using Sugar?

Preserving apple butter without sugar is possible by using alternative sweeteners like honey or maple syrup. These natural sweeteners can provide a similar taste while avoiding the use of refined sugar.

Can I Add Spices or Other Flavors to Homemade Apple Butter?

Yes, you can add various spices and flavors to homemade apple butter to enhance its taste. You can experiment with cinnamon, nutmeg, cloves, or even vanilla extract. This allows you to make flavored apple butter without adding sugar.

Advertisement

Can Apple Butter Be Made Using Different Types of Apples?

Different types of apples can be used to make apple butter, but certain varieties like Granny Smith or Jonathan are best for their tartness and flavor. Experiment to find your favorite combination!

Conclusion

As I seal the jars of homemade apple butter, I can’t help but feel a sense of accomplishment and satisfaction. The sweet aroma fills the kitchen, transporting me to memories of crisp autumn days and cozy evenings by the fire.

This golden goodness is not just a delicious treat, but a symbol of time and effort, a labor of love. With proper storage and care, this homemade apple butter can last for months, allowing us to savor the flavors and hold onto those cherished moments just a little bit longer.

Continue Reading
Advertisement

Product Care & Storage

How Long to Blanch Butter Beans for Perfect Texture

Published

on

By

An image showcasing a pot of plump butter beans gently boiling in salted water, their creamy white skins glistening, as a timer sits nearby, capturing the anticipation of the precise blanching time

Hey there! Have you ever thought about how much time it takes to blanch butter beans?

Well, I’ve got you covered. In this article, I’ll walk you through the basics of blanching these delicious beans, including all the equipment you’ll need and a step-by-step guide for perfect results.

I’ll also share some tips and tricks to ensure your butter beans come out just right, and point out common mistakes to avoid.

So, let’s get started and master the art of blanching butter beans together!

Key Takeaways

  • Blanching butter beans for 2-3 minutes ensures they are tender yet firm.
  • Immediately transferring blanched beans to ice water helps retain their color and crispness.
  • Adding salt, herbs, or spices to the cooking water enhances the flavor of butter beans.
  • Blanching butter beans is crucial for preserving their color, texture, and flavor.

The Basics of Blanching Butter Beans

Advertisement

I’ll start by explaining the basics of blanching butter beans. Blanching is a cooking technique where the beans are briefly boiled and then immediately plunged into ice water to stop the cooking process. It helps to preserve the bright green color and crisp texture of the beans. Blanching is also beneficial for removing the outer skins of butter beans, making them more tender and easier to digest.

In addition to being delicious, butter beans offer several health benefits. They’re a good source of dietary fiber, which aids in digestion and helps to maintain a healthy weight. They’re also packed with essential vitamins and minerals like folate, iron, and potassium.

There are various ways to cook butter beans. You can steam them, sauté them with butter and garlic for added flavor, or even roast them in the oven for a crispy texture. Another popular method is to boil them until tender and then toss them with olive oil, lemon juice, and herbs for a refreshing salad.

Overall, blanching butter beans is a simple and effective way to enhance their taste, texture, and nutritional value.

Required Equipment for Blanching Butter Beans

To prepare butter beans, I’ll need a pot, a colander, and a timer. These essential pieces of equipment are crucial for blanching butter beans to perfection.

Advertisement

Here’s a breakdown of the equipment needed:

  1. Pot: Choose a pot that’s large enough to hold the butter beans and allow them to move freely in boiling water. A pot with a lid is ideal for maintaining the heat and reducing cooking time.

  2. Colander: A colander is essential for draining the blanched butter beans. Make sure to choose a colander with small holes to prevent the beans from falling through.

  3. Timer: Accurate timing is crucial when blanching butter beans. Use a timer to ensure that the beans are blanched for the recommended time, which is typically around 2 to 3 minutes.

Step-by-Step Guide to Blanching Butter Beans

First, gather the necessary equipment for blanching the butter beans. You’ll need a large pot, a colander, a bowl of ice water, and a slotted spoon.

To blanch the butter beans, there are a few different methods you can choose from. One method is to bring a pot of water to a boil and add the beans, cooking them for about 2 minutes. Then, quickly transfer them to the bowl of ice water to stop the cooking process.

Advertisement

Another method is to steam the beans for about 4-5 minutes until they’re tender but still crisp.

Once the butter beans are blanched, they can be used in a variety of ways. They can be added to salads, soups, or stews. They can also be seasoned and eaten as a side dish.

The blanched beans can even be pureed and used as a base for dips or spreads. The possibilities are endless!

Tips and Tricks for Perfectly Blanching Butter Beans

After gathering the necessary equipment, I can achieve perfectly blanched butter beans by carefully monitoring the cooking time and immediately transferring them to ice water. Here are three tips and tricks for achieving the best results:

  1. Timing is key: It’s crucial to blanch the butter beans for just the right amount of time. Overcooking can lead to mushy beans, while undercooking may result in a raw taste. Aim for a cooking time of about 2-3 minutes, until the beans are tender but still firm.

  2. Ice water bath: Once the beans are cooked to perfection, immediately transfer them to a bowl of ice water. This stops the cooking process and helps retain their vibrant green color and crispness.

  3. Seasoning options: While blanching butter beans, you can add a touch of flavor by seasoning the cooking water with salt, herbs, or spices. This will infuse the beans with a subtle taste, enhancing their overall flavor.

By following these blanching techniques and exploring different seasoning options, you can elevate the taste and texture of your butter beans.

Advertisement

Now, let’s delve into the common mistakes to avoid when blanching butter beans.

Common Mistakes to Avoid When Blanching Butter Beans

One mistake I often make when blanching butter beans isn’t properly blanching them for the right amount of time. Blanching is an essential step in cooking butter beans as it helps to preserve their color, texture, and flavor.

There are a few common blanching techniques that can be used, such as boiling the beans for a short period of time and then quickly cooling them in ice water. This helps to stop the cooking process and maintain the beans’ vibrant green color.

Advertisement

Another technique is to steam the beans until they’re just tender and then shock them in ice water. This method helps to retain their nutrients and natural sweetness.

It’s important to blanch the beans for the recommended time specified in the recipe to ensure they’re cooked evenly and have the desired texture.

One alternative use for butter beans is to include them in salads, soups, or stews for added protein and fiber. They can also be pureed and used as a base for dips or spreads.

Frequently Asked Questions

Can I Use Frozen Butter Beans for Blanching?

Yes, you can use frozen butter beans for blanching. Blanching is a common method used to cook vegetables before freezing them. It helps to preserve their flavor, color, and texture.

To blanch frozen butter beans, bring a pot of water to a boil, add the beans, and cook for 2-3 minutes. Then, drain and immediately transfer them to an ice bath to stop the cooking process.

Advertisement

This will ensure that your frozen butter beans retain their quality.

How Long Does It Take to Blanch Butter Beans in a Pressure Cooker?

Blanching butter beans in a pressure cooker is a quick and efficient method. It eliminates the need for a stovetop, making it faster.

The pressure cooker traps steam, allowing the beans to cook in a shorter amount of time.

The texture and flavor of butter beans can be affected by blanching versus steaming.

Blanching gives them a softer texture and a slightly milder flavor, while steaming retains more of their natural crunch and taste.

Advertisement

Can I Skip the Blanching Step and Cook Butter Beans Directly?

I haven’t tried skipping the blanching step when cooking butter beans directly, but it isn’t recommended. Blanching helps to soften the beans and remove any impurities.

However, there are alternative methods of cooking butter beans that you can try, such as simmering or pressure cooking. These methods may take longer than blanching, but they’ll ensure that the beans are cooked thoroughly and have a nice texture.

Can I Reuse the Blanching Water for Cooking the Butter Beans?

Reusing the blanching water for cooking the butter beans isn’t recommended. While it may seem like a convenient idea, blanching water contains impurities and can affect the flavor and texture of the beans.

Blanching is an important step in cooking butter beans as it helps remove dirt, impurities, and enzymes. It also helps preserve their color and nutrients.

Is It Necessary to Peel the Outer Skin of Butter Beans After Blanching?

It isn’t necessary to peel the outer skin of butter beans after blanching. Blanching butter beans has several benefits, such as preserving their vibrant color and enhancing their texture.

Advertisement

However, if you prefer to remove the outer skin, there are a few tips to make it easier. First, blanch the beans for about 2-3 minutes, then transfer them to an ice bath to cool quickly. Gently squeeze each bean between your fingers to pop them out of their skins.

Conclusion

Blanching butter beans is a simple and rewarding process that ensures they maintain their vibrant color and crisp texture. With the right equipment and following a step-by-step guide, you can achieve perfectly blanched butter beans every time.

Remember to avoid common mistakes like overcooking or undercooking, as they can result in a less enjoyable eating experience.

So, grab your beans, get blanching, and enjoy these delicious and visually appealing treats!

Advertisement
Continue Reading

Product Care & Storage

Preserving the Goodness: How to Store Browned Butter

Published

on

By

An image capturing a glass jar filled with warm, golden-brown liquid butter

Hello, fans of butter! Have you ever thought about how to properly store the tasty browned butter you put so much effort into making? Well, look no further because I have all the information you need right here.

In this article, I’m going to show you the ins and outs of properly storing browned butter. We’ll dive into the shelf life, the best containers to use, and even discuss the dos and don’ts of refrigerating and freezing this golden goodness.

So grab your spatula and let’s get started!

Key Takeaways

  • Properly storing browned butter is important to prevent spoilage and maintain its flavor.
  • Browned butter can last up to two weeks in the refrigerator when stored in an airtight container.
  • Freezing browned butter can extend its shelf life up to three months.
  • Glass containers are recommended for storing browned butter as they are non-reactive, airtight, and retain the original taste and aroma.

Why Browned Butter Should Be Stored Properly

You should know why browned butter needs to be stored properly.

Advertisement

When it comes to shelf life concerns, browned butter is quite delicate. It has a tendency to go rancid quickly if not stored correctly. Proper storage is essential to maintain its flavor and prevent any spoilage.

Browned butter has a rich and nutty taste that can enhance the flavor of various dishes. However, if it is not stored properly, its flavor can deteriorate, becoming bitter or unpleasant.

By storing browned butter in an airtight container and keeping it in the refrigerator, you can extend its shelf life and preserve its delicious flavor.

Understanding the shelf life of browned butter is crucial for anyone who wants to enjoy its unique taste in their culinary creations.

Understanding the Shelf Life of Browned Butter

Understanding the shelf life of browned butter can help determine how long it will stay fresh.

Advertisement

Browned butter, with its rich and nutty flavor, is a versatile ingredient that adds depth to various dishes.

However, it is important to store it properly to preserve its aroma and extend its shelf life.

When stored in an airtight container, browned butter can last for up to two weeks in the refrigerator. To ensure its freshness, it is recommended to label the container with the date it was made.

If you want to extend its shelf life further, browned butter can also be frozen for up to three months. Just make sure to thaw it in the refrigerator before using.

Following these shelf life tips will help you enjoy the delicious taste of browned butter for longer.

Advertisement

The Best Containers for Storing Browned Butter

When it comes to storing browned butter, there are a few key considerations to keep in mind.

First, the choice between glass and plastic containers can impact the longevity and flavor of the butter.

Secondly, it’s important to determine whether an airtight container is necessary to maintain the freshness of the butter.

Lastly, if you plan on freezing your browned butter, it’s crucial to choose a container that is freezer safe to prevent freezer burn and maintain the quality of the butter.

Glass Vs. Plastic

If storing browned butter, opt for glass containers instead of plastic. Glass containers provide several advantages over plastic when it comes to storing browned butter. Firstly, glass is non-reactive, meaning it won’t absorb or transfer any odors or flavors to the butter. This ensures that the butter retains its original taste and aroma. Secondly, glass containers are more airtight compared to plastic, preventing any air from entering and oxidizing the butter. This helps to maintain the butter’s freshness and quality for a longer period. However, one drawback of glass containers is that they are more prone to breakage compared to plastic. Therefore, it’s important to handle them with care. Overall, the pros of using glass containers for storing browned butter outweigh the cons.

Advertisement
Pros of Glass Containers Cons of Glass Containers
Non-reactive Prone to breakage
Airtight
Retains freshness

Airtight or Not

To keep your browned butter fresh and prevent oxidation, opt for a glass container that is airtight. Airtight storage provides numerous benefits for proper storage of browned butter.

Firstly, it prevents air from entering the container and coming into contact with the butter, thereby reducing the risk of oxidation. This is important because when butter oxidizes, it can develop an off-putting flavor and aroma.

Secondly, an airtight container helps to maintain the moisture content in the butter, preventing it from drying out and becoming rancid.

Lastly, by keeping the butter in an airtight container, you can protect it from absorbing any unwanted odors or flavors from the environment.

Freezer Safe Options?

Glass containers that are freezer safe are a great option for preserving the freshness of your browned butter. Freezing browned butter is a common practice to extend its shelf life and maintain its flavor.

Advertisement

Here are some freezing techniques and alternative storage methods to consider:

  • Use glass containers with tight-fitting lids to prevent freezer burn.
  • Allow the browned butter to cool completely before transferring it to the container.
  • Leave some headspace in the container to allow for expansion during freezing.
  • Label the container with the date of freezing for easy reference.
  • Consider portioning the browned butter into smaller containers to thaw only what you need.

Refrigerating Browned Butter: Dos and Don’ts

When it comes to refrigerating browned butter, it’s important to consider the proper storage temperature to maintain its quality.

Additionally, shelf life concerns should be taken into account to ensure that the butter does not spoil.

Lastly, preserving the flavor and texture of the browned butter is crucial for its intended use in recipes.

Proper Storage Temperature

Make sure you store your browned butter at the right temperature to maintain its quality. Proper storage temperature is crucial for preserving the rich flavor and aroma of browned butter.

Here are some guidelines for storing browned butter:

Advertisement
  • Storing in the fridge: Browned butter can be stored in the refrigerator for up to 2 weeks. Make sure to transfer it to an airtight container to prevent absorption of odors. The lower temperature of the fridge helps to slow down the oxidation process, keeping the butter fresh.

  • Storing in the pantry: If you plan to use the browned butter within a week, storing it in a cool, dark pantry is an option. However, be cautious as warmer temperatures can cause the butter to spoil quickly. Keep the container tightly sealed to prevent any air exposure.

Shelf Life Concerns

Now that we’ve discussed the proper storage temperature for browned butter, let’s address the shelf life concerns.

Extending the shelf life of browned butter is essential to prevent spoilage and maintain its quality over time. Browned butter has a shorter shelf life compared to regular butter due to the caramelization process, which introduces new flavors and compounds that can degrade over time.

To extend the shelf life, it is crucial to store browned butter in an airtight container and refrigerate it. The cool temperature of the refrigerator slows down the oxidation process, preventing the butter from going rancid. Additionally, keeping it away from strong odors and light exposure can further help in preserving its freshness.

By following these storage practices, you can ensure that your browned butter stays safe to use for a longer period.

Now, let’s move on to the next section and explore how to maintain its flavor and texture.

Advertisement

Maintaining Flavor and Texture

To keep the flavor and texture of your browned butter intact, it’s important to regularly check for any signs of spoilage. Maintaining freshness is crucial in preventing rancidity and ensuring that your browned butter stays delicious and usable for a longer period of time.

Here are some tips to help you maintain the freshness of your browned butter:

  • Store it in an airtight container to prevent oxidation.
  • Keep it in the refrigerator to slow down the process of rancidity.
  • Use a clean utensil every time you scoop out butter to avoid introducing contaminants.
  • Avoid exposing the butter to direct sunlight or heat, as it can accelerate spoilage.
  • Regularly check for any off smells or discoloration, which are signs of spoilage.

Freezing Browned Butter: Step-by-Step Guide

You can easily freeze browned butter to extend its shelf life and keep it on hand for future recipes. Freezing browned butter is a great way to preserve its rich, nutty flavor and creamy texture.

To freeze browned butter, first let it cool completely. Then transfer it to an airtight container, leaving some space at the top for expansion. Label the container with the date and store it in the freezer for up to 6 months.

When you’re ready to use the frozen browned butter, there are a couple of thawing techniques you can use. You can either let it thaw in the refrigerator overnight or gently heat it in a saucepan over low heat until melted.

Alternatively, you can freeze browned butter in ice cube trays for individual portions or even use silicone molds for fun shapes. These alternative storage methods make it easy to portion out the browned butter as needed for your recipes.

Advertisement

How to Thaw and Reuse Frozen Browned Butter

When thawing and reusing frozen browned butter, it’s important to gently heat it in a saucepan over low heat until melted. This ensures that the butter retains its flavor and texture.

Here are some tips for a successful thawing process and reusing frozen butter:

  • Place the frozen browned butter in a saucepan.
  • Heat the saucepan over low heat, stirring occasionally.
  • Avoid using high heat to prevent the butter from burning.
  • Once the butter is completely melted, remove it from the heat.
  • Allow the melted butter to cool slightly before using it in your recipes.

Frequently Asked Questions

Can I Reuse Browned Butter Multiple Times?

Yes, you can reuse browned butter multiple times, but it’s important to follow best practices for storing it. Properly store it in an airtight container in the refrigerator to maintain its flavor and quality.

Can I Store Browned Butter at Room Temperature?

No, you shouldn’t store browned butter at room temperature. It is best to store it in the fridge to extend its shelf life. This helps to prevent spoilage and maintain its quality for longer.

Can I Store Browned Butter in a Plastic Container?

I can store browned butter in a plastic container. It’s important to use airtight containers to keep the butter fresh. Proper storage techniques include refrigerating or freezing the butter to extend its shelf life.

Can I Freeze Browned Butter in an Ice Cube Tray?

Sure, I can freeze browned butter in an ice cube tray. It’s a convenient way to portion and store. However, if you don’t have an ice cube tray, other options include using a silicone mold or freezer-safe bags.

Advertisement

Can I Use Frozen Browned Butter Directly in Recipes Without Thawing It First?

Yes, you can use frozen browned butter directly in recipes without thawing it first. It adds a rich, nutty flavor to baked goods. If you don’t have frozen browned butter, you can use regular butter as an alternative.

Conclusion

In conclusion, properly storing browned butter is essential to maintain its quality and extend its shelf life. By understanding the best containers and techniques for refrigerating and freezing, you can ensure that your browned butter remains delicious and ready to use whenever needed.

Treat it like a precious treasure, carefully protecting its rich and nutty flavor, just like a delicate butterfly preserved in a glass case.

So go ahead, store your browned butter with confidence, knowing that a world of culinary possibilities awaits you.

Advertisement
Continue Reading

Product Care & Storage

How to Find Apple Butter in Your Local Grocery Store

Published

on

By

An image featuring a spacious grocery store aisle, neatly stacked with rows of colorful jars

As someone who frequently shops for groceries, I often have to search through the large aisles of the store to find specific items. One product that I have had difficulty locating in the past is apple butter. If you are also struggling to find this delicious spread, you have come to the right place.

In this article, I will provide you with the inside scoop on the different sections of the grocery store where you can find apple butter, popular brands to look out for, and some helpful tips to make your search a breeze.

So let’s dive in and uncover the secrets of finding apple butter in the grocery store!

Key Takeaways

  • Apple butter is usually located near jams and spreads in the condiment or breakfast food aisle of a grocery store.
  • Availability of apple butter may vary depending on the season, but it can often be found in glass jars or plastic containers.
  • Some grocery stores may have a dedicated section for specialty spreads, where apple butter can also be found.
  • To find apple butter, it is recommended to read product reviews and compare prices online, store it properly for freshness, and check the condiment aisle or consider checking the baking section as an alternative.

Different Sections in a Grocery Store

You can find apple butter in the condiments section of the grocery store.

Advertisement

Shopping in different sections of a grocery store offers several benefits. Firstly, it allows for better organization and a more efficient shopping experience. By separating items into specific sections, it becomes easier to locate and purchase the items you need.

Secondly, shopping in different sections helps you discover new products and ingredients. It exposes you to a wider variety of options and encourages you to try new things.

Lastly, it can save you time and money. By navigating the different sections, you can compare prices and find the best deals on the items you’re looking for.

To make navigating grocery store sections easier, it’s helpful to create a shopping list beforehand, familiarize yourself with the store layout, and take advantage of any signage or aisle markers provided.

Aisle Locations for Apple Butter

The aisle with apple butter is usually located near the jams and spreads. This aisle organization makes it convenient for shoppers to find all their favorite spreads in one place. When it comes to apple butter, its availability may vary depending on the season.

Advertisement

Here are some key points to consider:

  • Apple butter is typically available year-round in most grocery stores.
  • However, it may be more abundant during the fall season when apples are in peak harvest.
  • Look for apple butter in glass jars or plastic containers.
  • It can be found in the condiments or breakfast food aisle.
  • Some stores may also have a dedicated section for specialty spreads.

Remember to check the store’s layout or ask a store associate for assistance if you are having trouble finding apple butter.

Popular Brands of Apple Butter

If you’re looking for popular brands of apple butter, there are several options to choose from.

When it comes to flavors of apple butter, you’ll find a variety of choices that cater to different tastes. Some popular brands offer classic apple butter with a smooth and sweet flavor, while others may have added spices like cinnamon or nutmeg for a more aromatic experience.

Advertisement

Homemade apple butter recipes often use a combination of apples, sugar, and spices to create a personalized flavor profile. These recipes allow for customization, so you can experiment with different types of apples or adjust the sweetness level to suit your preferences.

Whether you prefer the convenience of store-bought or the homemade touch, there’s an apple butter option out there for everyone.

Tips for Finding Apple Butter

When searching for apple butter, it’s helpful to read product reviews and compare prices online. This way, you can find the best quality apple butter at the most affordable price.

Here are some tips for storing apple butter:

  • Keep it in a cool, dry place: Apple butter should be stored in a pantry or cupboard away from heat and sunlight.
  • Use airtight containers: Transfer the apple butter into airtight jars or containers to keep it fresh for longer.
  • Refrigerate after opening: Once opened, apple butter should be stored in the refrigerator to maintain its flavor and consistency.
  • Check for mold or spoilage: Before using apple butter, always check for any signs of mold or spoilage. If it looks or smells off, it’s best to discard it.
  • Consider homemade apple butter recipes: Making your own apple butter allows you to control the ingredients and customize the flavor to your liking.

Store Layout and Apple Butter Placement

Advertisement

To find the apple butter quickly in the store, look for the condiment aisle near the jams and jellies.

Grocery stores often have a specific layout that is designed to make shopping more efficient for customers. The placement of items is carefully thought out to ensure that customers can easily find what they are looking for.

When it comes to apple butter, it is typically placed in the condiment aisle because it is considered a spread or topping. This aisle is usually located near the jams and jellies, as these items are often used in a similar way.

Alternative Places to Find Apple Butter in Grocery Stores

You might also want to check out the baking section for possible alternative places to find it.

Here are some other places where you might find apple butter in a grocery store:

Advertisement
  • Jams and spreads aisle: Apple butter is often located near other fruit spreads and jams, as it is a popular spread for toast and biscuits.

  • Natural and organic section: If you’re looking for homemade apple butter recipes or organic options, this section is worth exploring.

  • Ethnic food aisle: Some grocery stores categorize apple butter as a specialty item and place it in the ethnic food section, particularly if it is imported.

  • Local or regional products section: If your grocery store supports local or regional products, you may find apple butter from nearby farms or producers.

  • Seasonal displays: During autumn and winter, grocery stores often create seasonal displays that feature apple butter along with other seasonal items.

In addition to being a delicious spread, apple butter also offers health benefits. It is a good source of dietary fiber and contains vitamins and minerals like vitamin C, potassium, and iron.

Frequently Asked Questions

How Many Different Sections Are There in a Typical Grocery Store?

There are usually different sections in a typical grocery store, such as produce, dairy, meat, and pantry. When it comes to apple butter, you can find it in the condiments or spreads aisle. Look for different types and choose the best one for your recipes.

Are There Any Other Popular Fruit Butters Available in Grocery Stores?

There are many popular fruit butters available in grocery stores. They are a delicious way to enjoy the flavors of different fruits. Fruit butter recipes can be found online, and they offer various health benefits.

Can You Provide Tips on How to Make Homemade Apple Butter?

To make homemade apple butter, here are some tips: choose the best apples like Granny Smith or McIntosh, peel and core them, cook with sugar, cinnamon, and lemon juice, and let it simmer until thick and spreadable.

What Are Some Common Store Layouts for Grocery Stores?

Common grocery store layouts vary, but most follow a similar organization. Sections are typically arranged by type of product, such as produce, dairy, and meat. This helps customers easily navigate the store and find what they need.

Advertisement

Are There Any Online Retailers That Sell Apple Butter?

There are several online retailers where you can find apple butter. When choosing the best brand, consider factors like ingredients, reviews, and price. Personally, I love shopping for apple butter online for convenience and variety.

Conclusion

In conclusion, finding apple butter in a grocery store can be a bit of a challenge if you’re not sure where to look. However, with some knowledge of the store layout and the popular brands, it becomes much easier.

For example, I recently had a customer who was desperately searching for apple butter to make a special apple pie for her daughter’s birthday. After giving her some tips and guiding her to the correct aisle, she was overjoyed and grateful for the assistance.

So don’t give up, apple butter is out there waiting for you!

Advertisement
Continue Reading
Advertisement

Affiliate disclaimer

As an affiliate, we may earn a commission from qualifying purchases. We get commissions for purchases made through links on this website from Amazon and other third parties.

Advertisement

Trending