Connect with us

Product Care & Storage

How Long Can You Keep Butter Frozen Perfectly?

Published

on

An image showcasing a close-up view of a sealed, frost-covered container of butter amidst a backdrop of swirling icy crystals

Are you aware that frozen butter can typically last for up to one year?

As a butter enthusiast, I’ve always wondered how long this creamy delight can last in the freezer.

In this article, we will explore the science behind freezing butter and the factors that can affect its shelf life.

I will also provide you with recommended storage times, tips for packaging, and creative uses for frozen butter.

So, let’s dive in and discover how long we can keep our butter perfectly preserved in the freezer!

Advertisement

Key Takeaways

  • Butter can be stored in the freezer for up to 6 months.
  • Proper packaging with airtight containers, plastic wrap, or aluminum foil prevents freezer burn and maintains freshness.
  • Freezing butter multiple times can negatively affect its quality.
  • Thaw butter in the refrigerator for at least 24 hours for optimal results.

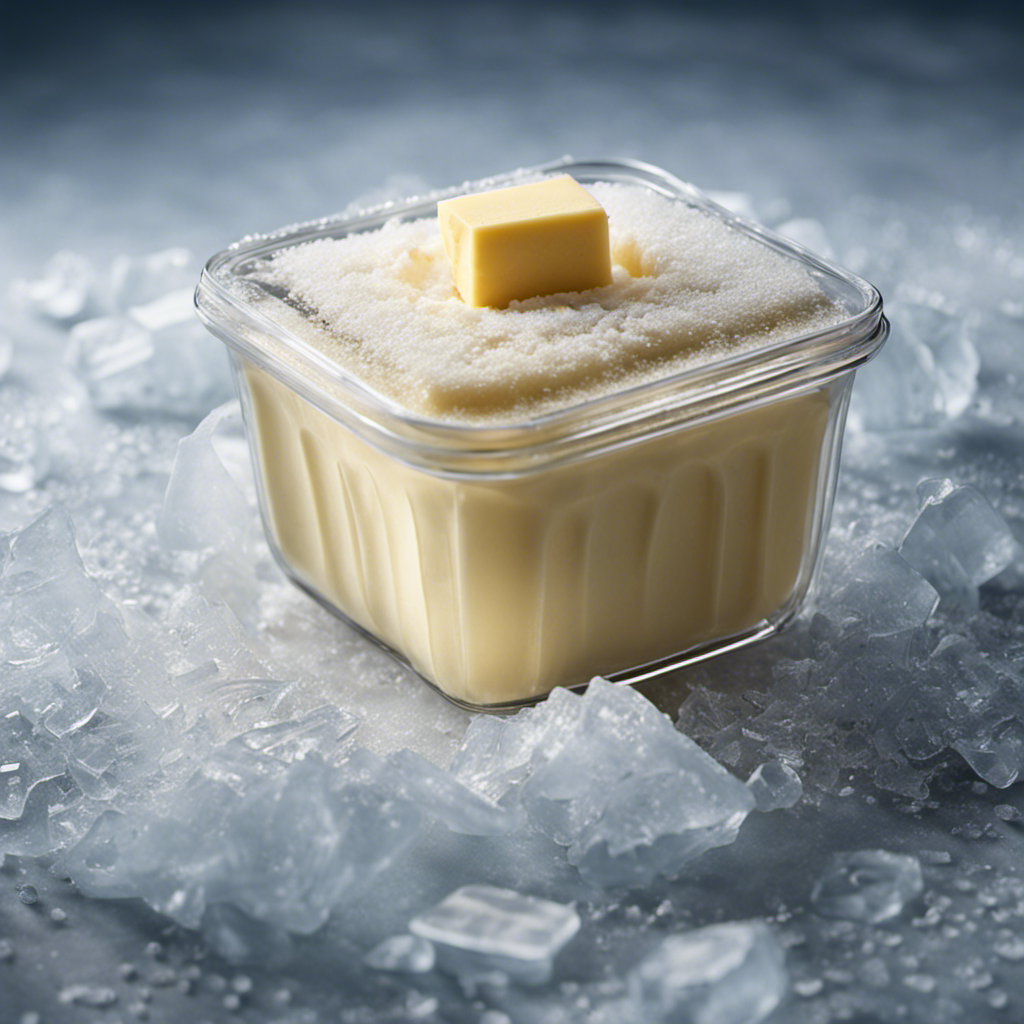
The Science Behind Freezing Butter

If you’re wondering about the science behind freezing butter, you’ll be interested to know that it can be stored in the freezer for up to six months. Freezing butter is a common practice to extend its shelf life and ensure it stays fresh.

When it comes to frozen butter storage methods, it is important to wrap it tightly in plastic wrap or aluminum foil to prevent any air from reaching it. This helps maintain its quality and prevents freezer burn. The freezing process affects the texture of butter, making it harder and less spreadable. However, once thawed, the butter will regain its original texture and taste.

It is important to note that freezing butter multiple times can negatively impact its quality. Now, let’s explore the factors affecting butter shelf life in the freezer.

Factors Affecting Butter Shelf Life in the Freezer

Factors like temperature and packaging can affect how long butter will stay fresh in the freezer. When it comes to freezing butter, there are several factors that play a role in maintaining its quality and prolonging its shelf life. Here are some key factors to consider:

Advertisement
  • Temperature: It is crucial to maintain a constant freezing temperature of 0°F (-18°C) or lower to prevent the growth of bacteria and maintain the butter’s texture and flavor.

  • Packaging: Proper packaging is essential to prevent freezer burn and maintain the butter’s freshness. Use airtight containers or wrap the butter tightly in plastic wrap or aluminum foil to protect it from moisture and odors.

  • Quality of butter: The quality of butter before freezing also affects its longevity in the freezer. Using fresh, high-quality butter will result in better taste and texture after freezing.

Recommended Storage Time for Frozen Butter

When storing butter in the freezer, it’s important to remember that the recommended storage time is typically around 6 to 9 months. This ensures that the butter maintains its quality and taste for an extended period. To illustrate the recommended storage methods and best practices, refer to the table below:

Storage Method Recommended Time
Sealed container 6 to 9 months
Wrapped in foil or freezer paper 6 to 9 months
Vacuum-sealed Up to 12 months

By following these storage methods, you can ensure that your frozen butter stays fresh and free from freezer burn. It’s essential to label the containers with the date of storage to keep track of the butter’s age. Additionally, make sure to place the butter in the coldest part of the freezer to maintain its quality.

In the next section, we will discuss the signs of spoiled butter in the freezer and how to identify them.

Advertisement

Signs of Spoiled Butter in the Freezer

When it comes to frozen butter, it’s important to know the signs of expiration and how to identify spoiled butter in the freezer.

One telltale sign of expired butter is a rancid smell, so be sure to trust your nose.

Additionally, if the butter has developed an off-color or strange texture, it’s likely no longer safe to consume.

Frozen Butter Expiration Signs

To determine if your frozen butter is still good to use, check for any signs of expiration. When butter starts to go bad, it develops a rancid smell and taste. Look for discoloration or mold on the surface of the butter as well. If you notice any of these signs, it’s best to discard the butter.

However, when stored properly, frozen butter can last for up to 6 months without losing its quality. Here are some tips for storing butter in the freezer:

Advertisement
  • Wrap butter tightly in plastic wrap or foil to prevent it from absorbing any odors.
  • Place the wrapped butter in an airtight container or freezer bag to protect it from freezer burn.
  • Label the container with the date of freezing to keep track of its storage time.

Benefits of freezing butter include extending its shelf life and allowing you to stock up when there are sales or promotions. Freezing butter is a convenient way to always have it on hand for baking or spreading on toast.

Identifying Spoiled Freezer Butter

In my experience, identifying spoiled butter can be a bit tricky. However, there are a few telltale signs to look out for.

First, check the texture. Spoiled butter tends to become greasy and slimy, losing its original creamy consistency. It may also develop an off-putting odor, similar to rancid oil or sour milk.

Secondly, look for any discoloration. If you notice any dark spots or a yellowish tint, it’s a sign that the butter has gone bad.

Lastly, trust your taste buds. If the butter tastes sour or has a strange, unpleasant flavor, it’s best to discard it.

To avoid spoilage, proper storage techniques are essential. Keep your butter in an airtight container or wrap it tightly in foil or wax paper to prevent exposure to air and moisture. Store it in the refrigerator, away from strong-smelling foods.

Advertisement

Following these guidelines will help keep your butter fresh and delicious for longer.

Tips for Properly Packaging Butter for Freezing

Make sure you’re properly packaging your butter when freezing it to maintain its quality. Here are some tips to help you with the process:

  • Labeling frozen butter:

  • Use a permanent marker to write the date of freezing on the packaging.

  • Include the type of butter (salted or unsalted) to easily identify it later.

  • Note any special additions, like herbs or spices, for future reference.

  • Best containers for freezing butter:

  • Opt for airtight containers or freezer bags to prevent freezer burn.

  • Use small containers or individually wrapped portions for convenience.

  • Glass containers with tight-fitting lids are also a good option.

Properly labeling your frozen butter ensures that you can easily identify and use it when needed. Choosing the right containers helps maintain its quality and prevent freezer burn. By following these tips, you can keep your frozen butter fresh for an extended period.

Thawing Frozen Butter Safely

When it comes to thawing frozen butter, there are several factors to consider in order to ensure optimal results.

First and foremost, it’s important to use the right thawing method to preserve the quality and texture of the butter.

Advertisement

Additionally, taking necessary precautions to prevent spoilage and considering the shelf life of the butter are crucial steps in maintaining its freshness and taste.

Optimal Thawing Methods

Thawing butter in the refrigerator is the best method to maintain its texture and flavor. When it comes to thawing butter, there are a few key points to keep in mind to ensure optimal results:

  • Thawing Time: It is recommended to thaw butter in the refrigerator for at least 24 hours. This slow thawing process allows the butter to gradually reach its original consistency, minimizing any potential texture changes.

  • Storage Containers: To prevent any cross-contamination or moisture loss during the thawing process, it is essential to use the best storage containers. Airtight containers or resealable bags are ideal for preserving the quality of the butter while it thaws.

  • Temperature Control: Keeping the refrigerator temperature at a consistent 40°F (4°C) or below is crucial for maintaining the quality and safety of the butter during the thawing process.

By following these guidelines, you can ensure that your butter thaws properly, preserving its texture and flavor for all your culinary creations.

Butter Spoilage Prevention

To prevent butter from spoiling, it’s important to store it in airtight containers or resealable bags. Proper butter storage techniques can help preserve its quality and extend its shelf life.

When exposed to air, butter can absorb odors and flavors from its surroundings, leading to a decrease in its overall quality. By storing butter in airtight containers or resealable bags, you can protect it from these external factors.

Advertisement

Additionally, keeping butter in the refrigerator helps to maintain its freshness and prevent it from becoming rancid. It’s also essential to check the expiration date on the packaging before purchasing butter and to consume it before the indicated date for optimal quality.

By following these storage techniques, you can ensure that your butter stays fresh and flavorful.

Now let’s delve into shelf life considerations.

Shelf Life Considerations

When it comes to freezing butter, there are several factors that can affect its quality and shelf life. It’s important to understand these factors in order to ensure the best results when freezing butter.

Here are some best practices to keep in mind:

Advertisement
  • Temperature: Butter should be stored at temperatures below 0°F (-18°C) to maintain its quality and prevent spoilage.

  • Packaging: Ensure that the butter is tightly sealed to prevent freezer burn and absorption of odors from other foods in the freezer.

  • Duration: While butter can be safely frozen for up to 12 months, it is best to use it within 6-9 months for optimal quality.

  • Exposure to air: The longer butter is exposed to air, the greater the risk of quality deterioration. It is recommended to divide the butter into smaller portions before freezing to reduce air exposure.

  • Butter quality: The quality of the butter before freezing will also impact its quality after thawing. It is best to freeze fresh, high-quality butter for the best results.

Creative Uses for Frozen Butter

Did you know that frozen butter can be used to make flaky and delicious pie crusts? It’s true! Besides being a staple in the kitchen, butter has a variety of uses when frozen.

One popular use is for baking, as frozen butter can help create that perfect flaky texture in pie crusts, biscuits, and scones. Additionally, frozen butter can be grated and used as a topping for vegetables, pasta, or popcorn, adding a rich and creamy flavor.

As for butter preservation techniques, freezing is a great option to extend its shelf life. By wrapping butter tightly in plastic wrap or placing it in an airtight container, you can keep it in the freezer for up to 6-9 months. This allows you to always have butter on hand for your culinary creations.

But how can you tell if frozen butter has gone bad? Let’s find out in the next section.

How to Tell If Frozen Butter Has Gone Bad

If your frozen butter develops a rancid smell or taste, it’s time to throw it out. Identifying rancid butter is important to prevent any unpleasant experiences. Here are some common storage mistakes that can lead to butter going bad:

Advertisement
  • Exposure to air: Oxygen can cause butter to oxidize and develop off-flavors.
  • Improper packaging: Using containers that are not airtight can allow moisture and odors to seep into the butter.
  • Incorrect temperature: Keeping butter at a temperature above freezing can lead to spoilage.

To determine if your frozen butter has gone bad, trust your senses. Look for discoloration or mold on the surface. Smell for any off-putting or sour odors. Finally, taste a small amount to check for a rancid or unpleasant flavor. If any of these signs are present, it’s best to discard the butter.

Now that you know how to identify rancid butter and avoid common storage mistakes, let’s move on to some frequently asked questions about freezing butter.

Faqs About Freezing Butter

Remember to always store your frozen butter in airtight containers to prevent moisture and odors from affecting its quality.

When it comes to thawing techniques, there are a few options to consider. The safest method is to transfer the frozen butter from the freezer to the refrigerator and allow it to thaw slowly overnight. This gradual thawing process helps maintain the butter’s texture and flavor.

However, if you need to speed up the thawing process, you can place the wrapped butter in a sealed plastic bag and submerge it in cold water. Change the water every 30 minutes to ensure it stays cold.

As for alternative storage methods, you can freeze butter in smaller portions using ice cube trays or silicone molds. This allows for convenient portioning and easy access when needed.

Advertisement

Frequently Asked Questions

Can I Freeze Salted Butter?

Yes, you can freeze salted butter. When freezing unsalted butter, wrap it tightly in plastic wrap or place it in an airtight container. To thaw frozen butter, transfer it to the refrigerator overnight.

Can I Freeze Butter in Its Original Packaging?

Yes, you can freeze butter in its original packaging. However, freezing butter can affect its texture. It may become crumbly or grainy. It’s best to wrap it tightly in plastic wrap or place it in a freezer-safe container to maintain its quality.

How Long Can I Keep Frozen Butter in the Freezer?

Butter can be kept frozen for up to six months. It should be stored in an airtight container to prevent freezer burn. If you find yourself with too much frozen butter, consider using it in baking or cooking for added flavor.

Can I Refreeze Butter After It Has Been Thawed?

Yes, you can refreeze butter after it has been thawed. The best way to thaw butter is to place it in the refrigerator overnight. This ensures gradual thawing and maintains the butter’s quality.

Can I Freeze Butter That Has Already Been Opened?

Yes, you can freeze unsalted butter. It is best to transfer it to a freezer-safe container if it’s not already in one. Glass containers are suitable for freezing butter as long as they have enough space for expansion.

Advertisement

Conclusion

In conclusion, freezing butter is a great way to extend its shelf life. By understanding the science behind freezing and the factors that affect butter’s quality in the freezer, we can ensure that our butter stays fresh for longer.

Proper packaging and thawing techniques are crucial to maintain its taste and texture. Remember, like a hidden treasure waiting to be discovered, frozen butter can be a versatile ingredient in various recipes.

So, don’t hesitate to embrace the cold and freeze your butter to enjoy its goodness for an extended period.

Continue Reading
Advertisement

Product Care & Storage

How Long to Blanch Butter Beans for Perfect Texture

Published

on

By

An image showcasing a pot of plump butter beans gently boiling in salted water, their creamy white skins glistening, as a timer sits nearby, capturing the anticipation of the precise blanching time

Hey there! Have you ever thought about how much time it takes to blanch butter beans?

Well, I’ve got you covered. In this article, I’ll walk you through the basics of blanching these delicious beans, including all the equipment you’ll need and a step-by-step guide for perfect results.

I’ll also share some tips and tricks to ensure your butter beans come out just right, and point out common mistakes to avoid.

So, let’s get started and master the art of blanching butter beans together!

Key Takeaways

  • Blanching butter beans for 2-3 minutes ensures they are tender yet firm.
  • Immediately transferring blanched beans to ice water helps retain their color and crispness.
  • Adding salt, herbs, or spices to the cooking water enhances the flavor of butter beans.
  • Blanching butter beans is crucial for preserving their color, texture, and flavor.

The Basics of Blanching Butter Beans

Advertisement

I’ll start by explaining the basics of blanching butter beans. Blanching is a cooking technique where the beans are briefly boiled and then immediately plunged into ice water to stop the cooking process. It helps to preserve the bright green color and crisp texture of the beans. Blanching is also beneficial for removing the outer skins of butter beans, making them more tender and easier to digest.

In addition to being delicious, butter beans offer several health benefits. They’re a good source of dietary fiber, which aids in digestion and helps to maintain a healthy weight. They’re also packed with essential vitamins and minerals like folate, iron, and potassium.

There are various ways to cook butter beans. You can steam them, sauté them with butter and garlic for added flavor, or even roast them in the oven for a crispy texture. Another popular method is to boil them until tender and then toss them with olive oil, lemon juice, and herbs for a refreshing salad.

Overall, blanching butter beans is a simple and effective way to enhance their taste, texture, and nutritional value.

Required Equipment for Blanching Butter Beans

To prepare butter beans, I’ll need a pot, a colander, and a timer. These essential pieces of equipment are crucial for blanching butter beans to perfection.

Advertisement

Here’s a breakdown of the equipment needed:

  1. Pot: Choose a pot that’s large enough to hold the butter beans and allow them to move freely in boiling water. A pot with a lid is ideal for maintaining the heat and reducing cooking time.

  2. Colander: A colander is essential for draining the blanched butter beans. Make sure to choose a colander with small holes to prevent the beans from falling through.

  3. Timer: Accurate timing is crucial when blanching butter beans. Use a timer to ensure that the beans are blanched for the recommended time, which is typically around 2 to 3 minutes.

Step-by-Step Guide to Blanching Butter Beans

First, gather the necessary equipment for blanching the butter beans. You’ll need a large pot, a colander, a bowl of ice water, and a slotted spoon.

To blanch the butter beans, there are a few different methods you can choose from. One method is to bring a pot of water to a boil and add the beans, cooking them for about 2 minutes. Then, quickly transfer them to the bowl of ice water to stop the cooking process.

Advertisement

Another method is to steam the beans for about 4-5 minutes until they’re tender but still crisp.

Once the butter beans are blanched, they can be used in a variety of ways. They can be added to salads, soups, or stews. They can also be seasoned and eaten as a side dish.

The blanched beans can even be pureed and used as a base for dips or spreads. The possibilities are endless!

Tips and Tricks for Perfectly Blanching Butter Beans

After gathering the necessary equipment, I can achieve perfectly blanched butter beans by carefully monitoring the cooking time and immediately transferring them to ice water. Here are three tips and tricks for achieving the best results:

  1. Timing is key: It’s crucial to blanch the butter beans for just the right amount of time. Overcooking can lead to mushy beans, while undercooking may result in a raw taste. Aim for a cooking time of about 2-3 minutes, until the beans are tender but still firm.

  2. Ice water bath: Once the beans are cooked to perfection, immediately transfer them to a bowl of ice water. This stops the cooking process and helps retain their vibrant green color and crispness.

  3. Seasoning options: While blanching butter beans, you can add a touch of flavor by seasoning the cooking water with salt, herbs, or spices. This will infuse the beans with a subtle taste, enhancing their overall flavor.

By following these blanching techniques and exploring different seasoning options, you can elevate the taste and texture of your butter beans.

Advertisement

Now, let’s delve into the common mistakes to avoid when blanching butter beans.

Common Mistakes to Avoid When Blanching Butter Beans

One mistake I often make when blanching butter beans isn’t properly blanching them for the right amount of time. Blanching is an essential step in cooking butter beans as it helps to preserve their color, texture, and flavor.

There are a few common blanching techniques that can be used, such as boiling the beans for a short period of time and then quickly cooling them in ice water. This helps to stop the cooking process and maintain the beans’ vibrant green color.

Advertisement

Another technique is to steam the beans until they’re just tender and then shock them in ice water. This method helps to retain their nutrients and natural sweetness.

It’s important to blanch the beans for the recommended time specified in the recipe to ensure they’re cooked evenly and have the desired texture.

One alternative use for butter beans is to include them in salads, soups, or stews for added protein and fiber. They can also be pureed and used as a base for dips or spreads.

Frequently Asked Questions

Can I Use Frozen Butter Beans for Blanching?

Yes, you can use frozen butter beans for blanching. Blanching is a common method used to cook vegetables before freezing them. It helps to preserve their flavor, color, and texture.

To blanch frozen butter beans, bring a pot of water to a boil, add the beans, and cook for 2-3 minutes. Then, drain and immediately transfer them to an ice bath to stop the cooking process.

Advertisement

This will ensure that your frozen butter beans retain their quality.

How Long Does It Take to Blanch Butter Beans in a Pressure Cooker?

Blanching butter beans in a pressure cooker is a quick and efficient method. It eliminates the need for a stovetop, making it faster.

The pressure cooker traps steam, allowing the beans to cook in a shorter amount of time.

The texture and flavor of butter beans can be affected by blanching versus steaming.

Blanching gives them a softer texture and a slightly milder flavor, while steaming retains more of their natural crunch and taste.

Advertisement

Can I Skip the Blanching Step and Cook Butter Beans Directly?

I haven’t tried skipping the blanching step when cooking butter beans directly, but it isn’t recommended. Blanching helps to soften the beans and remove any impurities.

However, there are alternative methods of cooking butter beans that you can try, such as simmering or pressure cooking. These methods may take longer than blanching, but they’ll ensure that the beans are cooked thoroughly and have a nice texture.

Can I Reuse the Blanching Water for Cooking the Butter Beans?

Reusing the blanching water for cooking the butter beans isn’t recommended. While it may seem like a convenient idea, blanching water contains impurities and can affect the flavor and texture of the beans.

Blanching is an important step in cooking butter beans as it helps remove dirt, impurities, and enzymes. It also helps preserve their color and nutrients.

Is It Necessary to Peel the Outer Skin of Butter Beans After Blanching?

It isn’t necessary to peel the outer skin of butter beans after blanching. Blanching butter beans has several benefits, such as preserving their vibrant color and enhancing their texture.

Advertisement

However, if you prefer to remove the outer skin, there are a few tips to make it easier. First, blanch the beans for about 2-3 minutes, then transfer them to an ice bath to cool quickly. Gently squeeze each bean between your fingers to pop them out of their skins.

Conclusion

Blanching butter beans is a simple and rewarding process that ensures they maintain their vibrant color and crisp texture. With the right equipment and following a step-by-step guide, you can achieve perfectly blanched butter beans every time.

Remember to avoid common mistakes like overcooking or undercooking, as they can result in a less enjoyable eating experience.

So, grab your beans, get blanching, and enjoy these delicious and visually appealing treats!

Advertisement
Continue Reading

Product Care & Storage

Preserving the Goodness: How to Store Browned Butter

Published

on

By

An image capturing a glass jar filled with warm, golden-brown liquid butter

Hello, fans of butter! Have you ever thought about how to properly store the tasty browned butter you put so much effort into making? Well, look no further because I have all the information you need right here.

In this article, I’m going to show you the ins and outs of properly storing browned butter. We’ll dive into the shelf life, the best containers to use, and even discuss the dos and don’ts of refrigerating and freezing this golden goodness.

So grab your spatula and let’s get started!

Key Takeaways

  • Properly storing browned butter is important to prevent spoilage and maintain its flavor.
  • Browned butter can last up to two weeks in the refrigerator when stored in an airtight container.
  • Freezing browned butter can extend its shelf life up to three months.
  • Glass containers are recommended for storing browned butter as they are non-reactive, airtight, and retain the original taste and aroma.

Why Browned Butter Should Be Stored Properly

You should know why browned butter needs to be stored properly.

Advertisement

When it comes to shelf life concerns, browned butter is quite delicate. It has a tendency to go rancid quickly if not stored correctly. Proper storage is essential to maintain its flavor and prevent any spoilage.

Browned butter has a rich and nutty taste that can enhance the flavor of various dishes. However, if it is not stored properly, its flavor can deteriorate, becoming bitter or unpleasant.

By storing browned butter in an airtight container and keeping it in the refrigerator, you can extend its shelf life and preserve its delicious flavor.

Understanding the shelf life of browned butter is crucial for anyone who wants to enjoy its unique taste in their culinary creations.

Understanding the Shelf Life of Browned Butter

Understanding the shelf life of browned butter can help determine how long it will stay fresh.

Advertisement

Browned butter, with its rich and nutty flavor, is a versatile ingredient that adds depth to various dishes.

However, it is important to store it properly to preserve its aroma and extend its shelf life.

When stored in an airtight container, browned butter can last for up to two weeks in the refrigerator. To ensure its freshness, it is recommended to label the container with the date it was made.

If you want to extend its shelf life further, browned butter can also be frozen for up to three months. Just make sure to thaw it in the refrigerator before using.

Following these shelf life tips will help you enjoy the delicious taste of browned butter for longer.

Advertisement

The Best Containers for Storing Browned Butter

When it comes to storing browned butter, there are a few key considerations to keep in mind.

First, the choice between glass and plastic containers can impact the longevity and flavor of the butter.

Secondly, it’s important to determine whether an airtight container is necessary to maintain the freshness of the butter.

Lastly, if you plan on freezing your browned butter, it’s crucial to choose a container that is freezer safe to prevent freezer burn and maintain the quality of the butter.

Glass Vs. Plastic

If storing browned butter, opt for glass containers instead of plastic. Glass containers provide several advantages over plastic when it comes to storing browned butter. Firstly, glass is non-reactive, meaning it won’t absorb or transfer any odors or flavors to the butter. This ensures that the butter retains its original taste and aroma. Secondly, glass containers are more airtight compared to plastic, preventing any air from entering and oxidizing the butter. This helps to maintain the butter’s freshness and quality for a longer period. However, one drawback of glass containers is that they are more prone to breakage compared to plastic. Therefore, it’s important to handle them with care. Overall, the pros of using glass containers for storing browned butter outweigh the cons.

Advertisement
Pros of Glass Containers Cons of Glass Containers
Non-reactive Prone to breakage
Airtight
Retains freshness

Airtight or Not

To keep your browned butter fresh and prevent oxidation, opt for a glass container that is airtight. Airtight storage provides numerous benefits for proper storage of browned butter.

Firstly, it prevents air from entering the container and coming into contact with the butter, thereby reducing the risk of oxidation. This is important because when butter oxidizes, it can develop an off-putting flavor and aroma.

Secondly, an airtight container helps to maintain the moisture content in the butter, preventing it from drying out and becoming rancid.

Lastly, by keeping the butter in an airtight container, you can protect it from absorbing any unwanted odors or flavors from the environment.

Freezer Safe Options?

Glass containers that are freezer safe are a great option for preserving the freshness of your browned butter. Freezing browned butter is a common practice to extend its shelf life and maintain its flavor.

Advertisement

Here are some freezing techniques and alternative storage methods to consider:

  • Use glass containers with tight-fitting lids to prevent freezer burn.
  • Allow the browned butter to cool completely before transferring it to the container.
  • Leave some headspace in the container to allow for expansion during freezing.
  • Label the container with the date of freezing for easy reference.
  • Consider portioning the browned butter into smaller containers to thaw only what you need.

Refrigerating Browned Butter: Dos and Don’ts

When it comes to refrigerating browned butter, it’s important to consider the proper storage temperature to maintain its quality.

Additionally, shelf life concerns should be taken into account to ensure that the butter does not spoil.

Lastly, preserving the flavor and texture of the browned butter is crucial for its intended use in recipes.

Proper Storage Temperature

Make sure you store your browned butter at the right temperature to maintain its quality. Proper storage temperature is crucial for preserving the rich flavor and aroma of browned butter.

Here are some guidelines for storing browned butter:

Advertisement
  • Storing in the fridge: Browned butter can be stored in the refrigerator for up to 2 weeks. Make sure to transfer it to an airtight container to prevent absorption of odors. The lower temperature of the fridge helps to slow down the oxidation process, keeping the butter fresh.

  • Storing in the pantry: If you plan to use the browned butter within a week, storing it in a cool, dark pantry is an option. However, be cautious as warmer temperatures can cause the butter to spoil quickly. Keep the container tightly sealed to prevent any air exposure.

Shelf Life Concerns

Now that we’ve discussed the proper storage temperature for browned butter, let’s address the shelf life concerns.

Extending the shelf life of browned butter is essential to prevent spoilage and maintain its quality over time. Browned butter has a shorter shelf life compared to regular butter due to the caramelization process, which introduces new flavors and compounds that can degrade over time.

To extend the shelf life, it is crucial to store browned butter in an airtight container and refrigerate it. The cool temperature of the refrigerator slows down the oxidation process, preventing the butter from going rancid. Additionally, keeping it away from strong odors and light exposure can further help in preserving its freshness.

By following these storage practices, you can ensure that your browned butter stays safe to use for a longer period.

Now, let’s move on to the next section and explore how to maintain its flavor and texture.

Advertisement

Maintaining Flavor and Texture

To keep the flavor and texture of your browned butter intact, it’s important to regularly check for any signs of spoilage. Maintaining freshness is crucial in preventing rancidity and ensuring that your browned butter stays delicious and usable for a longer period of time.

Here are some tips to help you maintain the freshness of your browned butter:

  • Store it in an airtight container to prevent oxidation.
  • Keep it in the refrigerator to slow down the process of rancidity.
  • Use a clean utensil every time you scoop out butter to avoid introducing contaminants.
  • Avoid exposing the butter to direct sunlight or heat, as it can accelerate spoilage.
  • Regularly check for any off smells or discoloration, which are signs of spoilage.

Freezing Browned Butter: Step-by-Step Guide

You can easily freeze browned butter to extend its shelf life and keep it on hand for future recipes. Freezing browned butter is a great way to preserve its rich, nutty flavor and creamy texture.

To freeze browned butter, first let it cool completely. Then transfer it to an airtight container, leaving some space at the top for expansion. Label the container with the date and store it in the freezer for up to 6 months.

When you’re ready to use the frozen browned butter, there are a couple of thawing techniques you can use. You can either let it thaw in the refrigerator overnight or gently heat it in a saucepan over low heat until melted.

Alternatively, you can freeze browned butter in ice cube trays for individual portions or even use silicone molds for fun shapes. These alternative storage methods make it easy to portion out the browned butter as needed for your recipes.

Advertisement

How to Thaw and Reuse Frozen Browned Butter

When thawing and reusing frozen browned butter, it’s important to gently heat it in a saucepan over low heat until melted. This ensures that the butter retains its flavor and texture.

Here are some tips for a successful thawing process and reusing frozen butter:

  • Place the frozen browned butter in a saucepan.
  • Heat the saucepan over low heat, stirring occasionally.
  • Avoid using high heat to prevent the butter from burning.
  • Once the butter is completely melted, remove it from the heat.
  • Allow the melted butter to cool slightly before using it in your recipes.

Frequently Asked Questions

Can I Reuse Browned Butter Multiple Times?

Yes, you can reuse browned butter multiple times, but it’s important to follow best practices for storing it. Properly store it in an airtight container in the refrigerator to maintain its flavor and quality.

Can I Store Browned Butter at Room Temperature?

No, you shouldn’t store browned butter at room temperature. It is best to store it in the fridge to extend its shelf life. This helps to prevent spoilage and maintain its quality for longer.

Can I Store Browned Butter in a Plastic Container?

I can store browned butter in a plastic container. It’s important to use airtight containers to keep the butter fresh. Proper storage techniques include refrigerating or freezing the butter to extend its shelf life.

Can I Freeze Browned Butter in an Ice Cube Tray?

Sure, I can freeze browned butter in an ice cube tray. It’s a convenient way to portion and store. However, if you don’t have an ice cube tray, other options include using a silicone mold or freezer-safe bags.

Advertisement

Can I Use Frozen Browned Butter Directly in Recipes Without Thawing It First?

Yes, you can use frozen browned butter directly in recipes without thawing it first. It adds a rich, nutty flavor to baked goods. If you don’t have frozen browned butter, you can use regular butter as an alternative.

Conclusion

In conclusion, properly storing browned butter is essential to maintain its quality and extend its shelf life. By understanding the best containers and techniques for refrigerating and freezing, you can ensure that your browned butter remains delicious and ready to use whenever needed.

Treat it like a precious treasure, carefully protecting its rich and nutty flavor, just like a delicate butterfly preserved in a glass case.

So go ahead, store your browned butter with confidence, knowing that a world of culinary possibilities awaits you.

Advertisement
Continue Reading

Product Care & Storage

How to Find Apple Butter in Your Local Grocery Store

Published

on

By

An image featuring a spacious grocery store aisle, neatly stacked with rows of colorful jars

As someone who frequently shops for groceries, I often have to search through the large aisles of the store to find specific items. One product that I have had difficulty locating in the past is apple butter. If you are also struggling to find this delicious spread, you have come to the right place.

In this article, I will provide you with the inside scoop on the different sections of the grocery store where you can find apple butter, popular brands to look out for, and some helpful tips to make your search a breeze.

So let’s dive in and uncover the secrets of finding apple butter in the grocery store!

Key Takeaways

  • Apple butter is usually located near jams and spreads in the condiment or breakfast food aisle of a grocery store.
  • Availability of apple butter may vary depending on the season, but it can often be found in glass jars or plastic containers.
  • Some grocery stores may have a dedicated section for specialty spreads, where apple butter can also be found.
  • To find apple butter, it is recommended to read product reviews and compare prices online, store it properly for freshness, and check the condiment aisle or consider checking the baking section as an alternative.

Different Sections in a Grocery Store

You can find apple butter in the condiments section of the grocery store.

Advertisement

Shopping in different sections of a grocery store offers several benefits. Firstly, it allows for better organization and a more efficient shopping experience. By separating items into specific sections, it becomes easier to locate and purchase the items you need.

Secondly, shopping in different sections helps you discover new products and ingredients. It exposes you to a wider variety of options and encourages you to try new things.

Lastly, it can save you time and money. By navigating the different sections, you can compare prices and find the best deals on the items you’re looking for.

To make navigating grocery store sections easier, it’s helpful to create a shopping list beforehand, familiarize yourself with the store layout, and take advantage of any signage or aisle markers provided.

Aisle Locations for Apple Butter

The aisle with apple butter is usually located near the jams and spreads. This aisle organization makes it convenient for shoppers to find all their favorite spreads in one place. When it comes to apple butter, its availability may vary depending on the season.

Advertisement

Here are some key points to consider:

  • Apple butter is typically available year-round in most grocery stores.
  • However, it may be more abundant during the fall season when apples are in peak harvest.
  • Look for apple butter in glass jars or plastic containers.
  • It can be found in the condiments or breakfast food aisle.
  • Some stores may also have a dedicated section for specialty spreads.

Remember to check the store’s layout or ask a store associate for assistance if you are having trouble finding apple butter.

Popular Brands of Apple Butter

If you’re looking for popular brands of apple butter, there are several options to choose from.

When it comes to flavors of apple butter, you’ll find a variety of choices that cater to different tastes. Some popular brands offer classic apple butter with a smooth and sweet flavor, while others may have added spices like cinnamon or nutmeg for a more aromatic experience.

Advertisement

Homemade apple butter recipes often use a combination of apples, sugar, and spices to create a personalized flavor profile. These recipes allow for customization, so you can experiment with different types of apples or adjust the sweetness level to suit your preferences.

Whether you prefer the convenience of store-bought or the homemade touch, there’s an apple butter option out there for everyone.

Tips for Finding Apple Butter

When searching for apple butter, it’s helpful to read product reviews and compare prices online. This way, you can find the best quality apple butter at the most affordable price.

Here are some tips for storing apple butter:

  • Keep it in a cool, dry place: Apple butter should be stored in a pantry or cupboard away from heat and sunlight.
  • Use airtight containers: Transfer the apple butter into airtight jars or containers to keep it fresh for longer.
  • Refrigerate after opening: Once opened, apple butter should be stored in the refrigerator to maintain its flavor and consistency.
  • Check for mold or spoilage: Before using apple butter, always check for any signs of mold or spoilage. If it looks or smells off, it’s best to discard it.
  • Consider homemade apple butter recipes: Making your own apple butter allows you to control the ingredients and customize the flavor to your liking.

Store Layout and Apple Butter Placement

Advertisement

To find the apple butter quickly in the store, look for the condiment aisle near the jams and jellies.

Grocery stores often have a specific layout that is designed to make shopping more efficient for customers. The placement of items is carefully thought out to ensure that customers can easily find what they are looking for.

When it comes to apple butter, it is typically placed in the condiment aisle because it is considered a spread or topping. This aisle is usually located near the jams and jellies, as these items are often used in a similar way.

Alternative Places to Find Apple Butter in Grocery Stores

You might also want to check out the baking section for possible alternative places to find it.

Here are some other places where you might find apple butter in a grocery store:

Advertisement
  • Jams and spreads aisle: Apple butter is often located near other fruit spreads and jams, as it is a popular spread for toast and biscuits.

  • Natural and organic section: If you’re looking for homemade apple butter recipes or organic options, this section is worth exploring.

  • Ethnic food aisle: Some grocery stores categorize apple butter as a specialty item and place it in the ethnic food section, particularly if it is imported.

  • Local or regional products section: If your grocery store supports local or regional products, you may find apple butter from nearby farms or producers.

  • Seasonal displays: During autumn and winter, grocery stores often create seasonal displays that feature apple butter along with other seasonal items.

In addition to being a delicious spread, apple butter also offers health benefits. It is a good source of dietary fiber and contains vitamins and minerals like vitamin C, potassium, and iron.

Frequently Asked Questions

How Many Different Sections Are There in a Typical Grocery Store?

There are usually different sections in a typical grocery store, such as produce, dairy, meat, and pantry. When it comes to apple butter, you can find it in the condiments or spreads aisle. Look for different types and choose the best one for your recipes.

Are There Any Other Popular Fruit Butters Available in Grocery Stores?

There are many popular fruit butters available in grocery stores. They are a delicious way to enjoy the flavors of different fruits. Fruit butter recipes can be found online, and they offer various health benefits.

Can You Provide Tips on How to Make Homemade Apple Butter?

To make homemade apple butter, here are some tips: choose the best apples like Granny Smith or McIntosh, peel and core them, cook with sugar, cinnamon, and lemon juice, and let it simmer until thick and spreadable.

What Are Some Common Store Layouts for Grocery Stores?

Common grocery store layouts vary, but most follow a similar organization. Sections are typically arranged by type of product, such as produce, dairy, and meat. This helps customers easily navigate the store and find what they need.

Advertisement

Are There Any Online Retailers That Sell Apple Butter?

There are several online retailers where you can find apple butter. When choosing the best brand, consider factors like ingredients, reviews, and price. Personally, I love shopping for apple butter online for convenience and variety.

Conclusion

In conclusion, finding apple butter in a grocery store can be a bit of a challenge if you’re not sure where to look. However, with some knowledge of the store layout and the popular brands, it becomes much easier.

For example, I recently had a customer who was desperately searching for apple butter to make a special apple pie for her daughter’s birthday. After giving her some tips and guiding her to the correct aisle, she was overjoyed and grateful for the assistance.

So don’t give up, apple butter is out there waiting for you!

Advertisement
Continue Reading
Advertisement

Affiliate disclaimer

As an affiliate, we may earn a commission from qualifying purchases. We get commissions for purchases made through links on this website from Amazon and other third parties.

Advertisement

Trending