When it comes to spreading peanut butter on bread, we’ve all experienced the struggle of tearing the bread or unevenly distributing the peanut butter. Imagine the frustration of trying to spread a thick, sticky glob of peanut butter across your bread, only to end up with a messy, uneven result. But fear not, there are some simple yet effective techniques that can make this task a breeze.
So, how can we achieve that perfectly spread peanut butter on our bread without the hassle? Well, let's just say there are a few surprising tricks that might just revolutionize your peanut butter spreading game.
Key Takeaways
- The right consistency of peanut butter is important for easy spreading on bread.
- Warming up chunky peanut butter makes it more pliable and easier to spread.
- Using an offset spatula or different spreading tools can help achieve a smooth and even spread.
- Enhancing the flavor and visual appeal by adding granola or nuts to the peanut butter spread.

Peanut Butter Maker, Nut Butter Machine, 2025 New Electric Nut Butter Maker Machine, Electric Sesame Sauce Nut Grinder with Non-Slip Base Entry, Easy Install Easy to Use,Grinder
Our peanut nut grinder lets you easily grind a variety of nuts and seeds to make smooth.
As an affiliate, we earn on qualifying purchases.
Selecting the Right Peanut Butter Consistency
Selecting the right peanut butter consistency can significantly impact the ease and enjoyment of spreading it on bread, making the choice of texture an important consideration.
When it comes to spreading peanut butter on bread, the type of bread used plays a crucial role. For firmer bread varieties, especially when not toasted, opting for a smoother consistency can prevent tearing and make the spreading process much easier.
On the other hand, if you're a fan of chunky peanut butter, consider warming it up slightly to make it more pliable for spreading. Experimenting with different techniques, such as using multiple smaller spoonfuls of chunky peanut butter or trying out other spreading tools, can also help achieve a smooth spread.
It's essential to take personal preferences and dietary needs into account when selecting the right consistency, as some individuals may prefer a thicker or smoother peanut butter spread.
Additionally, exploring alternative uses for peanut butter, such as using it as a butter substitute or incorporating it into various dishes, can enhance the overall experience and make the most out of your chosen consistency.
Aeitto Blenders for Kitchen with 68Oz. Large Capacity, 1800W Max Power Smoothie Blender, 3 Preset Programs & 7 Speeds, Professional Countertop Blender for Smoothies, Ice Crush, Generation2 Silver
1800W Maximum Power: Aeitto blender with the 1800W peak power delivers high performance. It effortlessly handles professional tasks—from...
As an affiliate, we earn on qualifying purchases.
Choosing the Ideal Bread Type

Considering different bread types can significantly impact the ease and enjoyment of spreading peanut butter, especially when aiming for a smooth and tear-free application. When choosing the ideal bread type, it's important to consider several factors that can make the spreading process easier and more satisfying.
- Texture: Opt for bread with a smooth and even texture, as it allows the peanut butter to spread effortlessly without tearing the bread.
- Thickness: Choose bread slices that aren't too thin, as they may tear easily, nor too thick, which can make spreading more challenging.
- Freshness: Fresh bread is ideal for spreading peanut butter as it's softer and more pliable, making the process smoother.
- Whole Grain: Whole grain bread, due to its slightly rough texture, can provide a pleasant contrast to the creamy peanut butter, enhancing the overall experience.
- Sliced Loaf: Select pre-sliced loaves as they offer uniform thickness, ensuring an even spread of peanut butter without any uneven bumps.

H-Duka 1800W Blender for Smoothies with 70oz Pitcher & 20oz Grinder 28000 RPM High Speed Countertop Blenders for Kitchen for Ice Crushing, Frozen Fruits, Nut Butter Multiple Speeds & 1-5 Min Timer
Ultra-Powerful Performance: Engineered with an 1800W motor and stainless steel blades reaching 28,000 RPM, powerful smoothie blender is...
As an affiliate, we earn on qualifying purchases.
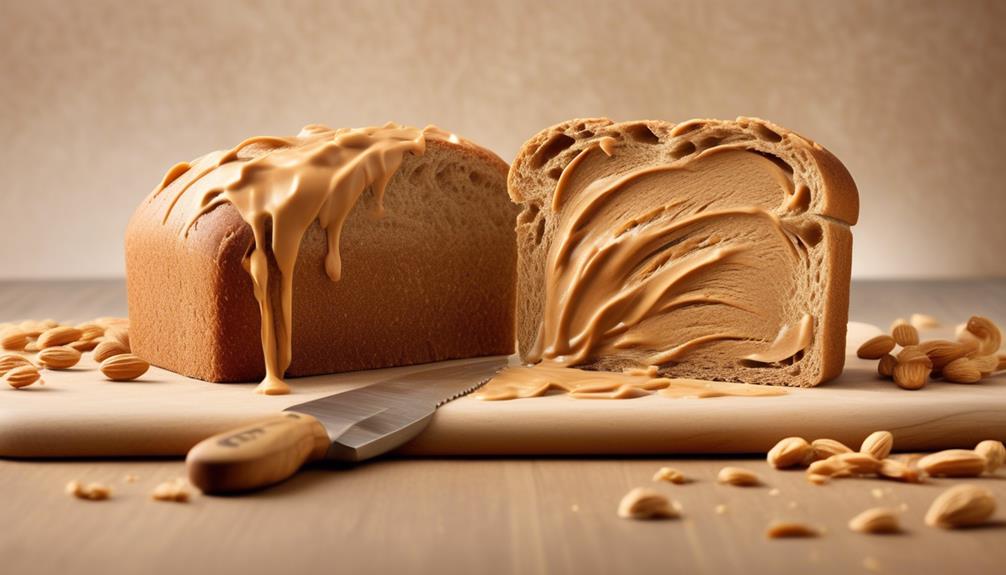
Warming Up the Peanut Butter

When it comes to spreading peanut butter effortlessly on the ideal bread, warming it up can make all the difference in achieving a smooth and tear-free application.
Peanut butter, straight from the fridge, can be quite stiff, making it challenging to spread evenly. To overcome this, we can warm the peanut butter slightly to make it more pliable.
One simple way to do this is by microwaving it for about 10-15 seconds, or until it reaches a spreadable consistency. Be sure to use a microwave-safe container and stir the peanut butter well after heating to distribute the warmth evenly.
Another method is to place the closed jar of peanut butter in a bowl of warm water for a few minutes. This gentle heat will soften the peanut butter, making it easier to spread.

PRASKY 2400W High Speed Countertop Blender, 101oz Large Capacity, BPA-Free, 25000 RPM Blenders for Smoothies, Ice Crushing, Soups, Nut Butters & Baby Food (Gray, 3L)
[3.0 HP Motor & 25,000 RPM Blender] Crush through frozen fruit, ice cubes, and tough ingredients in seconds....
As an affiliate, we earn on qualifying purchases.
Using an Offset Spatula

To achieve a smooth and even spread of peanut butter on bread, consider using an offset spatula held at a slight angle for effortless application. When using an offset spatula, it becomes easier to spread peanut butter on bread due to its unique design and functionality. Here are some tips for using an offset spatula effectively:
- Hold the offset spatula at a slight angle to the bread for easy spreading.
- Gently glide the offset spatula across the surface to evenly spread peanut butter or jelly.
- Utilize the pointed tip of the spatula to reach the edges and corners of the bread.
- To avoid tearing delicate bread, use a light touch with the offset spatula.
- Clean the offset spatula after each use for efficient spreading and to prevent cross-contamination.
Using an offset spatula not only makes spreading peanut butter easier but also allows for precise and controlled application. The angled design of the spatula enables a comfortable grip and smooth motion, resulting in a perfectly spread layer of peanut butter on your bread.
Applying a Thin Layer

After mastering the use of an offset spatula for effortless peanut butter spreading, we can now focus on achieving a thin layer by using a clean butter knife.
When it comes to making the perfect peanut butter and jelly sandwich, applying a thin layer of peanut butter is key. To achieve this, start by covering only half of the knife with peanut butter. This technique allows for better control over the amount of peanut butter being spread and ensures a thin layer. As you spread, apply gentle pressure to achieve a smooth and even layer.
If the peanut butter is too firm, consider warming it for a few seconds in the microwave to make it softer and easier to spread thinly. Additionally, don't be afraid to experiment with different tools and techniques. For instance, using the back of a spoon can also help achieve a thin layer of peanut butter.
Slicing the Bread Correctly

Using a sharp serrated knife, gently apply pressure to slice the bread, ensuring it remains intact and uniform in thickness. When slicing super soft pre-sliced bread for your peanut butter sandwich, it's essential to follow a few key steps to achieve the perfect slices.
Here's how we do it:
- Secure the bread on a stable surface and hold it firmly with one hand while slicing with the other, ensuring it doesn't shift or squish.
- Aim for even and consistent slices to create a uniform base for spreading peanut butter, enhancing the overall taste and texture of the sandwich.
- Adjust the thickness of the slices based on your personal preference and the type of spread you plan to apply, whether it's creamy or chunky peanut butter.
- Practice proper knife safety and technique to prevent accidents and ensure a smooth slicing process without compromising the integrity of the bread.
Sprinkling With Granola or Nuts

We love adding a crunchy texture to our peanut butter sandwiches by sprinkling them with granola or nuts.
Not only does it enhance the nutty flavor, but it also boosts the visual appeal of the sandwich.
The combination of the smooth peanut butter and the crunchy granola or nuts creates a delightful contrast that elevates the overall experience.
Crunchy Texture Addition
To enhance the crunchy texture of your peanut butter spread, consider sprinkling a handful of granola or chopped nuts over the peanut butter on the bread. Gently press the granola or nuts into the peanut butter to ensure it sticks. Ensure an even distribution of granola or nuts for consistent crunch in every bite. Experiment with different types of granola or nuts to find the best texture and flavor combination. Consider toasting the granola or nuts beforehand for an extra depth of flavor and crunch.
When it comes to creating the perfect peanut butter and jelly sandwich, adding a sprinkle of granola or chopped nuts can take it to a whole new level. The combination of creamy peanut butter and the crunch of granola or nuts adds an exciting texture to every bite. It's a simple yet effective way to make your sandwich heartier and more satisfying.
Nutty Flavor Enhancement
Enhancing the crunchy texture of your peanut butter spread with a sprinkle of granola or chopped nuts not only adds a satisfying crunch but also elevates the nutty flavor for a more enjoyable sandwich experience. When the basic spread fails to excite the taste buds, incorporating granola or nuts can provide a delightful contrast that enhances the overall flavor profile.
To ensure the granola or nuts adhere to the peanut butter, consider drizzling a touch of honey or agave nectar. Experiment with different types of granola or nuts to find the perfect combination that complements the peanut butter.
Evenly distribute the granola or nuts to guarantee a consistent burst of nutty flavor in every bite. Adjust the amount of granola or nuts according to personal preference, balancing the texture and flavor for a truly satisfying sandwich.
Visual Appeal Boost
Sprinkling granola or nuts on top of the spread peanut butter adds both texture and visual appeal to your sandwich. It not only enhances the look of your creation but also adds a delightful crunch to every bite.
Here are some tips for achieving the best visual appeal boost:
- Use a variety of granola or chopped nuts to add color and interest to the peanut butter spread.
- Ensure an even distribution of granola or nuts to create an aesthetically pleasing presentation.
- Experiment with different combinations of granola or nuts to find the perfect match for your peanut butter spread.
- Consider adding a drizzle of honey or a sprinkle of cinnamon for an extra flavor boost and visual appeal.
Trying the Criss-Cross Method

We've all struggled with getting an even spread of peanut butter on bread, but have you tried the criss-cross method?
This technique not only ensures an efficient spreading process but also provides consistent coverage of peanut butter on the bread.
Efficient Spreading Technique
To achieve even and smooth spread of peanut butter on bread, one can employ the criss-cross method using a butter knife, ensuring uniform coverage without tearing the bread.
When using this efficient spreading technique, it's important to hold the bread firmly and start with a small amount of peanut butter.
By making a criss-cross pattern, one can spread the peanut butter evenly, adding more as needed. Avoid using too much pressure to prevent tearing, and ensure the entire surface of the bread is covered.
With practice, the criss-cross method can help perfect your spreading technique, resulting in smooth, even layers of peanut butter on the bread.
Consistent Coverage Method
After mastering the efficient spreading technique for achieving smooth peanut butter coverage, we can now explore the consistent coverage method, specifically the criss-cross technique, to further enhance our bread spreading skills.
Start by placing a piece of bread on a flat surface to create a stable base. Use a clean butter knife and cover about half of the knife with peanut butter for an even spread. Apply the peanut butter in criss-cross patterns over the bread surface, ensuring even distribution.
Add more peanut butter to the knife if needed to achieve the desired coverage without tearing the bread. Experiment with different techniques and tools to find the most effective method for achieving a smooth and consistent spread of peanut butter.
This method allows for a more controlled and even coverage, resulting in a satisfying peanut butter experience.
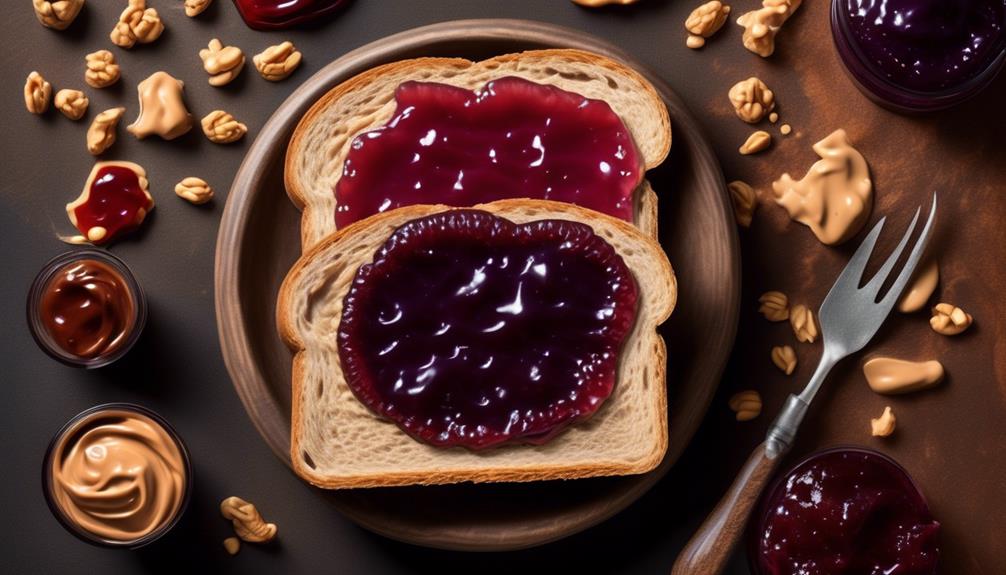
Incorporating Honey or Jam

Spreading peanut butter on bread becomes even more delicious when incorporating honey or jam, adding a sweet and flavorful twist to this classic combination. There's something magical about the way the creamy peanut butter intermingles with the sticky sweetness of honey or the fruity burst of jam.
Here are a few ways to take your peanut butter and honey or jam combo to the next level:
- Mix It In: Try mixing the peanut butter with honey or jam before spreading it on the bread. This ensures that every bite is filled with the perfect balance of flavors.
- Layer It: For a visually appealing and evenly distributed flavor, layer peanut butter, honey, and jam on the bread. Each layer adds a new dimension to the taste experience.
- Swirl It: Create a beautiful swirl pattern by drizzling honey or jam over the peanut butter. It not only looks delightful but also ensures that every bite is a harmonious blend of flavors.
- Customize It: Experiment with different types of honey and jams to find your favorite combinations. Whether it's wildflower honey or raspberry jam, there's a world of flavors to explore.
- Warm It Up: If using honey, consider warming it slightly before mixing or drizzling. The warmth enhances the aromas and makes the spread even more luscious.
Using a Sandwich Knife

Incorporating honey or jam into your peanut butter spread adds a delightful twist. When it comes to spreading the mixture, using a sandwich knife is key to achieving an even and satisfying distribution of flavors. Holding the knife at a specific angle and covering about half of it with peanut butter ensures an even spread. The same goes for spreading the jelly – covering half of the knife with jelly and applying an even layer on top of the peanut butter ensures a perfect blend of flavors.
Don't hesitate to experiment with different jelly flavors and consider adding sliced bananas to enhance the sandwich. And when it comes to the bread, cutting it diagonally from the right-hand upper corner to the left-hand lower corner ensures a perfect piece with peanut butter and jelly. You might also want to consider toasting the bread before spreading to prevent tearing and create a firmer surface for spreading.
Using a sandwich knife not only makes the spreading process easier but also ensures that every bite is a delightful combination of peanut butter, jelly, and bread.
Employing the Double Knife Technique

When it comes to spreading peanut butter on bread, employing the double knife technique can make the process much smoother.
We find that holding one knife in each hand allows for quick and easy application of the peanut butter.
Double Knife Method
We often find that using the double knife method makes spreading peanut butter and jelly on bread much easier and neater. It allows for a more efficient and controlled process, resulting in a visually appealing and satisfying sandwich.
When employing the double knife technique, we experience the following benefits:
- Use two knives, one for spreading peanut butter and the other for spreading jelly, to prevent mixing and keep the flavors distinct.
- Cover half of each knife with the respective spread to ensure an even distribution on the bread.
- Alternate spreading peanut butter and jelly using the dedicated knives to create neat and separate layers.
- This method allows for precise control over the spread thickness and ensures a clean and efficient sandwich-making process.
- Employing the double knife method can result in perfectly layered and visually appealing peanut butter and jelly sandwiches.
Smooth Spreading Technique
For smoother and easier spreading of peanut butter and jelly, consider using the double knife technique to achieve a more even and controlled application on the bread. This technique allows for a smooth and effortless spread, ensuring that each bite of your sandwich is perfectly balanced. Here's a table to demonstrate the step-by-step process of employing the double knife technique for smooth spreading:
| Step | Technique |
|---|---|
| 1. Spread butter or margarine thinly on bread | Evenly coat one side of the bread |
| 2. Spread peanut butter | Use the double knife technique for an even layer |
| 3. Add more peanut butter as needed | Ensure a consistent spread |
| 4. Spread jelly | Use the double knife technique for an even layer |
This method ensures that the spread is consistent and the flavors are well-balanced.
Quick and Easy Application
To achieve quick and easy application of peanut butter and jelly using the double knife technique, start by spreading a thin layer of butter or margarine on the bread to moisten it, making it easier to spread the peanut butter. This simple trick ensures a smooth and effortless spreading process.
Here are some tips to help you master the double knife technique:
- Use a clean butter knife to moisten the bread with butter or margarine.
- Spread peanut butter evenly over one slice of bread.
- Add jelly on top of the peanut butter using the other half of the knife.
- Cut the bread diagonally for the perfect serving.
- Consider toasting the bread for easier spreading and added flavor.
These steps make the process of spreading peanut butter and jelly on bread quick and effortless.
Applying Even Pressure

When spreading peanut butter on bread, it is essential to hold the knife or spoon firmly and evenly to ensure an even distribution of the spread. By maintaining even pressure, you can avoid clumps and ensure a smooth layer of peanut butter. To achieve this, use a smooth, sweeping motion while spreading, adjusting the pressure based on the bread's texture and the desired thickness of the spread. It's important to start from the center and work your way outwards, applying gentle and steady pressure to prevent tearing the bread while spreading. To convey the significance of even pressure visually, consider the following table:
| Importance of Even Pressure | Benefits |
|---|---|
| Ensures even distribution | Prevents clumps and uneven spread |
| Maintains bread integrity | Prevents tearing and preserves texture |
| Enhances overall presentation | Aesthetically pleasing appearance |
Applying even pressure may seem like a small detail, but it can make a significant difference in the quality of your peanut butter spread. So, next time you make a peanut butter sandwich, remember to hold that knife or spoon firmly and apply even pressure for a perfect spread.
Employing a Rotary Spreader

We found that a high-quality rotary spreader with a sturdy handle and evenly spaced blades is essential for efficiently spreading peanut butter on bread. When employing a rotary spreader, it's important to hold it firmly and position it at a comfortable angle to ensure even coverage of peanut butter across the bread. As you rotate the handle smoothly and steadily, the blades will evenly distribute the peanut butter over the entire surface of the bread. Applying gentle pressure is crucial to prevent tearing of the bread and to ensure a consistent layer of peanut butter.
After using the rotary spreader, it's vital to clean it thoroughly to maintain its effectiveness and prevent cross-contamination of spreads.
- Choose a high-quality rotary spreader with a sturdy handle and evenly spaced blades for smooth and efficient spreading of peanut butter.
- Hold the rotary spreader firmly and position it at a comfortable angle to ensure even coverage of peanut butter across the bread.
- Rotate the handle of the rotary spreader smoothly and steadily, allowing the blades to evenly distribute the peanut butter over the entire surface of the bread.
- Apply gentle pressure while using the rotary spreader to prevent tearing of the bread and ensure a consistent layer of peanut butter.
- Clean the rotary spreader thoroughly after use to maintain its effectiveness and prevent cross-contamination of spreads.
Trying a Different Spreading Tool

A butter knife provides a simple and versatile alternative for spreading peanut butter on bread. When it comes to spreading peanut butter, we've found that using a butter knife can make the process much smoother and more enjoyable. The flat, wide blade allows for easy maneuvering, ensuring an even spread of peanut butter across the entire surface of the bread.
The pointed tip also comes in handy for reaching those tricky corners, ensuring that no area is left untouched. This tool also gives us the flexibility to control the thickness of the spread, catering to our individual preferences. Additionally, a butter knife is easy to clean and can be used for other spreads and condiments, making it a practical and multi-functional kitchen essential.
Its simplicity and effectiveness make it a go-to tool for achieving the perfect peanut butter spread on our favorite bread. So, next time you're looking for an uncomplicated and reliable method for spreading peanut butter, give the trusty butter knife a try – you won't be disappointed.
Frequently Asked Questions
How Do You Make Peanut Butter Spread Easier?
We make peanut butter spread easier by warming it slightly and using a butter knife. This helps the peanut butter soften and spread smoothly over the bread.
It's important to use a gentle touch to avoid tearing the bread.
Also, storing peanut butter at room temperature can make it easier to spread.
How Do You Spread Peanut Butter on Soft Bread?
Spreading peanut butter on soft bread can be a challenge, but we've found a trick that works like a charm.
We slightly moisten the bread with butter or margarine before spreading the peanut butter. This makes the process much easier and helps prevent tearing.
Then, we use a clean butter knife to cover about half of the knife with peanut butter and spread it evenly over the bread.
It's a game-changer!
How Do You Keep Peanut Butter Spreadable?
To keep peanut butter spreadable, we store it at room temperature. We also make sure to thoroughly mix it before each use to prevent the oil from separating.
Additionally, we prefer to use creamy peanut butter as it tends to spread more easily than chunky varieties.
What Can I Spread Peanut Butter On?
We love spreading peanut butter on a variety of foods! It's versatile and delicious. From bread to crackers, fruits, and even pancakes or waffles, there are endless options to enjoy peanut butter.
It adds a delightful touch to any snack or meal. Plus, blending it into smoothies gives a protein-packed boost. The possibilities are endless, and we can't get enough of it!
Conclusion
So, next time you're making a peanut butter and jelly sandwich, remember to choose a creamy peanut butter for easy spreading.
I once had a friend who struggled with spreading chunky peanut butter on bread, but after following these tips, they were able to make a perfect sandwich without any hassle.
It's all about finding the right consistency and using the right tools to make the process easier and more enjoyable.