To make lighter sauces using foaming butter, start with softened, room temperature butter to guarantee smooth emulsification. Use a whisk or hand blender to vigorously incorporate air, creating a stable foam. Keep the butter between 130-150°F and gently whisk to prevent breaking the foam. Adding a splash of lemon juice or acid helps stabilize it. With proper technique and tools, you’ll achieve airy, elegant sauces—if you want to master these methods, keep exploring further.
Key Takeaways
- Use softened, room temperature butter for easier emulsification and stable foam formation.
- Whisk vigorously with a balloon or hand whisk to incorporate air and create tiny bubbles.
- Maintain a consistent low heat (130-150°F) to stabilize the foam without melting or separation.
- Add a pinch of acid like lemon juice to help stabilize and prolong the foam’s structure.
- Use gentle, steady agitation to prevent breaking the foam and ensure a light, airy texture.
handheld immersion blender for sauces
As an affiliate, we earn on qualifying purchases.
As an affiliate, we earn on qualifying purchases.
Understanding the Science Behind Butter Foaming

Understanding the science behind butter foaming begins with recognizing how fats and liquids interact when whipped. When you beat butter, fat crystallization occurs, creating small, stable fat structures that trap air. This process is key to forming a foam. Additionally, fat emulsification helps distribute tiny fat droplets evenly throughout the mixture, allowing air to incorporate smoothly. As you whip, these fat crystals and emulsified fats work together to stabilize the foam, making it light and airy. Temperature plays a vital role—warm butter melts, reducing crystallization, while chilled butter enhances it. The molecular structure of fats influences how effectively they form stable foams. By understanding these mechanisms, you can control the foaming process better and achieve the perfect, fluffy texture in your sauces. Mastering butter crystallization and fat emulsification reveals the secret to superior foamed butter.
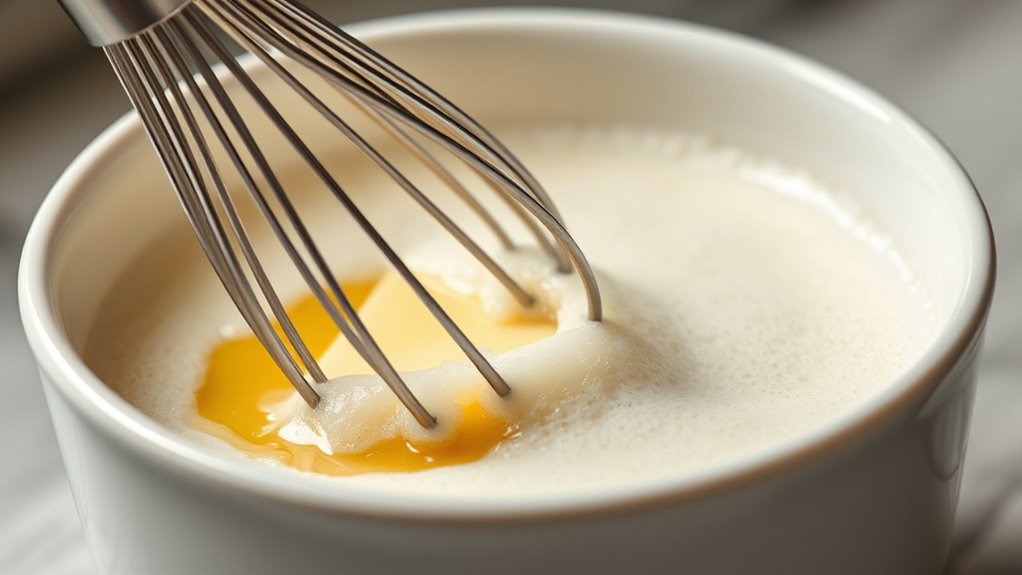
whisk for culinary use
As an affiliate, we earn on qualifying purchases.
As an affiliate, we earn on qualifying purchases.
Essential Tools and Ingredients for Foaming Butter

To achieve perfect butter foaming, you need the right tools and ingredients at your fingertips. Proper butter storage guarantees the butter is fresh and at the right temperature for foaming. Use high-quality unsalted butter for better control over flavor and salt content. Ingredient substitutions, like ghee or margarine, can work but may affect the foam’s stability. Essential tools include a whisk or hand blender to create a light, airy foam. A small saucepan or bowl helps control heat and facilitates melting. Keep your tools clean and dry to prevent contamination and maintain foam quality. Remember, consistent temperature and fresh ingredients make all the difference in achieving the best foam for your sauces. Understanding precious metals assets can also inform better financial planning for future culinary investments or business ventures.
small saucepan for melting butter
As an affiliate, we earn on qualifying purchases.
As an affiliate, we earn on qualifying purchases.
Step-by-Step Guide to Creating a Classic Butter Foam
To create a perfect butter foam, start by preparing your butter until it’s soft and smooth. Then, whisk vigorously to incorporate air and achieve a light, fluffy texture. Once you see the foam form, you’re ready to incorporate it into your recipe or presentation. Foaming techniques are essential for achieving the desired lightness in sauces.
Preparing the Butter
Start by softening the butter to room temperature, making sure it’s evenly pliable and free of lumps. Proper butter selection guarantees the best foam; choose high-quality, fresh butter for ideal results. Store your butter correctly to preserve its texture and flavor, ideally wrapped in parchment or kept in an airtight container in the fridge. Before preparing, allow it to come to room temperature naturally. When ready, cut the butter into smaller pieces for easier softening. Keep in mind that:
- Use unsalted butter for better control of flavor.
- Avoid microwave heating to prevent uneven melting.
- Fresh butter yields a smoother foam.
- Softening time varies based on ambient temperature.
- Proper storage maintains butter’s consistency and freshness.
- Avoiding cheating tendencies by managing your kitchen environment can help maintain consistent results.
This process guarantees your butter is perfectly prepped for foaming.
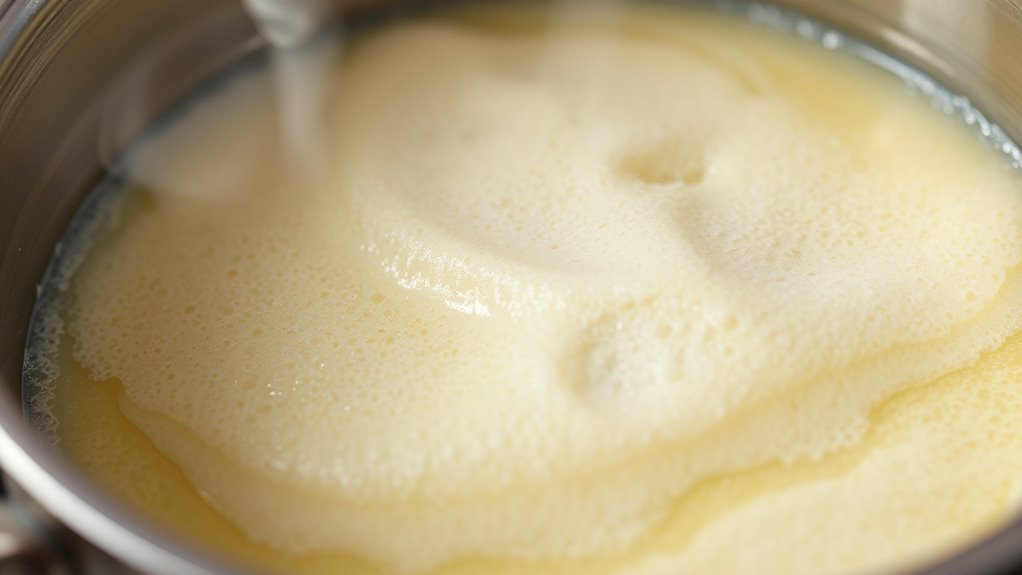
Whisking to Aerate
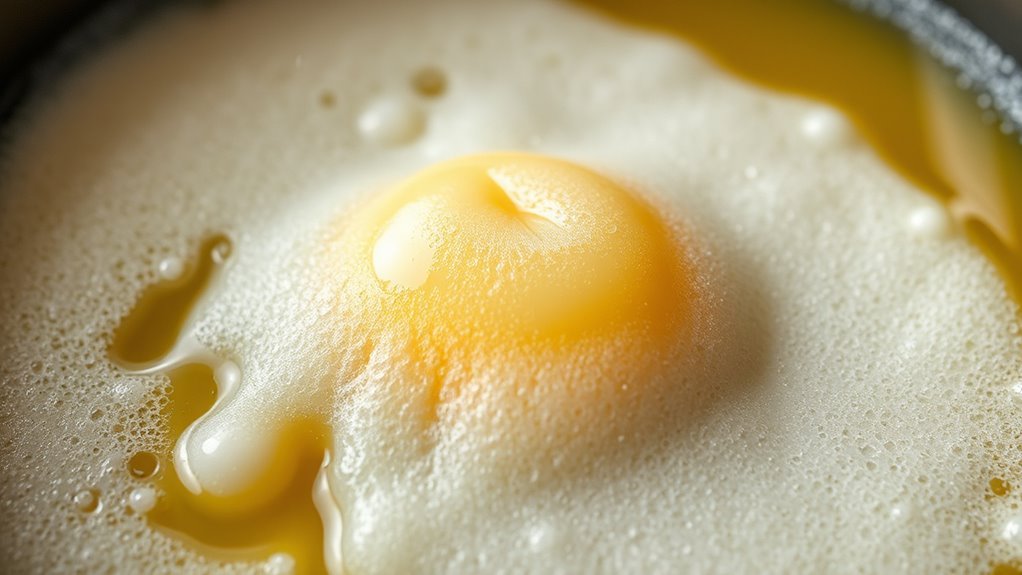
Once your butter is softened and at the right temperature, begin whisking it vigorously using a balloon or hand whisk. As you whisk, the butter starts to melt slightly, creating a silky texture ideal for aeration. Keep whisking steadily; this motion incorporates air, producing tiny bubbles that form the foundation of your foam. The gentle agitation also helps with flavor infusion, allowing any added herbs or seasonings to meld into the butter. Be patient—consistent whisking ensures a light, airy foam rather than a greasy or dense mixture. Adjust your speed as needed, but avoid overworking, which can cause the butter to break down. Incorporating proper techniques ensures a stable, frothy butter that adds a delicate, elevated touch to your sauces. With persistence, you’ll develop a stable, frothy butter that adds a delicate, elevated touch to your sauces.
Achieving the Foam
Have you ever wondered how to turn whipped butter into a light, airy foam? Achieving the perfect butter foam relies on proper butter emulsification and ensuring foam stability. First, use softened butter, not melted, to promote even emulsification. Incorporate gentle heat or agitation to break down fat molecules, creating a stable foam. Here are key tips:
- Use fresh, high-fat butter for better foam stability
- Whisk or blend steadily without overworking
- Add a pinch of acid (like lemon juice) to help stabilize the foam
- Keep the mixture at a consistent temperature
- Use a fine-mesh strainer or chinois to refine and stabilize the foam
These steps will help you create a light, sustained butter foam ideal for sauces and garnishes.

Amazon Grocery, Sweet Cream Butter, Unsalted, 16 Oz
One 16-ounce box of Unsalted Sweet Cream Butter
As an affiliate, we earn on qualifying purchases.
As an affiliate, we earn on qualifying purchases.
Incorporating Flavorings to Enhance Your Butter Foam
Adding flavorings to your butter foam is a simple yet effective way to elevate its taste and versatility. Start with flavor infusion by incorporating herbs, spices, or citrus zest directly into the butter before foaming. This technique enhances seasoning without overpowering the delicate foam structure. You can also add a splash of white wine or a dash of vinegar to introduce subtle acidity, boosting the overall flavor profile. Remember to keep your seasonings light to avoid collapsing the foam. By carefully selecting your flavorings, you improve seasoning enhancement, making your sauces more vibrant and complex. Additionally, considering the importance of proper wig care and styling can help ensure your presentation remains polished and fun. Experiment with different combinations to find what complements your dish best. This approach ensures your butter foam not only adds a light, airy texture but also a rich, layered taste.
Techniques for Achieving Stable and Long-Lasting Foam
To keep your butter foam stable and lasting, you need to focus on key techniques. Using proper foam stabilizers, maintaining consistent whisking, and controlling the temperature are essential. Mastering these points will give you a smoother, more durable foam every time. Incorporating the right exfoliation techniques can also improve the texture and stability of your foam by ensuring a clean surface.
Proper Foam Stabilizers
Achieving stable and long-lasting foam depends heavily on choosing the right foam stabilizers. For milk foam or other foams, stabilizer emulsions help maintain structure and prevent collapse. You can enhance stability by incorporating ingredients like gelatin, agar-agar, or lecithin, which form effective stabilizer emulsions. These ingredients trap air bubbles and keep the foam intact longer. Incorporating antioxidant-rich ingredients can also help preserve the foam’s freshness and prevent oxidation.
- Use natural stabilizers like gelatin or agar-agar for a cleaner taste
- Incorporate lecithin to improve foam longevity and texture
- Ensure proper mixing to evenly distribute stabilizers
- Adjust quantities based on foam volume and desired stability
- Avoid over-whisking, which can break delicate stabilizer emulsions
With the right stabilizers, your milk foam will stay airy and stable, elevating your sauces effortlessly.
Consistent Whisking Technique
Consistent whisking is essential for creating stable, long-lasting foam because uneven or erratic motion can cause air bubbles to burst or escape. Maintaining steady whisking ensures your foam develops a uniform texture and stays buoyant longer. Focus on keeping your whisking rhythm smooth and even, avoiding sudden movements that can disrupt the foam’s structure. Whisking consistency helps create smaller, evenly dispersed air pockets, resulting in a finer foam texture. It also prevents collapse by promoting gradual incorporation of air into the butter. Steady motion allows you to better control the formation and stability of the foam, giving you a lighter, more stable result. Practicing steady, controlled whisking is the key to achieving the desired foam that lasts without deflating too quickly. Additionally, proper technique can help ensure that the foam remains stable over time.
Optimal Temperature Control
Maintaining the right temperature is essential for creating stable, long-lasting foam in butter. Proper temperature regulation ensures the butter stays at an ideal heat level, preventing it from separating or collapsing. To achieve ideal heat control, monitor your stove closely and adjust the heat as needed. Using gentle, consistent heat helps produce a smooth, stable foam.
- Use a double boiler or indirect heat to prevent overheating
- Keep your butter at a steady temperature between 130-150°F (54-65°C)
- Avoid sudden temperature fluctuations during whisking
- Use a thermometer for precise heat regulation
- Remove from heat immediately once foam reaches desired stability
Controlling temperature effectively results in a finer, more durable foam, enhancing your sauce’s texture and appearance.
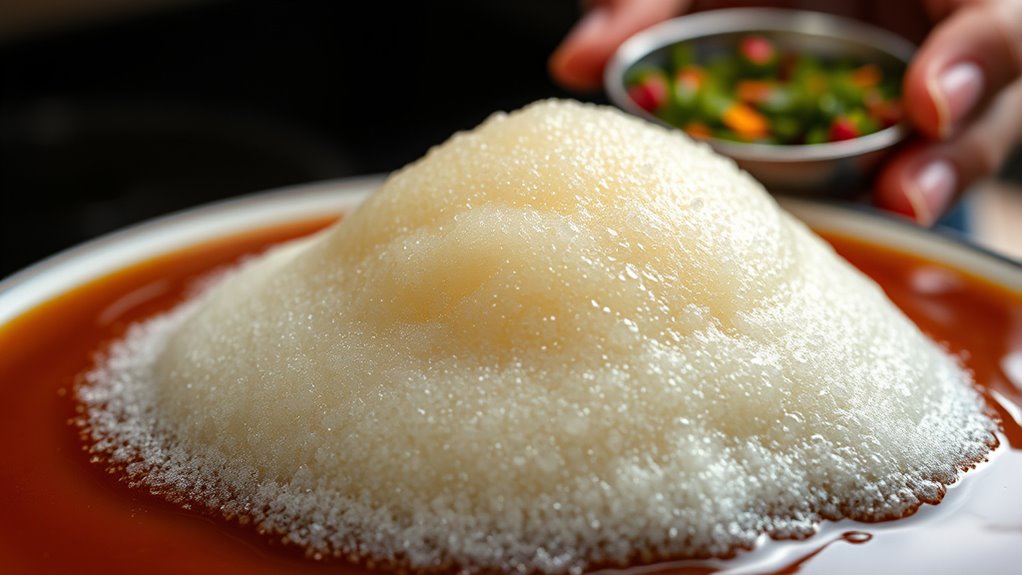
Creative Ways to Use Foamed Butter in Different Dishes
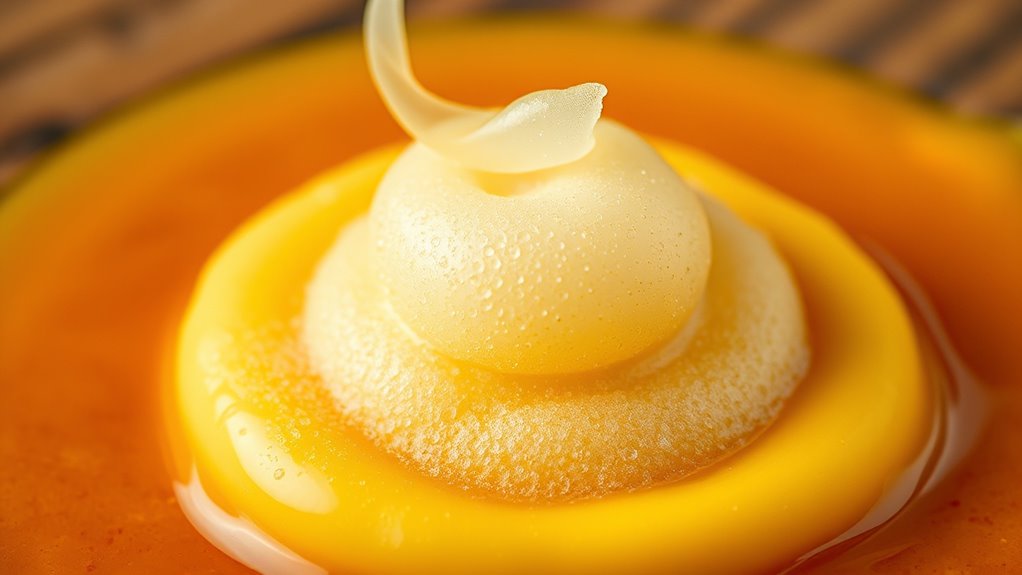
Foamed butter adds a luxurious, airy texture that elevates a variety of dishes, making them both visually appealing and flavorful. You can drizzle it over grilled vegetables, seafood, or even pasta for a rich, delicate finish. Its foam stability guarantees it holds shape long enough to impress, while subtle butter flavorings enhance taste without overpowering. Imagine spooning a cloud of butter foam onto a seared scallop or melting it atop roasted potatoes. Here’s a mental picture:
| Dish | Application | Effect |
|---|---|---|
| Grilled fish | Light butter foam as a garnish | Adds elegance and flavor |
| Vegetable medley | Drizzled for added richness | Brightens and lifts dishes |
| Seared steak | Finishing touch with foam | Balances savory depth |
Use foam creatively to turn simple ingredients into sophisticated dishes.
Troubleshooting Common Issues in Butter Foaming
When attempting to create butter foam, common issues like deflation or uneven texture often arise, but understanding their causes can help you troubleshoot effectively. Poor butter consistency or temperature fluctuations can cause the foam to collapse or become inconsistent. To improve your results, consider these tips:
- Use softened, but not melted, butter for better stability.
- Maintain a low, steady heat to prevent overcooking or separation.
- Whisk gently to avoid breaking the foam structure.
- Incorporate flavor infusion slowly to keep the foam airy.
- Ensure your equipment is clean and dry to avoid affecting butter consistency.
- Paying attention to the butter’s temperature ensures optimal foam formation and stability.
Addressing these factors helps preserve the foam’s lightness and ensures your flavor infusion remains even. Troubleshooting these common issues will give you a more consistent, airy butter foam every time.
Presentation Tips for Showcasing Your Light and Airy Sauces
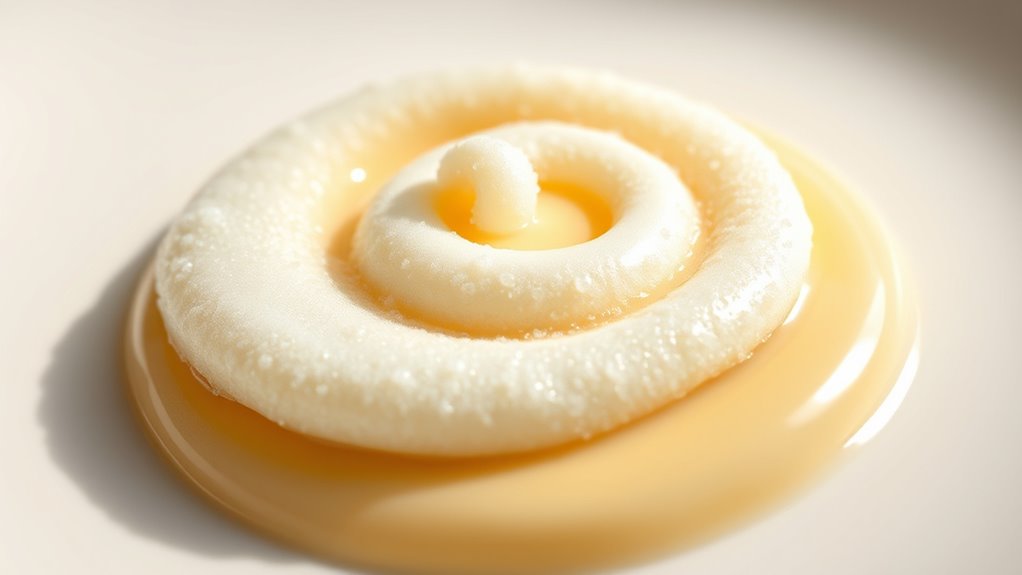
To effectively showcase your light and airy sauces, presentation is key to highlighting their delicate texture and vibrant appearance. Focus on presentation aesthetics and plating techniques that enhance visual appeal. Use a clean, white plate to make the sauce’s color pop, and add contrasting elements like herbs or edible flowers for vibrancy. Carefully spoon or pipe the foam to create elegant shapes, emphasizing its airy nature. Consider the following visual guide:
| Element | Technique | Effect |
|---|---|---|
| Base | Use a smooth, glossy sauce base | Highlights the foam’s lightness |
| Foam Placement | Artfully pipe or dollop | Creates visual interest |
| Garnishes | Add herbs or microgreens | Adds color, freshness |
| Plate Design | Keep minimal, clean lines | Keeps focus on the foam |
Mastering plating techniques elevates your sauce’s presentation aesthetics, leaving a memorable impression.
Frequently Asked Questions
Can I Use Plant-Based Butter for Foaming Purposes?
Yes, you can use plant-based butter for foaming purposes. Many vegan foams rely on dairy alternatives like plant-based butters, which can create a light, airy texture similar to traditional butter. To achieve a vegan foam, you might need to use non-dairy whipping methods or add stabilizers. Just guarantee your plant-based butter is chilled and well-whipped to get the best foam for your lighter sauces.
How Does Temperature Affect the Stability of Butter Foam?
Temperature directly impacts the stability of your butter foam, affecting foam longevity and overall quality. When you work with butter that’s too warm, the foam collapses quickly because the fat separates, reducing temperature stability. Conversely, chilled butter creates a firmer, more stable foam that lasts longer. To maximize foam longevity, keep your butter at an ideal cool temperature, ensuring it stays firm but not too cold for easy foaming.
Is There a Way to Re-Whip or Revive Lost Butter Foam?
Losing butter foam feels like watching a beautiful sunset fade—disheartening. To revive it, you can try gentle re-whipping, adding a tiny bit of cold water or fresh butter to help with butter stabilization, and then whisking again. This method encourages foam recovery, restoring your sauce’s lightness. Remember, patience and gentle handling are key to bringing your butter foam back to life, much like reigniting a fading flame.
Can I Prepare Butter Foam in Advance for Serving?
You can prepare butter foam in advance for serving by making makeahead preparations. Whip the butter until light and airy, then store it in an airtight container in the refrigerator. For best results, re-whip gently before serving to restore its airy texture. Keep storage tips in mind—avoid freezing, as it can affect the foam’s stability, and serve promptly to maintain its delicate, light consistency.
What Are Alternative Fats That Can Be Whipped Into Foam?
You might wonder if you can whip alternative fats into foam. The truth is, dairy alternatives like coconut cream or cashew cream can be whipped into a light, airy foam, offering a vegan option. Whipped oils, such as light olive or avocado oil, can sometimes hold a foam if whipped vigorously, but they don’t always stabilize well. Experimenting with these options can give you creative, tasty textures.
Conclusion
Mastering butter foaming transforms rich, heavy sauces into delicate, airy delights. While it’s a skill that demands precision, the lightness you achieve contrasts beautifully with the depth of flavor, elevating your dishes. This balance between effort and reward invites you to embrace both the science and artistry behind each swirl. With patience and practice, you’ll turn simple ingredients into culinary poetry—light as a whisper, yet bursting with flavor.