Side Dishes
Butter Rice Pilaf: A Simple Yet Flavorful Side That Complements Any Main Dish
Masterfully crafted with aromatic spices and creamy butter, this butter rice pilaf elevates any meal, promising a delightful culinary journey.
Butter rice pilaf is a beloved staple across the Middle East and Central Asia, tracing its roots to ancient Persian and Mughal cuisines. This simple yet flavorful side dish pairs perfectly with a variety of main courses, from roasted meats to grilled seafood. The key is high-quality basmati rice simmered in broth and seasoned with aromatic spices like cumin, coriander, and cardamom. The addition of butter gives the rice a rich, creamy texture and nutty flavor. Prepare it with care, and you'll have a side dish that not only complements your main dish but also elevates the entire meal. Let's dive deeper into the history and preparation of this versatile culinary delight.
Key Takeaways
- Butter rice pilaf is a staple dish across the Middle East and Central Asia with a unique combination of basmati rice, spices, and butter or ghee.
- The dish features a simple yet comforting preparation, making it a versatile side that complements various main courses, including grilled meats, stews, and curries.
- The use of high-quality basmati rice and butter creates a rich, creamy mouthfeel with a nutty aroma, adding depth and elegance to the overall dining experience.
- Attention to cooking techniques, such as sautéing onions, simmering rice, and fluffing the final dish, ensures perfect texture and flavor development.
- Butter rice pilaf's versatility and ability to complement a wide range of main dishes make it a popular and beloved side dish in many cuisines.
History
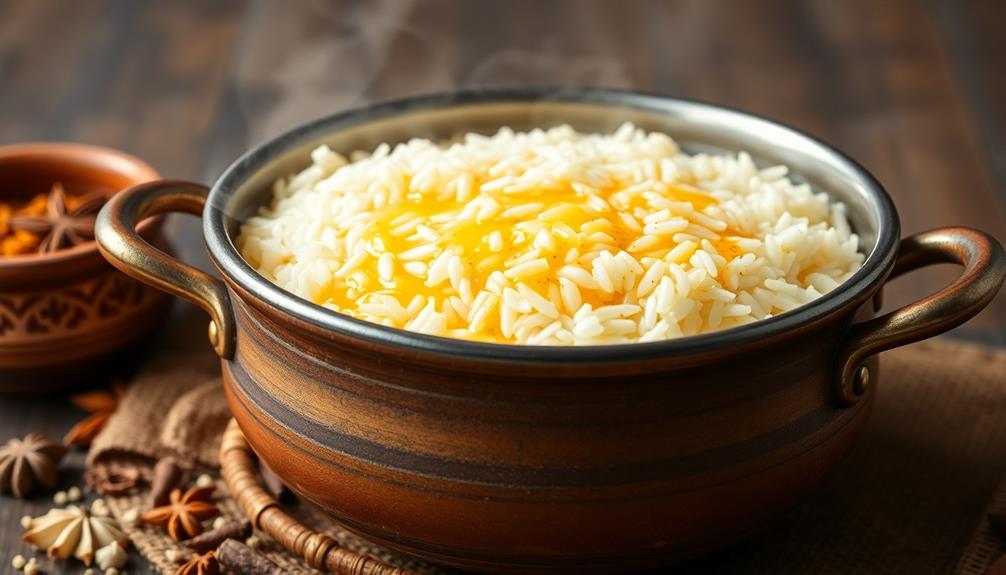
Butter rice pilaf has long been a staple dish across the Middle East and Central Asia. Its origins can be traced back thousands of years, with variations of the dish appearing in ancient Persian and Mughal cuisines. The unique combination of fragrant basmati rice, aromatic spices, and rich butter or ghee has captivated palates for generations.
The term "pilaf" (or "pilau") refers to a method of cooking rice where it's first sautéed in oil or butter, then simmered in broth or water until tender and fluffy. This technique helps the rice grains retain their distinct texture and allows the flavors to meld together seamlessly.
Over time, different regions have developed their own signature versions, each boasting its own unique blend of spices and accompaniments.
Today, butter rice pilaf remains a beloved dish, often served as a side to grilled meats, stews, or curries. Its comforting, aromatic nature makes it a versatile and beloved staple in many households.
Recipe
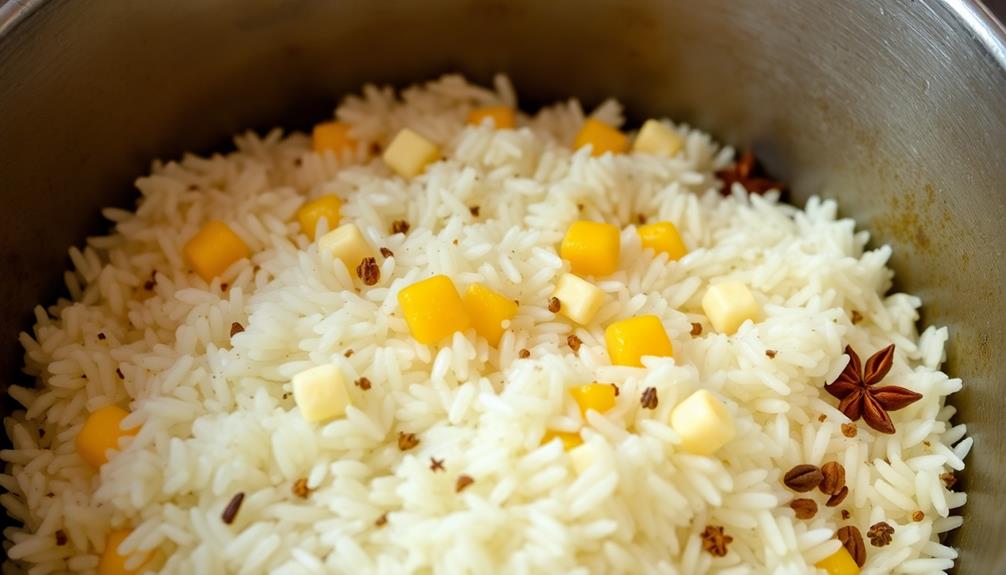
Butter Rice Pilaf is a simple and delicious side dish that can be enjoyed with a variety of main courses. The combination of fragrant basmati rice, warm spices, and rich butter creates a comforting and flavorful dish that's sure to impress.
The key to a successful Butter Rice Pilaf is to use high-quality, long-grain basmati rice. Basmati rice is known for its distinctive aroma and fluffy texture, making it the perfect choice for this dish. Additionally, the use of butter adds a luxurious mouthfeel and a subtle nutty flavor that complements the spices beautifully.
Ingredients:
- 2 cups basmati rice
- 4 cups chicken or vegetable broth
- 4 tablespoons unsalted butter
- 1 onion, finely chopped
- 2 garlic cloves, minced
- 1 teaspoon ground cumin
- 1 teaspoon ground coriander
- 1 teaspoon ground cardamom
- 1/2 teaspoon ground cinnamon
- Salt and freshly ground black pepper, to taste
Instructions:
In a large saucepan, melt the butter over medium heat. Add the onion and sauté until translucent, about 5 minutes. Stir in the garlic and spices, and cook for an additional minute until fragrant.
Add the basmati rice and stir to coat the grains with the butter and spices. Pour in the broth and bring the mixture to a boil. Reduce the heat to low, cover the pan, and simmer for 20-25 minutes, or until the rice is tender and the liquid has been absorbed.
To ensure the best results, be sure to use a tight-fitting lid and avoid lifting it during the cooking process, as this can release valuable steam and affect the rice's texture. Additionally, let the cooked rice rest for 5-10 minutes before fluffing it with a fork and serving.
Cooking Steps

First, you'll want to rinse the rice thoroughly before cooking. This helps remove excess starch and ensures the grains don't stick together.
Next, sauté the onions in the pan until they're nice and translucent.
Then, add the stock and the rice, cover, and let it simmer until the rice is tender and fluffy.
Step 1. Rinse Rice Thoroughly Before Cooking
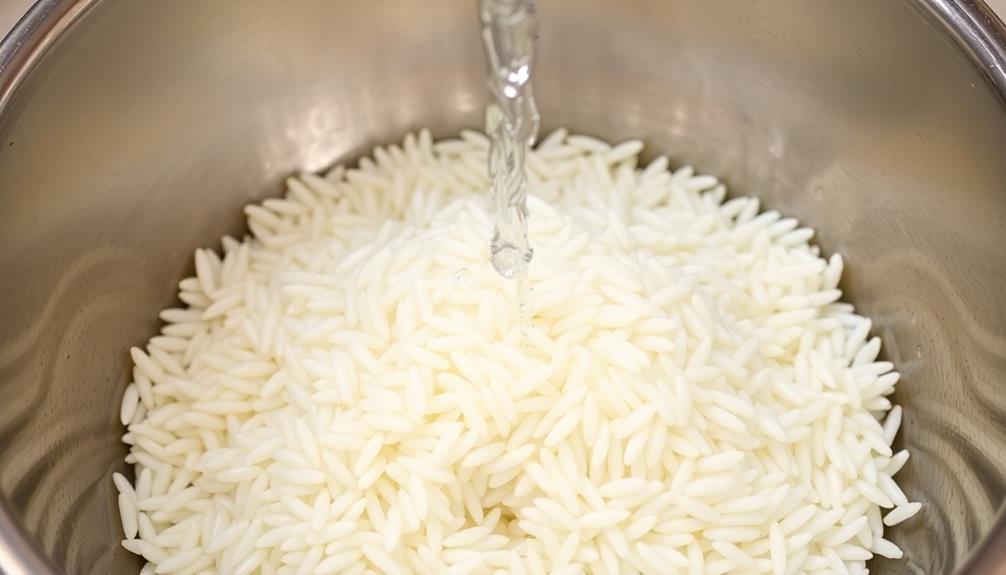
Rinsing the rice thoroughly is a crucial step in preparing a fluffy and flavorful butter rice pilaf. You'll want to place the rice in a fine-mesh strainer and hold it under cool, running water. Gently swish the rice around, letting the water run through, until it runs clear. This simple action removes excess starch, which can lead to clumpy, sticky rice.
Once the water runs clear, you're ready to move on to the next step. Rinsing the rice takes just a minute or two, but it makes a big difference in the final texture. You'll end up with perfectly separated grains that are light and fluffy, rather than a dense, gloppy mess.
The clean, pure flavor of the rice will also shine through, allowing the buttery richness to take center stage. Remember to drain the rinsed rice thoroughly before adding it to the pot. With this quick prep work done, you're well on your way to creating a truly delicious butter rice pilaf.
Step 2. Sauté Onions Until Translucent
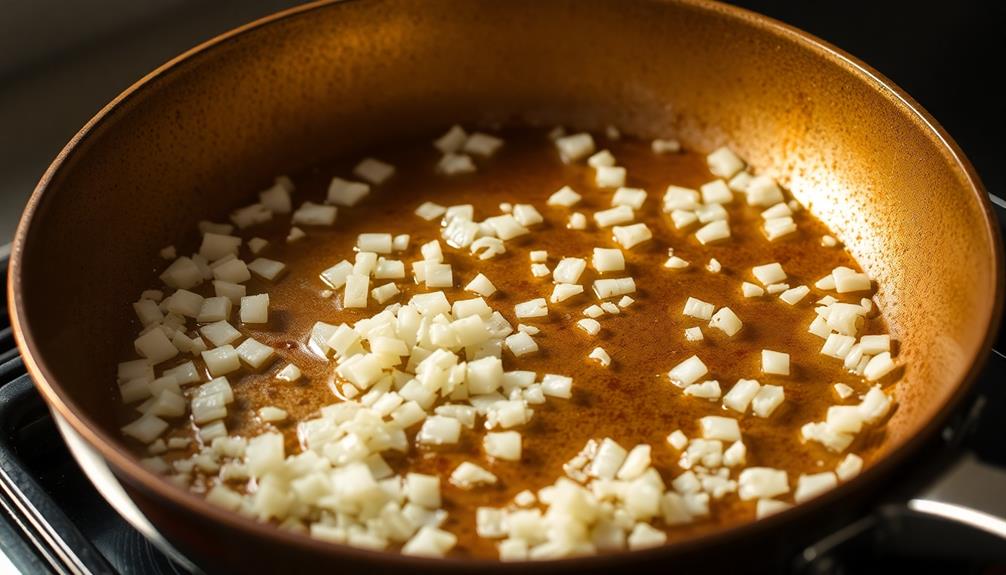
With the rice thoroughly rinsed and ready to go, it's time to turn your attention to the onions. Grab a sharp knife and a cutting board, then dice the onions into small, uniform pieces. This will help them cook evenly and develop a lovely, golden-brown color. As you prepare the onions, consider pairing this dish with a cup of Earl Grey tea for a delightful flavor contrast.
Next, heat a large skillet or saucepan over medium heat and add a generous knob of butter. As the butter melts, toss in the diced onions. Give them a stir to coat them in the warm, fragrant butter.
Now, let the onions sizzle away, stirring occasionally, until they become soft, tender, and beautifully translucent. This should take around 5-7 minutes.
Keep a close eye on the onions, making sure they don't burn. You want them to slowly caramelize, releasing their natural sweetness and filling your kitchen with an irresistible aroma.
Once the onions have reached this perfect, translucent state, you're ready to move on to the next step in creating your delicious butter rice pilaf.
Step 3. Add Stock and Rice
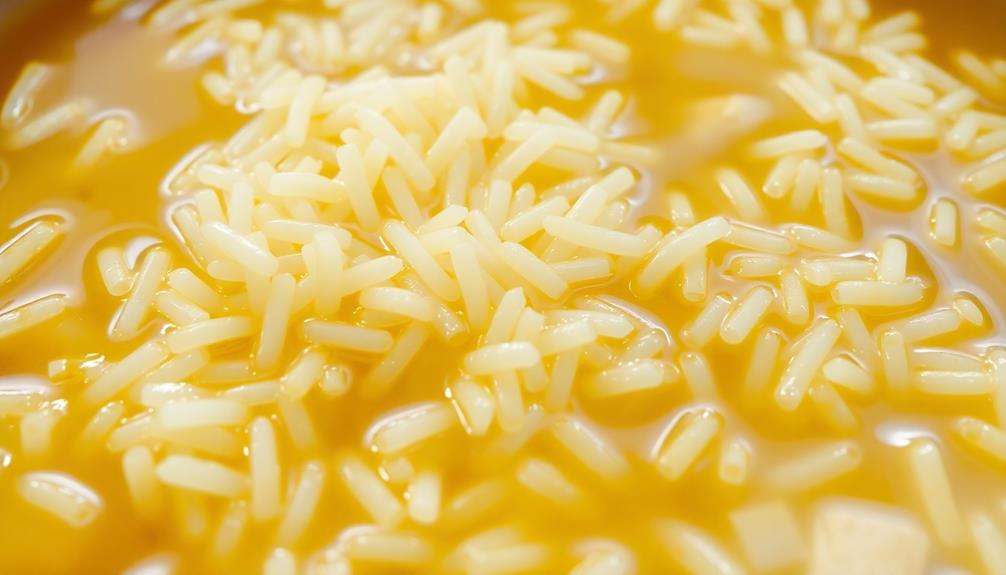
Once the onions have reached the perfect, translucent state, it's time to add the stock and rice. Grab your trusty pot and pour in the warm, fragrant stock. The aroma will make your mouth water in anticipation!
Carefully measure the rice and add it to the pot, making sure to evenly distribute it. Stir the mixture gently, ensuring the rice is fully submerged in the flavorful broth.
Now, bring the pot to a boil over medium-high heat. Once it reaches a rolling boil, reduce the heat to low, cover the pot with a tight-fitting lid, and let the rice simmer. Set a timer for 18-20 minutes, allowing the rice to slowly absorb all the delicious flavors of the stock.
Resist the urge to lift the lid and peek, as this can disrupt the cooking process.
When the timer goes off, turn off the heat and let the pot sit, covered, for an additional 5-10 minutes. This final resting period allows the rice to become perfectly tender and fluffy.
Step 4. Simmer Until Rice Is Tender
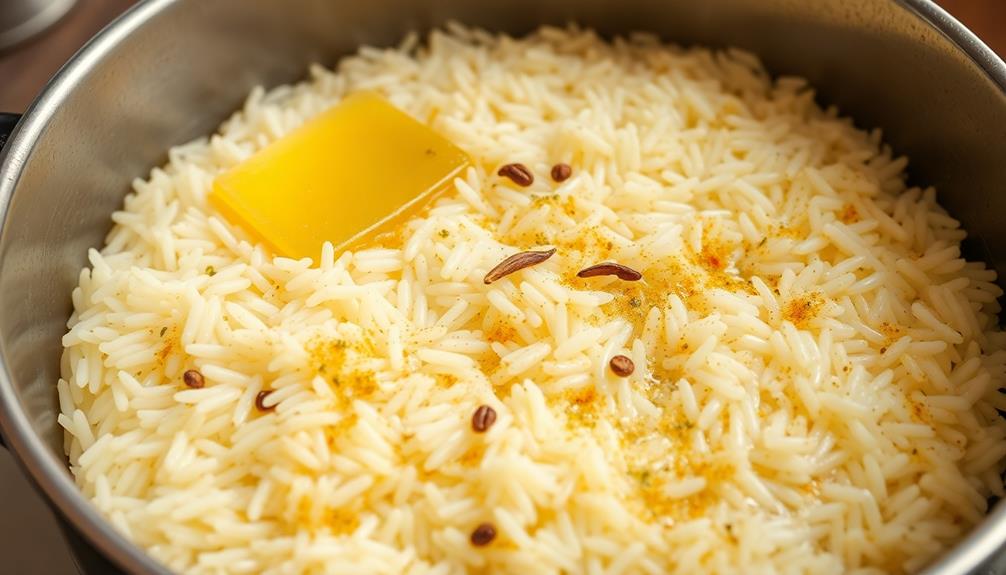
Now that the rice is submerged in the flavorful stock, it's time to let it simmer until it's tender and perfectly cooked. Keep the heat at medium-low, allowing the rice to gently bubble away.
This method of slow cooking is similar to how mushroom risotto achieves its creamy consistency, with constant attention to texture. You'll know it's ready when the grains are soft and plump, with each bite offering a lovely fluffy texture.
As the rice simmers, you'll catch the enticing aromas of the aromatic vegetables and warming spices. Periodically, lift the lid to check on the progress, but try not to remove it too often, as that can disrupt the cooking process.
Patience is key here – the rice needs time to fully absorb the flavors and transform into a delightful side dish. Soon, your kitchen will be filled with the comforting scent of perfectly cooked butter rice pilaf, ready to accompany your main course.
Get ready to savor each flavorful bite!
Step 5. Fluff Rice With a Fork
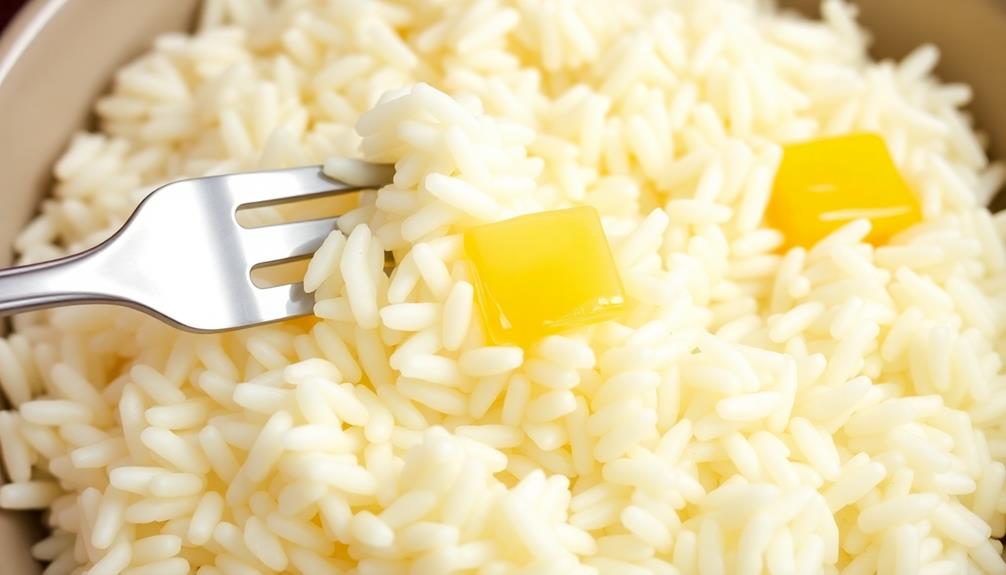
After the rice has simmered to tenderness, you'll want to fluff it with a fork. This simple step is crucial for achieving the perfect light and fluffy texture.
Gently run the tines of the fork through the cooked rice, lifting and separating the grains. Be careful not to overmix, as this can make the rice starchy and clumpy.
As you fluff, you'll see the individual grains become distinct and separate, creating a lovely, airy pilaf. The gentle motion also helps to release any steam trapped within the rice, allowing it to cool slightly before serving.
Fluffing with a fork is an easy way to ensure your butter rice pilaf turns out beautifully every time. This step takes just a minute or two, but it makes a big difference in the final texture and presentation of your dish.
With a few quick flicks of the wrist, you can transform the rice from sticky to sublime, ready to be enjoyed as the perfect accompaniment to your main course.
Final Thoughts
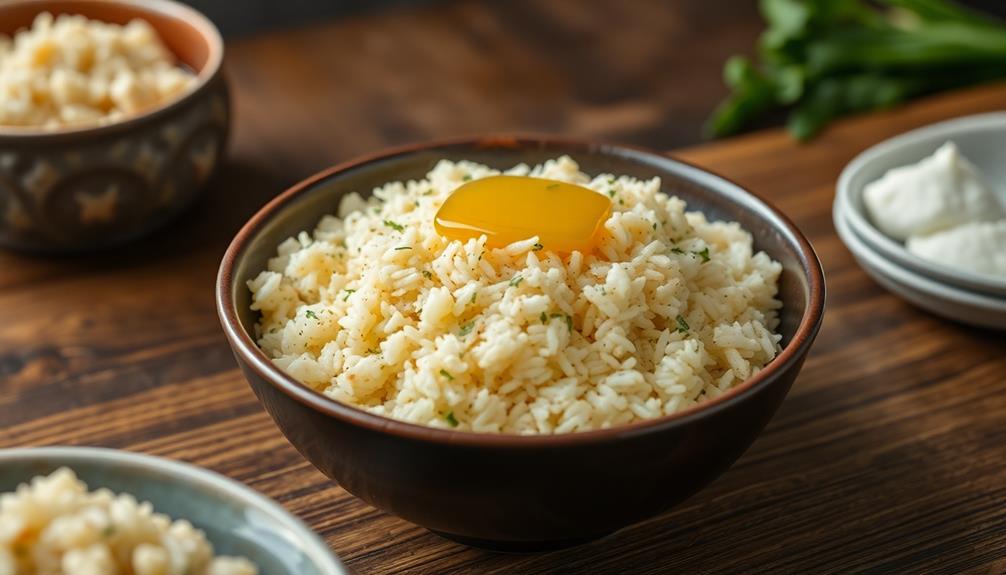
The preparation of this butter-enriched rice pilaf represents a culinary journey worth savoring. As you've discovered, the simplicity of this dish belies its depth of flavor. The slow, gentle toasting of the rice grains in butter allows them to develop a nutty aroma, while the fragrant addition of herbs and spices infuses the entire dish with a warm, comforting essence.
This careful attention to detail in the cooking process mirrors the thoughtful approach businesses must take when navigating business compliance and regulations to ensure success.
When you fluff the rice with a fork, you're unlocking a fluffy, light texture that's an absolute delight. The use of high-quality butter is key, as it lends a rich, creamy mouthfeel that beautifully complements the tender grains.
This butter rice pilaf is a versatile side that can elevate a wide range of main dishes, from roasted meats to grilled seafood. Its simplicity allows the other flavors on the plate to shine, while its own delectable taste ensures it won't be overlooked.
Savor each bite, and enjoy the way this unassuming dish brings a touch of elegance to every meal.
Frequently Asked Questions
Can Butter Rice Pilaf Be Made in Advance?
Yes, you can make butter rice pilaf in advance. It reheats well and the flavors will have time to meld together, making it even more delicious. Just be sure to store it properly in the fridge until you're ready to serve it.
How Should Leftover Butter Rice Pilaf Be Reheated?
To reheat leftover butter rice pilaf, simply place it in a covered microwave-safe dish and heat in the microwave for 1-2 minutes, stirring halfway. You can also reheat it on the stovetop over low heat, adding a splash of broth or water if needed.
Can Butter Rice Pilaf Be Frozen for Later Use?
Yes, you can freeze butter rice pilaf for later use. Simply let it cool completely, then transfer it to an airtight container or freezer-safe bag and freeze it for up to 3 months. When ready to serve, thaw it in the fridge overnight.
What's the Best Way to Add More Flavor to Butter Rice Pilaf?
To add more flavor to your butter rice pilaf, try sautéing aromatics like onions, garlic, or spices before cooking the rice. You can also use broth instead of water and stir in fresh herbs or lemon zest at the end.
Can Butter Rice Pilaf Be Made With a Different Type of Rice?
Absolutely! You can make butter rice pilaf with different types of rice. Try using basmati, jasmine, or even brown rice for a healthy twist. The key is adjusting the cooking time to ensure the rice cooks through.
Sunny’s articles radiate enthusiasm, much like her sunny disposition. As our resident “Butter Geek”, she delves deep into the latest butter trends, ensuring our readers are always in the know. Beyond her writing, Sunny’s passion lies in exploring vegan butter alternatives and hosting butter-tasting soirées.
Side Dishes
Butter-Braised Leeks: a Soft, Savory Side Dish With Incredible Flavor
Nourishing butter-braised leeks transform into a velvety, caramelized delight when slowly simmered, providing a soft, savory side dish with incredible flavor.
Butter-braised leeks are a delightful side dish that'll melt in your mouth. These tender alliums transform into a velvety, caramelized delight when slowly simmered in butter and stock. The golden-brown edges provide a crunchy contrast to the creamy interior, perfectly balanced by a hint of garlic and fresh thyme. It's an easy-to-prepare recipe suitable for all skill levels, making it ideal for busy nights or special occasions. Serve these butter-braised leeks warm, garnished with Parmesan cheese or chives, to elevate a variety of main dishes. One bite and you'll understand why this savory side is so incredibly flavorful.
Key Takeaways
- Butter-braised leeks are a simple yet elegant side dish with a creamy, velvety texture and caramelized edges for added flavor and crunch.
- The long cooking process in butter and stock enhances the natural sweetness and mild flavor of leeks, making them suitable for various cuisines and occasions.
- Minimal preparation and cooking time make this dish ideal for busy nights or special events, with the rich, buttery sauce complementing the tender leeks.
- Proper trimming and rinsing of leeks, along with monitoring the cooking process, are crucial for achieving the desired texture and flavor profile.
- Butter-braised leeks can be served warm, garnished with Parmesan cheese or chives, and paired with roasted meats, grilled fish, or salads for a versatile and impressive side dish.
History
Leeks, a member of the allium family, have a long and storied history dating back to ancient civilizations. These versatile vegetables were prized by the Egyptians, Greeks, and Romans for their mild, onion-like flavor and impressive health benefits. In fact, the ancient Egyptians even depicted leeks in their hieroglyphics, showcasing their significance in the local cuisine and culture.
Throughout the centuries, leeks have continued to be a staple ingredient in many traditional dishes across Europe and Asia. In Wales, they're even considered a national symbol, with the leek adorning the country's royal badge.
Likewise, the French have long incorporated leeks into their beloved cuisine, using them in everything from hearty soups to delicate tarts.
Today, leeks remain a beloved ingredient, prized for their versatility and ability to add depth of flavor to a wide range of dishes. From humble home-cooked meals to elegant fine dining experiences, the humble leek continues to hold a special place in the hearts and kitchens of food lovers around the world.
Recipe
Butter-Braised Leeks are a simple yet elegant side dish that showcase the delicate, sweet flavor of this versatile vegetable. The long, slow cooking process in butter and stock transforms the leeks into a silky, luxurious accompaniment to any meal.
This recipe is easy to prepare and requires minimal hands-on time, making it an ideal choice for busy weeknights or special occasions. The rich, buttery sauce coats the tender leeks, creating a dish that's both comforting and sophisticated.
Ingredients:
- 4 large leeks, trimmed, halved lengthwise, and thinly sliced
- 4 tablespoons unsalted butter
- 1 cup chicken or vegetable stock
- 1 teaspoon kosher salt
- 1/4 teaspoon freshly ground black pepper
In a large skillet or Dutch oven, melt the butter over medium heat. Add the sliced leeks and cook, stirring occasionally, until they're softened and beginning to caramelize, about 10-15 minutes.
Pour in the stock, season with salt and pepper, and bring the mixture to a simmer. Cover the pan, reduce the heat to low, and cook, stirring occasionally, until the leeks are very tender and the liquid has reduced by half, about 30-40 minutes.
Serve the butter-braised leeks warm, spooning the rich, creamy sauce over the top. This dish pairs well with roasted meats, grilled fish, or as a side to a simple green salad.
For an extra indulgent touch, garnish with a sprinkle of freshly grated Parmesan cheese or chopped chives.
Cooking Steps
First, trim and rinse the leek slices to remove any dirt or debris.
Leeks are a versatile ingredient that can enhance various dishes, much like how bread pudding transforms stale bread into a comforting dessert.
Next, melt the butter in a skillet over medium heat.
Then, add the leeks and cook, stirring occasionally, until they're tender and fragrant.
Be sure to season with a pinch of salt and pepper to enhance the flavors.
Let's keep going – the leeks will soon be ready to enjoy!
Step 1. Trim and Rinse Leek Slices
To prepare the leeks, begin by trimming the root ends and slicing the leeks into 1-inch pieces.
You want to make sure all the dirt and grime are removed, so give those leek slices a good rinse under cool running water. Gently separate the layers as you rinse to ensure every nook and cranny is clean.
It's important to get them nice and clean, as you don't want any grit or debris in your final dish. Once they're thoroughly rinsed, give the leeks a gentle pat dry with a clean kitchen towel or paper towels.
You want them to be damp, but not dripping wet, before moving on to the next step. Properly prepping the leeks sets you up for success in creating a delightfully buttery, savory side dish that's sure to impress.
Step 2. Melt Butter in a Skillet
With the leeks prepped and ready, it's time to start cooking. Grab a large skillet and place it over medium heat. As the pan heats up, take a generous knob of butter and add it to the skillet.
Watch as the butter begins to melt, sizzling and coating the bottom of the pan. Butter adds flavor and moisture to baked goods, and it will do the same for our leeks. Swirl the butter around to ensure even melting and distribution. Soon, the butter will start to foam and turn a light golden brown, filling your kitchen with an irresistible aroma.
This is the perfect time to add your leek slices. Carefully transfer the leeks into the hot, buttery skillet, making sure they're in a single layer. Let the leeks sizzle and cook, stirring occasionally, until they become soft and tender, about 8-10 minutes.
The butter will continue to coat and flavor the leeks, creating a deliciously rich and savory base for the next steps of the recipe.
Step 3. Add Leeks and Cook
Next, add the prepared leeks to the hot, buttery skillet. Toss and coat the leeks in the melted butter, ensuring they're evenly distributed.
Let the leeks sizzle and cook, stirring occasionally, until they start to soften and become tender, about 5-7 minutes. Using proper storage techniques can help maintain the quality of your butter for this dish. You'll know they're ready when the leeks turn bright green and become slightly translucent.
As the leeks cook, the butter will begin to caramelize, creating a rich, savory aroma that fills the air.
Gently stir the leeks to prevent them from burning and to allow the edges to get golden and crispy. The longer you cook the leeks, the more they'll develop a sweet, nutty flavor, so keep a close eye and adjust the heat as needed to achieve your desired level of tenderness and caramelization.
Step 4. Season With Salt and Pepper
Season the cooked leeks generously with salt and freshly ground black pepper to taste. The salt helps to intensify the natural sweetness of the leeks, while the pepper adds a subtle kick of warmth and complexity.
Imagine the sizzle as the seasonings hit the hot butter in the pan, releasing their aromas and infusing the tender leeks with robust flavor. Grind the pepper directly over the leeks, allowing the fragrant spice to coat every piece.
Take a moment to savor the aroma – it's mouthwatering! You'll want to taste a piece to ensure the seasoning is just right. The leeks should be well-seasoned, with the salt and pepper enhancing their inherent buttery goodness.
Now that the leeks are perfectly seasoned, you're ready to serve this simple yet sophisticated side dish. Get ready to delight your taste buds with the rich, savory goodness of these butter-braised leeks.
Step 5. Finish Cooking Until Tender
Once the leeks are well-seasoned, go ahead and continue cooking them until they're perfectly tender.
You'll want to keep a close eye on them, gently stirring every few minutes, to ensure they don't burn or become too soft. As the butter melts and the leeks slowly sizzle, you'll notice their vibrant green hues transform into a lovely golden-yellow color.
The leeks will gradually become meltingly soft and silky, their layers separating into delicate strands. When they reach your desired level of tenderness, around 10-15 minutes total, remove the pan from the heat.
The leeks should now be wonderfully buttery, infused with the aromatic blend of seasonings. You can serve them immediately as a flavorful side dish, or let them cool slightly before enjoying their comforting, savory goodness.
Either way, these butter-braised leeks are sure to delight your taste buds.
Final Thoughts
The dish's richness and subtle sweetness make it a delightful finale to any meal. You'll want to savor every bite, letting the tender leeks melt in your mouth. The golden-brown edges add a lovely caramelized crunch, while the creamy interior provides a velvety smooth contrast. The hint of garlic and fresh thyme elevates the natural flavor of the leeks, creating a beautifully balanced dish.
Serve the butter-braised leeks as a side to roasted meats or fish, or enjoy them on their own as a simple yet elegant vegetarian option. They pair wonderfully with crusty bread, allowing you to soak up every last drop of that heavenly butter sauce.
This easy-to-prepare recipe is sure to impress your guests and have them reaching for seconds. The delicate, almost sweet taste of the leeks makes them a versatile and delicious addition to any meal.
Frequently Asked Questions
Can I Use Other Types of Onions Instead of Leeks?
You can certainly use other types of onions instead of leeks. Scallions, shallots, or even regular yellow or white onions would work well in this dish, offering similar flavors and textures. Feel free to experiment with your preferred onion variety.
How Long Do Leftover Braised Leeks Last in the Fridge?
Leftover braised leeks can last in the fridge for up to 4 days. Store them in an airtight container and they'll stay fresh and flavorful. Just be sure to reheat them before serving for the best texture and taste.
Can I Add Other Herbs or Spices to the Braising Liquid?
Absolutely! You can enhance the flavor of the braising liquid by adding your favorite herbs and spices. Experiment with garlic, thyme, rosemary, or even a pinch of red pepper flakes to create a personalized dish.
Can I Make This Dish Vegan by Using Plant-Based Butter?
Absolutely! You can easily make this dish vegan by using plant-based butter instead of the traditional dairy version. The flavor and texture will be just as delicious, so go ahead and give it a try.
Do I Need to Peel the Leeks Before Cooking Them?
No, you don't need to peel the leeks before cooking them. The outer layers are edible, though you may want to remove any damaged or discolored parts. Just be sure to thoroughly clean the leeks to remove any dirt or grit.
Sunny’s articles radiate enthusiasm, much like her sunny disposition. As our resident “Butter Geek”, she delves deep into the latest butter trends, ensuring our readers are always in the know. Beyond her writing, Sunny’s passion lies in exploring vegan butter alternatives and hosting butter-tasting soirées.
Side Dishes
Brown Butter Brussels Sprouts: The Crispy, Nutty Twist on Brussels That Everyone Will Love
A crispy, nutty twist on the classic Brussels sprouts that transforms the polarizing veggie into a delicious dish everyone will devour. Read on to learn more.
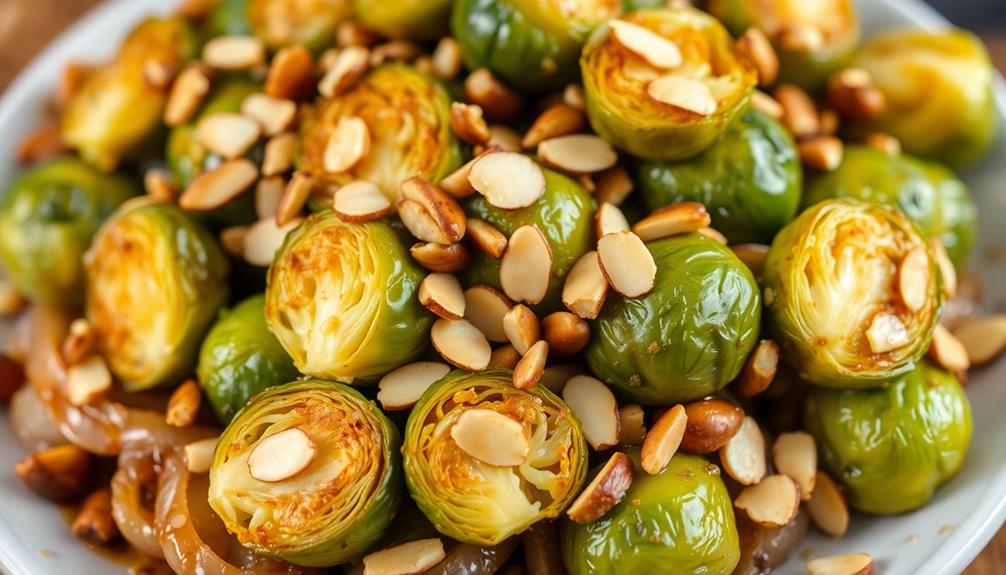
Brussels sprouts may be a polarizing vegetable, but this Brown Butter Brussels Sprouts recipe transforms them into a crispy, nutty, and utterly delicious dish that everyone will love. You'll start by browning the butter until it's rich and nutty, then toss the trimmed and halved Brussels sprouts in the fragrant, caramelized butter. After roasting until they're deeply golden and crispy, the sprouts develop a wonderfully sweet and savory flavor that's sure to win over even the most skeptical eaters. Curious to learn more about the history and preparation of this tasty twist on a classic veggie?
Key Takeaways
- This recipe transforms the often polarizing Brussels sprouts into a desirable dish by browning the butter for a nutty, caramelized flavor.
- The key preparation steps involve trimming, halving, and roasting the Brussels sprouts to achieve a crispy, crunchy texture.
- The final dish combines savory and slightly sweet elements, making it a crave-worthy side or main course.
- The recipe is designed for ease, suitable for all cooking levels, and encourages repeat making due to its versatility and crowd-pleasing appeal.
- Serving suggestions include pairing the Brown Butter Brussels Sprouts with various main courses, tossing them with pasta, or enjoying them as a healthy snack.
History
The humble Brussels sprout has undergone a remarkable transformation over the centuries. Once scorned as a bitter, unappetizing vegetable, these little cabbages have now become a beloved culinary darling.
Tracing the sprout's journey, you'll find that it originated in ancient Rome and the Mediterranean region, where it was prized for its hardy, resilient nature. As Europeans explored the world, the Brussels sprout traveled with them, eventually finding a home in Belgium, where it earned its now-famous moniker.
Notably, agricultural practices in various regions contributed to the sprout's development, much like the historical farmhouses that reflect deep-rooted cultural narratives.
In the early 20th century, the sprout's popularity soared, as innovative chefs began experimenting with new cooking techniques. The discovery of roasting Brussels sprouts, for instance, unlocked their inherent sweetness and transformed the texture into a delightfully crisp exterior and tender interior.
And now, with the addition of rich, nutty brown butter, the Brussels sprout has reached its full culinary potential, delighting taste buds everywhere.
Recipe
Brussels sprouts are a polarizing vegetable. Some love their earthy, slightly bitter flavor, while others find them unpalatable. However, with the right preparation, even the most reluctant eater can be won over. This recipe for Brown Butter Brussels Sprouts is a game-changer, transforming the humble sprout into a delightful side dish.
The key to this recipe lies in the magical process of browning the butter. As the butter sizzles in the pan, it develops a nutty, caramelized flavor that complements the Brussels sprouts perfectly. The result is a dish that's both savory and slightly sweet, with a lovely crunch from the roasted sprouts.
Ingredients:
- 1 lb Brussels sprouts, trimmed and halved
- 4 tbsp unsalted butter
- 2 cloves garlic, minced
- 1 tsp lemon juice
- Salt and pepper to taste
Instructions:
Melt the butter in a large skillet over medium-high heat. Continue cooking, swirling the pan occasionally, until the butter turns golden brown and develops a nutty aroma, about 5-7 minutes.
Add the Brussels sprouts and sauté, stirring occasionally, until they're tender and caramelized, about 10-12 minutes. Stir in the garlic and cook for an additional minute. Remove from heat, drizzle with lemon juice, and season with salt and pepper to taste.
When cooking this dish, be patient and allow the butter to brown fully. The nutty flavor is crucial to the dish's success. Additionally, be sure to cut the Brussels sprouts evenly so they cook at the same rate.
Serve these Brown Butter Brussels Sprouts as a side dish to your favorite protein or as part of a larger meal.
Cooking Steps
Trim and halve those Brussels sprouts to prep them for roasting.
For an added health boost, consider incorporating essential oils like peppermint oil for respiratory support while you enjoy your cooking experience.
Next, melt the butter in a pan until it's a rich, nutty brown.
Now, add the sprouts and toss them until they're evenly coated in that heavenly brown butter.
Time to roast them up until they're deeply caramelized – they'll be irresistible!
Step 1. Trim and Halve Brussels Sprouts
Start by removing any discolored or damaged outer leaves from the brussels sprouts.
Grab each sprout and give it a gentle trim at the base, cutting off just the very bottom end. This will help release any tough or woody stems.
Next, use a sharp knife to carefully slice each sprout in half from top to bottom. Try to make clean, even cuts so the sprouts cook evenly.
Once they're all trimmed and halved, give the brussels sprouts a good rinse under cool running water.
Gently pat them dry with a clean kitchen towel or paper towels. This will help the sprouts get nice and crispy when you cook them later.
With your brussels sprouts all prepped, you're ready to move on to the next step – browning the butter!
Step 2. Melt Butter Until Nutty Brown
To begin browning the butter, melt it in a large skillet or saucepan set over medium heat. As the butter melts, keep a close eye on it, stirring occasionally. You'll start to see tiny little bubbles form and the butter will begin to foam up. This is good! It means the butter is starting to brown.
Now, you'll want to keep a watchful eye as the butter continues to cook. The color will start to change from pale yellow to a rich, nutty brown.
You'll also notice a delightful aroma filling the air – that's the nutty, toasted flavor developing. Once the butter reaches a deep amber hue and has a nutty, fragrant scent, it's time to remove it from the heat.
Be careful not to let it burn, as that can result in a bitter, acrid flavor. Removing the pan from the heat will stop the browning process and ensure you end up with perfect, golden-brown butter.
Step 3. Add Brussels Sprouts
Once the butter has reached the perfect nutty-brown hue, you can add the brussels sprouts to the pan.
Make sure you prepare the cooking area safely, as proper venting requirements can enhance your overall cooking experience.
Watch as they sizzle and dance, absorbing all that rich, buttery goodness. Give them a gentle stir, ensuring each sprout is coated evenly.
As they begin to caramelize, you'll notice the edges turning delightfully crispy, while the centers stay tender and juicy.
The earthy, slightly bitter notes of the brussels sprouts perfectly complement the nutty sweetness of the brown butter.
With each bite, you'll be delighted by the contrast of textures – the crisp, golden exterior and the soft, melty interior.
The brussels sprouts will become infused with the warm, toasted flavors, transforming them into an irresistible side dish.
Keep a close eye and stir occasionally, allowing the sprouts to cook until they reach your desired level of doneness.
Once they're perfectly tender and caramelized, you're ready to serve these incredible brown butter brussels sprouts.
Step 4. Toss Sprouts Until Evenly Coated
Gently toss the brussels sprouts in the pan until they're evenly coated with the rich, nutty brown butter. The sprouts should glisten and shimmer, every inch bathed in the golden, aromatic sauce.
Using a pair of tongs or a spatula, lift and turn the sprouts, ensuring each one is fully submerged and caressed by the decadent butter. As you toss, the sprouts will start to sizzle and caramelize, developing a delightful crispness around the edges.
Keep a close eye, gently tossing and turning until the sprouts are perfectly coated and glistening. The key is to handle them with care, allowing the butter to cling to every nook and cranny.
Once the sprouts are evenly coated, they're ready to serve up and enjoy, with that irresistible nutty, buttery flavor in every bite.
Step 5. Roast Until Deeply Caramelized
How else can you achieve that deep, caramelized flavor on the brussels sprouts? By roasting them in the oven until they're perfectly crispy and golden brown! This is the key to unlocking the nutty, almost sweet essence of these little green gems.
Preheat your oven to 400°F (200°C) and line a baking sheet with parchment paper. Spread the tossed brussels sprouts in a single layer, making sure they've plenty of room to breathe. You want them to get nice and crispy, not steamed.
Roast for 18-22 minutes, flipping them halfway through, until they're deeply caramelized and a gorgeous shade of amber. Keep a close eye on them towards the end to prevent burning. The sugars in the sprouts will start to caramelize, creating those irresistible crunchy, nutty edges.
Once they're done, transfer the roasted brussels sprouts to a serving bowl and prepare to be dazzled by their irresistible flavor and texture!
Final Thoughts
The brussels sprouts, now perfectly caramelized, invite you to savor each bite fully. The nutty, buttery aroma fills the air, making your mouth water in anticipation.
As you take the first taste, the flavors burst forth – the sweetness of the roasted sprouts mingling with the rich, toasted notes of the brown butter. It's a symphony of textures, too, with the crisp outer leaves giving way to the tender, melty centers.
You can't help but smile, knowing you've created something truly special. These brussels sprouts are a revelation, transforming a sometimes-maligned vegetable into a dish that everyone will crave.
Serve them as a side, toss them with pasta, or enjoy them on their own – no matter how you indulge, you'll be left feeling satisfied and content.
The best part? This recipe is so simple, you'll find yourself making it again and again. Embrace the magic of brown butter and let these brussels sprouts become a new family favorite.
Frequently Asked Questions
Can I Use Frozen Brussels Sprouts Instead of Fresh?
Absolutely! You can use frozen brussels sprouts instead of fresh. Just be sure to thaw and pat them dry before cooking. Frozen brussels sprouts can work just as well, saving you time and effort.
How Long Do the Brussels Sprouts Need to Chill in the Fridge?
You can skip the chilling step if you're using frozen Brussels sprouts. Just make sure to pat them dry before cooking to get that nice crispy texture. No need to let them chill in the fridge.
Is It Possible to Make This Recipe Ahead of Time?
You can absolutely make this recipe ahead of time. Simply prepare the brussels sprouts, then store them in an airtight container in the fridge for up to 3 days. When ready to serve, reheat and finish with the brown butter.
Can I Substitute the Brown Butter With Regular Butter?
Yes, you can substitute regular butter for the brown butter in this recipe. The flavor profile won't be as nutty, but it'll still result in deliciously crispy brussels sprouts. Just be mindful of the cooking time as regular butter has a lower smoke point.
How Do I Get the Brussels Sprouts to Be Extra Crispy?
To get extra crispy brussels sprouts, you'll want to toss them in oil and spread them out in a single layer on a baking sheet. Roast them at a high temperature, flipping halfway, until they're nicely browned and crunchy.
Sunny’s articles radiate enthusiasm, much like her sunny disposition. As our resident “Butter Geek”, she delves deep into the latest butter trends, ensuring our readers are always in the know. Beyond her writing, Sunny’s passion lies in exploring vegan butter alternatives and hosting butter-tasting soirées.
Side Dishes
Butter-Poached Asparagus: Tender, Flavorful Asparagus That’s Perfect Every Time
Kick off spring with the exquisite simplicity of butter-poached asparagus, a mouthwatering dish that’ll have your taste buds dancing with joy. Learn the secrets behind this springtime delight.
Elevate your spring menu with the exquisite simplicity of butter-poached asparagus, a dish that'll have your taste buds dancing with joy. The gentle poaching technique enhances the vegetable's tender, succulent texture and nuanced flavors, creating a mouthwatering experience. Just simmer fresh asparagus in melted butter until perfectly tender, then season with a squeeze of lemon and a sprinkle of salt and pepper. Serve this elegant side dish immediately for maximum flavor impact – you won't believe how quick and easy it is to prepare restaurant-quality asparagus that's sure to impress. Want to learn more about the history and cooking secrets behind this springtime delight?
Key Takeaways
- Butter-poaching asparagus enhances its delicate flavor and texture, resulting in a tender and flavorful dish perfect for special occasions or everyday meals.
- The gentle poaching method prevents overcooking, ensuring the asparagus retains a crisp texture while being infused with the richness of butter.
- Seasoning the asparagus with lemon juice, salt, and pepper balances the flavors and adds brightness to the dish.
- Butter-poached asparagus is a versatile side dish that can be paired with a variety of main courses to create a complete and satisfying meal.
- The visual appeal of carefully arranged, vibrant green asparagus spears further enhances the overall dining experience.
History
Asparagus, a vegetable with roots tracing back to ancient times, has long been a cherished ingredient in culinary traditions across the globe. You can find references to this nutrient-rich plant in Egyptian, Greek, and Roman texts, where it was revered for its unique flavor and purported health benefits.
Over the centuries, asparagus has become a springtime staple, its tender spears eagerly anticipated as a sign of the changing seasons.
Today, this versatile vegetable continues to captivate chefs and home cooks alike, with endless ways to prepare and enjoy its distinctive taste. From classic roasted asparagus to vibrant salads and rich, creamy soups, the possibilities are endless.
And one of the most indulgent ways to savor asparagus is through the simple yet decadent technique of butter-poaching, which coaxes out the vegetable's natural sweetness and imparts a luxurious mouthfeel.
Whether you're a seasoned asparagus enthusiast or just discovering this spring treasure, the history and versatility of this beloved ingredient are sure to inspire your culinary adventures.
Recipe
Butter-poached asparagus is a simple yet elegant dish that showcases the delicate flavors of fresh asparagus. The gentle poaching in a rich butter sauce creates a luxurious texture and intensifies the natural sweetness of the vegetable.
To prepare this dish, you'll need a few high-quality ingredients and a bit of patience, but the result is well worth the effort. The key is to poach the asparagus gently, allowing the butter to infuse the stalks with its creamy and savory notes.
Ingredients:
- 1 lb fresh asparagus, trimmed
- 4 tbsp unsalted butter
- 1 tsp lemon juice
- Salt and freshly ground black pepper to taste
Instructions:
In a large skillet, melt the butter over medium-low heat. Gently add the trimmed asparagus spears and poach them, turning occasionally, for 8 to 10 minutes, or until they're tender but still have a slight bite. Be careful not to overcook.
Remove the asparagus from the butter and transfer to a serving dish. Drizzle the lemon juice over the asparagus and season with salt and pepper to taste.
For best results, use the freshest and thinnest asparagus you can find. The gentle poaching in the butter allows the vegetable to retain its vibrant color and delicate flavor.
Serve the butter-poached asparagus immediately, as it's best enjoyed warm.
Cooking Steps
Bring the butter to a gentle simmer in a pan.
Carefully add the asparagus to the simmering butter and let it cook until it's tender.
Once the asparagus is done, remove it from the butter and season it with a sprinkle of salt and pepper.
Step 1. Bring Butter to Gentle Simmer
To begin, you'll want to bring the butter to a gentle simmer. Place the butter in a skillet or saucepan over medium heat. Keep a close eye on it, stirring occasionally, until the butter melts and starts to bubble gently.
You're looking for a soft, steady simmer – not a rapid boil. This gentle heat will help the butter infuse the asparagus with its rich, creamy flavor.
As the butter simmers, you might notice it start to foam up a bit. That's normal! Just continue to stir it occasionally to prevent any burning or scorching.
The goal is to maintain that gentle simmer until you're ready to add the asparagus. Once the butter is perfectly melted and heated through, you can move on to the next step.
Just be patient and resist the urge to crank up the heat – slow and steady is the way to go for this butter-poached asparagus technique. Your taste buds will thank you!
Step 2. Add Asparagus to Butter
With the butter at the perfect temperature, it's time to add the asparagus. Gently lower the spears into the silky, golden liquid, making sure each one is fully submerged. The asparagus will immediately begin to sizzle and soak up the rich, nutty flavor of the butter.
Swirl the pan gently to ensure even cooking, and watch as the vibrant green stalks slowly transform, becoming tender and infused with the buttery goodness.
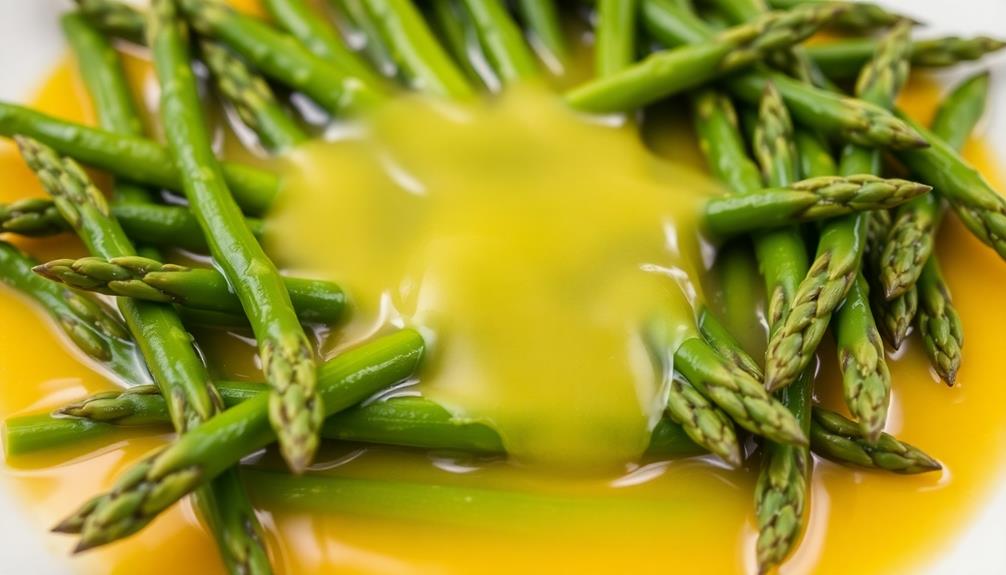
As the asparagus cooks, the butter will take on a slightly greenish hue, absorbing the essence of the vegetable. Baste the spears occasionally, coating them completely in the aromatic butter.
This gentle poaching method ensures the asparagus remains delicate and succulent, retaining its crisp-tender texture and vibrant color. The longer you cook the asparagus, the more it will soften, so keep a close eye and remove it from the heat when it reaches your desired doneness.
Step 3. Cook Until Tender
The asparagus will begin to transform as it cooks, gradually softening to your desired doneness. Keep a watchful eye as the spears gently simmer in the fragrant butter, their vibrant green hues steadily deepening.
You'll notice the stems becoming increasingly tender, while the tips remain slightly crisp, creating a wonderful contrast in texture. Periodically, use tongs to flip and rotate the asparagus, ensuring even cooking. This will also allow you to gauge their progress – when they yield to the gentle pressure of the tongs, you'll know they're perfectly cooked.
Resist the urge to overcrowd the pan, as this can result in uneven heating. Work in batches if necessary, maintaining the butter at a gentle simmer. The aroma will become increasingly mouthwatering as the asparagus reaches your preferred level of doneness, perhaps 5-8 minutes.
Once they reach that point, use the tongs to transfer the asparagus to a serving dish, allowing any excess butter to drip off. Your tender, flavorful asparagus is now ready to enjoy.
Step 4. Remove Asparagus From Butter
Once the asparagus has reached your desired level of doneness, it's time to remove them from the butter. Using a slotted spoon, gently lift the tender asparagus spears out of the warm, fragrant butter, letting the excess liquid drip back into the pan.
Be careful not to overcrowd the spears – work in batches if needed to ensure each piece is thoroughly coated and delicately handled. This method not only enhances the flavors but also ensures the asparagus retains a vibrant color and appealing texture, characteristic of butter's role in global cuisine.
As you transfer the asparagus to a serving platter or plate, take a moment to admire their vibrant green hues and silky-smooth texture. The butter-poaching process has transformed these vegetables, leaving them soft, supple, and infused with a rich, buttery flavor.
Arrange the asparagus in a visually appealing manner, perhaps fanning them out or standing them upright, so your guests can fully appreciate their appetizing appearance.
Now that the asparagus is ready, it's time to move on to the final step of this delectable recipe. Get ready to drizzle on the finishing touches and serve up a truly remarkable dish!
Step 5. Season With Salt and Pepper
Generously season the butter-poached asparagus with a pinch of salt and a few grinds of freshly cracked black pepper. The salt will enhance the natural sweetness of the asparagus, while the pepper adds a subtle kick of heat and complexity.
As you sprinkle the seasonings over the tender, glistening spears, you'll see them come alive, the flavors dancing on your palate. It's important to choose the right ingredients for your dishes, much like selecting cold medications for effective relief during a cold.
Be generous but not overpowering – a light touch is all you need. Gently toss the asparagus to evenly distribute the salt and pepper, ensuring every bite is perfectly seasoned.
The aroma of the fragrant butter will mingle with the earthy, grassy notes of the asparagus, creating a mouthwatering symphony. Take a moment to admire the way the spears glisten, reflecting the light and begging to be savored.
Now, dig in and experience the true depth of flavor that butter-poaching can bring out in asparagus. Each bite will be a delightful balance of richness, brightness, and subtle heat.
Final Thoughts
Ultimately, butter-poached asparagus makes a delightful and simple side dish.
You'll be amazed at how the rich, creamy butter transforms tender asparagus into a true delight for your senses. The method is straightforward, yet the result is truly impressive. The asparagus glistens with a velvety sheen, the perfect complement to its bright green hue.
Each bite melts in your mouth, the butter's luxurious texture perfectly paired with the asparagus's fresh, slightly sweet flavor. This dish is a true crowd-pleaser, sure to impress your dinner guests.
Additionally, understanding the importance of consumer awareness in food sourcing can enhance your culinary experience.
And the best part? It's incredibly easy to prepare, allowing you to enjoy the taste of restaurant-quality asparagus in the comfort of your own home.
Frequently Asked Questions
Is Butter-Poaching the Only Way to Cook Asparagus?
No, butter-poaching is not the only way to cook asparagus. You can also roast, grill, sauté, or steam asparagus, each method offering unique flavors and textures. The best cooking method depends on your personal preferences and the dish you're preparing.
How Long Does It Take to Butter-Poach Asparagus?
To butter-poach asparagus, it typically takes 5-7 minutes. The asparagus should be tender yet still retain a crisp texture when done. The exact time can vary depending on the thickness of the asparagus spears.
Can I Use Frozen Asparagus for This Recipe?
Yes, you can use frozen asparagus for this recipe. The cooking time may be slightly shorter, so keep an eye on it. Give the asparagus a quick rinse before adding it to the butter-poaching liquid.
What Kind of Butter Works Best for This Dish?
For this dish, you'll want to use a high-quality, unsalted butter. The butter's rich flavor and creamy texture will complement the asparagus perfectly, creating a delightful poached experience. Avoid using salted butter, as it can overpower the asparagus.
How Do I Know When the Asparagus Is Cooked Through?
To know when the asparagus is cooked through, keep an eye on it and test it with a fork. It should be tender yet still have a slight bite. You'll know it's done when it's easily pierced but not mushy.
Sunny’s articles radiate enthusiasm, much like her sunny disposition. As our resident “Butter Geek”, she delves deep into the latest butter trends, ensuring our readers are always in the know. Beyond her writing, Sunny’s passion lies in exploring vegan butter alternatives and hosting butter-tasting soirées.
-
Recipes & Culinary Uses5 months ago
Make Homemade Butter from Milk at Home
-
Shopping Guides6 months ago
Where to Buy Raw Butter
-
Butter Tips and Tricks7 months ago
Churn Butter the Old Fashioned Way: 3 Traditional Steps
-
Butter Tips and Tricks8 months ago
How Many Tablespoons of Butter in 3/4 Cup: A Simple Guide
-
Butter Basics5 months ago
Quick Conversion: How Many Tablespoons of Butter Is 1/4 Cup?
-
Butter Tips and Tricks7 months ago
How Much Heavy Cream to Make Butter: A Step-by-Step Guide
-
Recipes & Culinary Uses7 months ago
How Many Sticks of Butter Equals a Pound: A Handy Guide
-
Recipes & Culinary Uses5 months ago
Make Creamy Butter From Buttermilk