Connect with us

Recipes & Culinary Uses

Creamy Dessert: Best Peanut Butter Cheesecake Recipe Ever!

Indulge in the irresistible allure of the ultimate peanut butter cheesecake recipe, leaving your taste buds craving for more.

Published

on

decadent peanut butter cheesecake

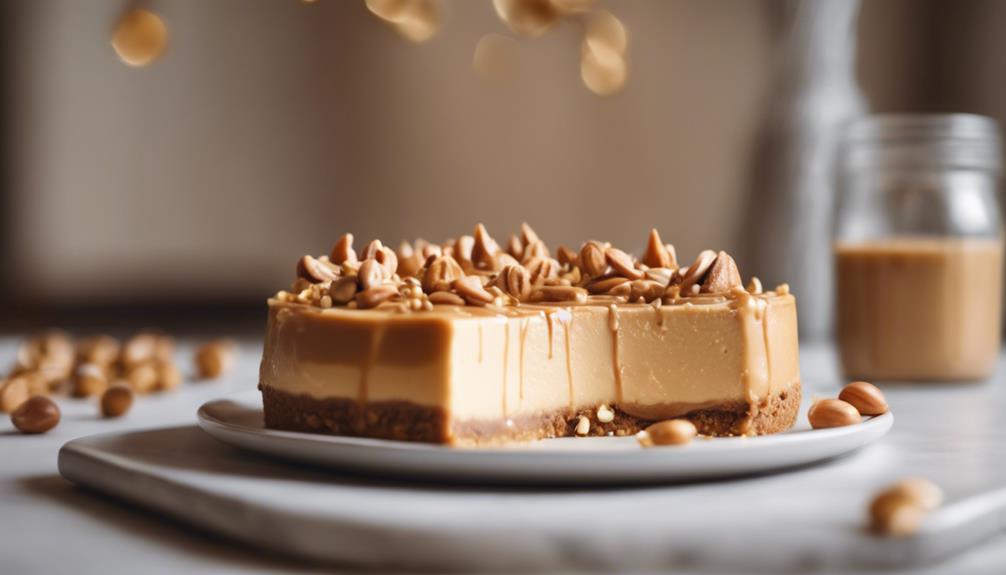
Get ready for a taste sensation with the ultimate peanut butter cheesecake recipe. Blend creamy peanut butter, cheese, and whipping cream until smooth. Add eggs, sugar, and vanilla; bake, cool, and chill. Top with Reese's cups or whipped cream for extra pizzazz. Experiment with different crust and peanut butter types. Store in the fridge or freeze for up to 3 weeks. Maintain freshness by wrapping slices tightly. For more pro tips and a delicious twist, access the full recipe and release your inner dessert chef!

Key Takeaways

  • Creamy peanut butter and cream cheese create a rich, smooth texture.
  • Incorporate heavy whipping cream for a luscious consistency.
  • Use powdered sugar for sweetness and Oreo cookies for a decadent crust.
  • Bake in a water bath for a perfectly creamy center.
  • Chill before serving for the best flavor and texture.
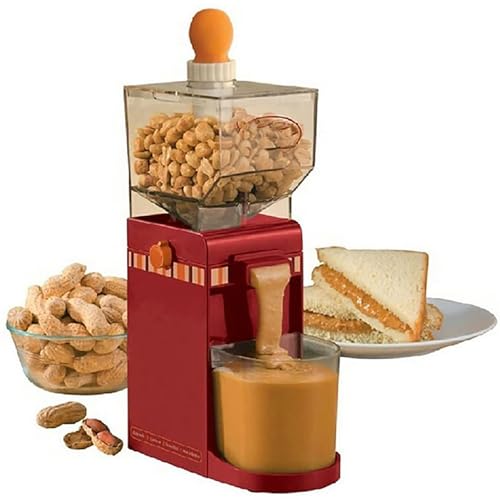
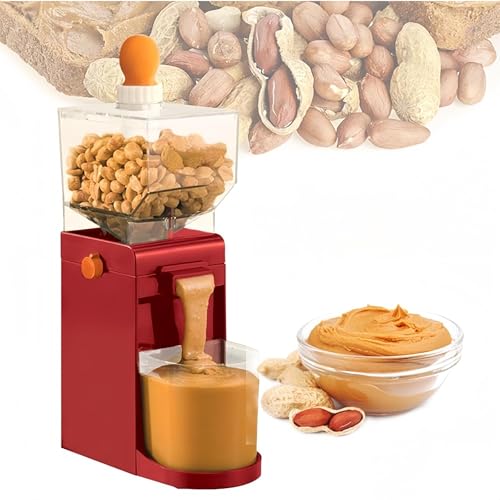
Ingredients

To create a scrumptious peanut butter cheesecake, gather creamy peanut butter, cream cheese, heavy whipping cream, powdered sugar, and Oreo cookies for the crust. These cheesecake ingredients form the base of a delectable dessert.

The cream cheese provides a rich and tangy flavor, blending perfectly with the creamy texture of the peanut butter filling. Adding heavy whipping cream and powdered sugar creates a light and fluffy consistency that will melt in your mouth.

The Oreo cookie crust adds a delightful crunch and a hint of chocolate to complement the peanut butter filling. Properly chilling the cheesecake is essential to allow it to set and develop its full flavor.

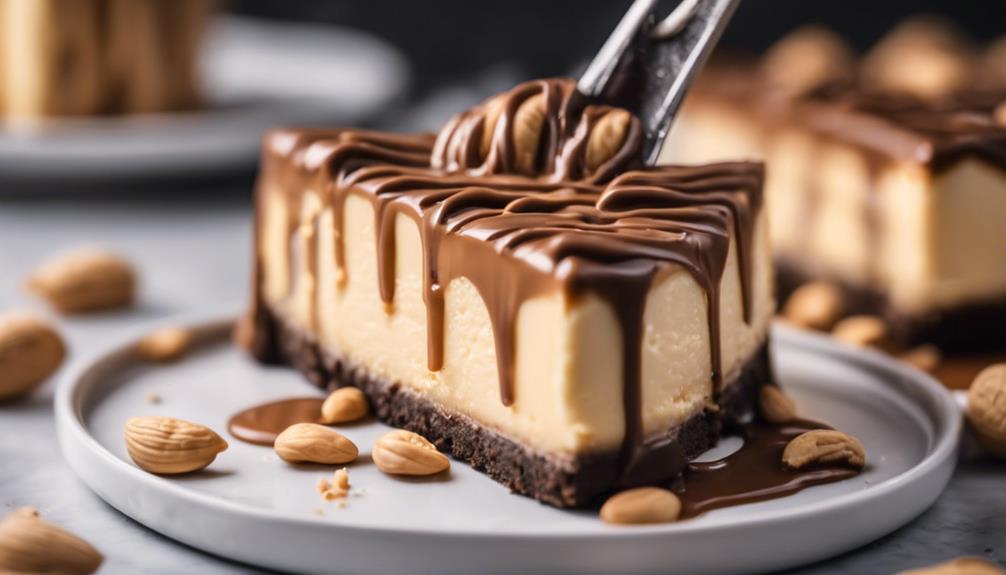
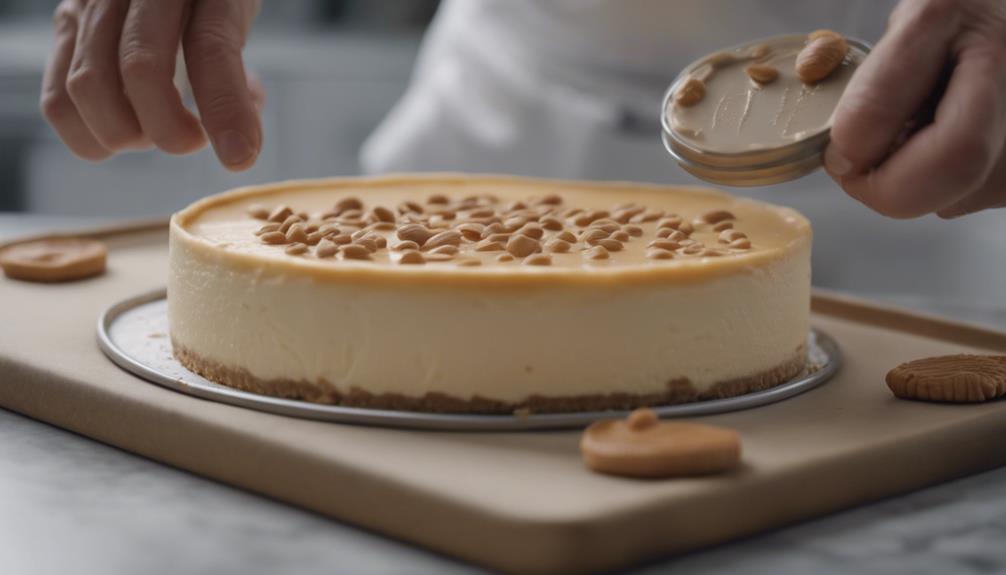
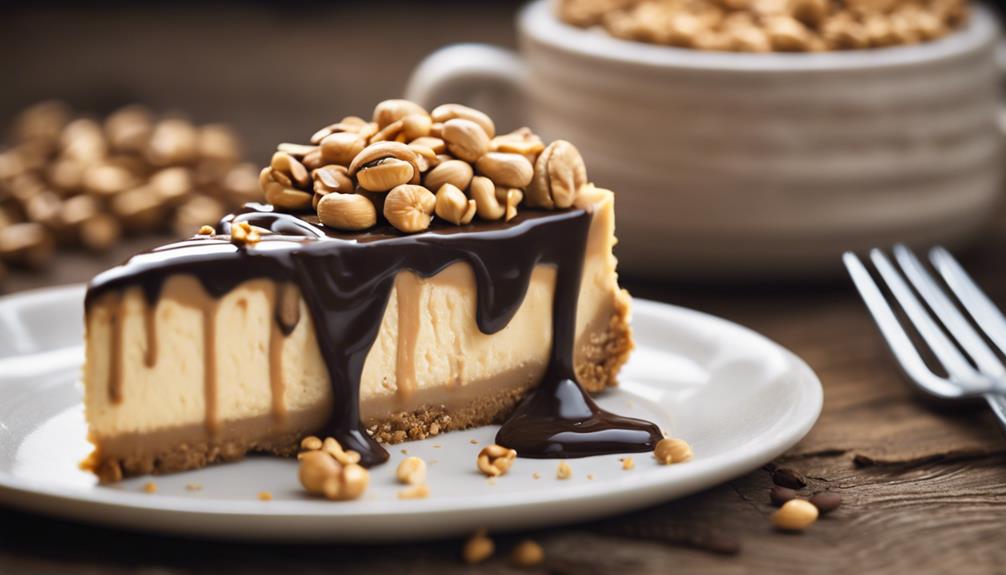
For a finishing touch, consider garnishing your creation with a drizzle of chocolate ganache, a dollop of whipped cream, or some chopped peanut butter cups. These cheesecake garnishes not only enhance the presentation but also add an extra layer of decadence to this irresistible dessert.

Preparation Steps

great suggestion

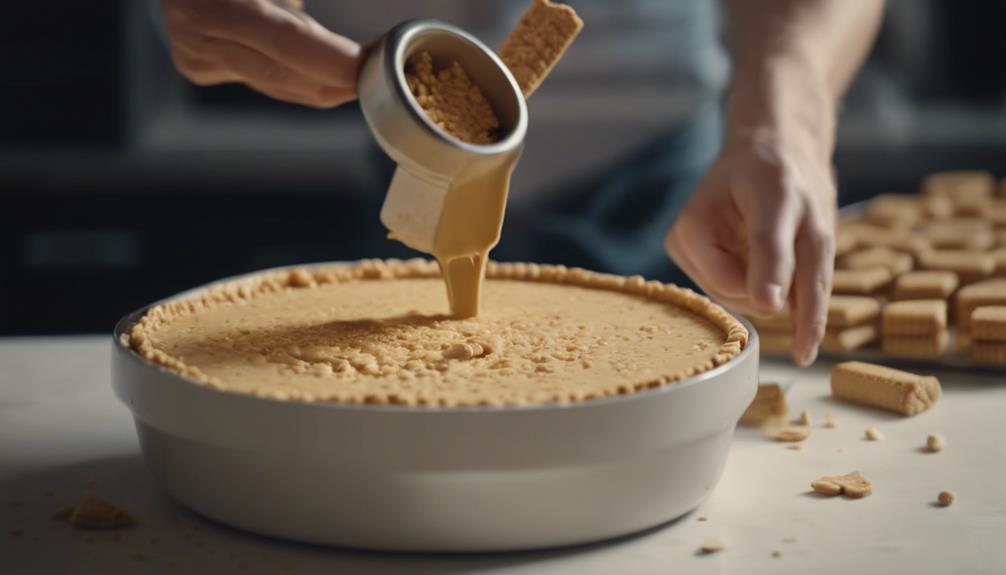
For the preparation steps of this peanut butter cheesecake recipe, start by combining cream cheese, sour cream, and peanut butter in a mixing bowl.

Here's how to create this delectable dessert:

Advertisement
  1. Create the Filling: Mix together the cream cheese, sour cream, and peanut butter until smooth and well combined. Add in the heavy whipping cream gradually, incorporating it fully to achieve a light and fluffy texture.
  2. Add Flavorful Elements: Beat in the eggs one at a time, followed by the sugar, salt, and vanilla extract. Verify everything is blended evenly to create a well-balanced flavor profile for your peanut butter cheesecake.
  3. Baking and Finishing: Pour the filling into a prepared crust and bake the cheesecake in a water bath to prevent cracking. Once baked, let it cool and chill in the refrigerator.

Finish off by adding a decadent chocolate ganache topping before serving up this luscious dessert.

Pro Tips

mastering the art of communication

When it comes to perfecting your peanut butter cheesecake, there are a few key points worth noting.

Baking techniques can make all the difference in achieving that creamy, velvety texture.

Additionally, exploring ingredient variations can add unique flavors and textures to your dessert.

Baking Techniques

Guarantee a smooth texture in your Peanut Butter Cheesecake by tapping the pan to remove any air bubbles.

Here are three essential baking techniques to secure your cheesecake turns out perfect:

  1. Bring cold ingredients to room temperature before mixing to create a smooth batter without lumps and to prevent overmixing. This step also helps in achieving a creamy texture in your cheesecake.
  2. Securely wrap the pan in foil before placing it in a water bath to avoid leaks during the baking process. This method secures even cooking and prevents the cheesecake from cracking.
  3. When garnishing your finished Peanut Butter Cheesecake, consider using Reese's cups or whipped cream for added flavor and presentation. These garnishes complement the rich peanut butter flavor and enhance the overall appearance of your dessert.

Ingredient Variations

Experiment with different types of peanut butter and chocolate chips to create unique flavor profiles in your Peanut Butter Cheesecake.

Varying between creamy and crunchy peanut butter can add a delightful texture contrast to the smooth cheesecake filling.

Advertisement

Additionally, consider using milk, dark, or semi-sweet chocolate chips to tailor the level of richness and sweetness in each bite.

For a twist on the classic graham cracker crust, try incorporating crushed peanuts, cookies, or cereal for a more diverse flavor profile.

To elevate the cheesecake further, include peanut butter cups within the layers for a decadent surprise with every slice.

If allergies are a concern, opt for alternatives like WOW Butter to accommodate nut-free dietary restrictions without compromising on taste.

Storage Instructions

store in cool place

You'll want to know how long your peanut butter cheesecake will stay fresh and how to freeze it for later enjoyment.

Remember to wrap individual slices properly before freezing them to maintain the best texture.

Advertisement

When you're ready to enjoy a frozen slice, remember to thaw it overnight in the refrigerator.

Storage Duration

Store leftover peanut butter cheesecake in the refrigerator for up to 5 days in an airtight container to maintain freshness.

When storing your delicious dessert, follow these tips:

  1. Refrigeration: Place the leftover peanut butter cheesecake in an airtight container before storing it in the refrigerator. This helps to preserve its flavor and texture for up to 5 days.
  2. Freezing: If you need to store the cheesecake for a longer period, consider freezing it. Wrap individual slices in plastic wrap and then store them in a freezer-friendly container. The frozen cheesecake can be kept for up to 3 months without compromising its taste and quality.
  3. Thawing: When you're ready to enjoy the frozen cheesecake, thaw the slices overnight in the refrigerator. This gradual thawing process helps maintain the texture and flavor of the dessert. Avoid refreezing thawed cheesecake to make certain it remains as delicious as when first made.

Proper storage and thawing techniques will help you savor the peanut butter cheesecake at its best.

Freezing Recommendations

To maintain the freshness and quality of your peanut butter cheesecake for an extended period, consider freezing individual slices wrapped in plastic wrap. Freezing the cheesecake properly is essential to prevent freezer burn and maintain its delicious taste. Remember to avoid freezing the dessert during the setting process to preserve its desired creamy consistency. When storing leftover cheesecake, place it in an airtight container in the refrigerator for up to a week. However, for longer storage, freezing is the best option. Below are some freezing recommendations to guarantee your peanut butter cheesecake stays perfect for enjoyment:

Action Description
Freeze Peanut Butter Cheesecake Wrap slices individually in plastic wrap to prevent freezer burn.
Thaw Thaw frozen slices in the refrigerator overnight before serving.
Store Leftover Store leftover cheesecake in an airtight container in the refrigerator for up to 1 week.
Freeze Duration Properly wrapped and stored cheesecake can be frozen for up to 3 months.

Thawing Instructions

Thawing leftover peanut butter cheesecake slices in the refrigerator overnight is the recommended method to preserve its texture and flavor.

Advertisement

Here are three essential tips to maintain the quality of your cheesecake:

  1. Refrigerator Thawing: Place the wrapped cheesecake slices in the refrigerator to thaw slowly. This gradual defrosting process helps maintain the creamy texture and rich flavor of the dessert.
  2. Chilled Serving: Once fully thawed, serve the peanut butter cheesecake slices chilled for a revitalizing and delightful treat. The cool temperature enhances the flavors and makes each bite more enjoyable.
  3. Easy Slicing: Thawing in the refrigerator also allows for easy slicing and serving. The chilled cheesecake will hold its shape better, making it simpler to cut into neat portions for serving to your guests or enjoying a slice by yourself.

Recommended Tools

helpful garden maintenance supplies

Consider incorporating essential tools like a 6-inch springform pan and parchment paper when preparing a peanut butter cheesecake. To enhance your baking experience, having a scraper spatula, stand mixer, piping bags, and a non-stick pan are recommended. Brands like Rubbermaid, KitchenAid, and Aleeza Cake Wonders offer quality products for creating the perfect peanut butter cheesecake.

Utilizing these tools can streamline the preparation process and ensure a smooth baking journey. Whether mixing the creamy batter with a stand mixer or neatly piping the cheesecake filling into the springform pan, having the right tools at your disposal is key to achieving a delicious result.

Invest in high-quality tools from trusted brands like Hiware to elevate your peanut butter cheesecake-making experience. By using the suggested tools, you'll not only make the process easier but also set yourself up for success in creating a delectable peanut butter cheesecake.

Nutritional Information

dietary facts and figures

When reviewing the nutritional information of the peanut butter cheesecake, you'll find that each serving packs a flavorful punch with 510 calories.

Here are some key nutritional details to contemplate:

  1. Carbohydrates and Protein: A serving of this decadent dessert contains 40g of carbohydrates and 9g of protein, offering a balance of energy-providing nutrients.
  2. Fat and Saturated Fat: Indulge in the richness of this cheesecake, as it provides 36g of fat, with 15g being saturated fat, contributing to its creamy texture.
  3. Calcium, Iron, Vitamins A, and C: In addition to its delicious taste, this cheesecake also offers essential nutrients like calcium, iron, and vitamins A and C, adding a nutritional boost to your dessert choice.

With these nutritional insights, you can enjoy this peanut butter cheesecake knowing it not only satisfies your taste buds but also contributes to your daily nutrient intake.

Variations and Substitutions

adapt to dietary needs

For added creativity in your peanut butter cheesecake, feel free to experiment with different types of chocolate chips and crust options.

Whether you prefer creamy or crunchy peanut butter, both work well in this recipe. Consider using milk, dark, or semi-sweet chocolate chips to add different flavor profiles to your dessert.

Advertisement

When it comes to the crust, you can customize it by using graham crackers, crushed peanuts, cookies, or even cereal for a unique twist.

If you want to enhance the peanut butter flavor further, you can add peanut butter cups to the cheesecake, but remember, this is optional.

For those with nut allergies or looking for nut-free alternatives, consider using WOW Butter or substituting with cookie crumbles or chocolate pieces in place of peanuts.

These variations and substitutions allow you to tailor the peanut butter cheesecake to your preferences while still enjoying a delicious and decadent dessert.

Freezing Tips

keep warm this winter

To sustain the freshness of your peanut butter cheesecake for an extended period, make certain each slice is tightly wrapped in plastic wrap before freezing. Here are some freezing tips to help you preserve the deliciousness of your dessert:

  1. Wrap Individual Slices: Before placing your peanut butter cheesecake slices in the freezer, encase each slice tightly in plastic wrap. This step helps prevent freezer burn and keeps the cheesecake fresh.
  2. Thaw in the Refrigerator: When you're ready to enjoy a slice of your frozen peanut butter cheesecake, thaw it in the refrigerator overnight. This gradual thawing process guarantees the best texture and flavor.
  3. Properly Wrapped for Longevity: A properly wrapped and frozen peanut butter cheesecake can last up to 3 weeks in the freezer without compromising taste. Remember not to refreeze thawed slices to maintain the best quality and freshness. Enjoy your thawed cheesecake within a few days for prime flavor.

Recipe Appreciation

baking for family gatherings

Indulge in the delectable flavors of Nettie Moore's Peanut Butter Cheesecake recipe. Nettie Moore, a New England mom and wife, shares her family recipes and product reviews through her social media platforms.

By following Nettie Moore on Pinterest, you can discover more mouthwatering recipes like her Peanut Butter Cheesecake and save your favorites using the pin button for later.

Advertisement

Stay updated with Nettie Moore's weekly recipe releases by joining her mailing list, where she shares exclusive cooking insights and tips.

Nettie Moore participates in the Amazon Associates Program, which allows her to earn advertising fees through affiliate links to Amazon.com. By supporting Nettie Moore through these links, you contribute to her dedication to sharing delightful recipes like her Creamy Peanut Butter Cheesecake.

Engage with Nettie Moore's recipes by commenting your feedback and sharing your experiences, creating a vibrant community-driven cooking environment.

Frequently Asked Questions

What Is the Secret to the Best Cheesecake?

To make the best cheesecake, you need a perfect balance of creamy texture and rich flavor. Use high-quality ingredients like full-fat cream cheese and creamy peanut butter. Proper chilling and attention to detail in mixing, baking, and cooling processes are key.

Is Sour Cream or Whipping Cream Better for Cheesecake?

You want a dreamy cheesecake? Sour cream brings tangy richness, balancing sweetness. Whipping cream whips up a light, airy delight. Both are stars, each adding its magic to create the creamiest, most decadent cheesecake ever!

Advertisement

How to Make Peanut Cheesecake?

To make peanut butter cheesecake, mix cream cheese and peanut butter until smooth. Add powdered sugar and vanilla for sweetness. Slowly blend in heavy whipping cream for fluffiness. Pour into crust, chill, and garnish before serving.

What's the Difference Between NY Cheesecake and Philadelphia Cheesecake?

Imagine diving into a slice of cheesecake: New York style is dense and tall, while Philadelphia's is lighter and softer with a cracked top. NY uses a water bath, and Philly can be topped creatively.

Conclusion

Savor every scrumptious bite of this sensational peanut butter cheesecake, packed with creamy goodness and a hint of sweetness.

Let your taste buds dance with delight as you indulge in this delectable dessert.

Don't miss out on this perfect peanut butter paradise!

Advertisement
Continue Reading
Advertisement

Recipes & Culinary Uses

Southern Comfort: Best Butter Bean Recipe for Hearty Meals!

Craving a taste of Southern comfort?

Published

on

By

delicious southern butter beans

Indulge in the rich, buttery flavors of Southern comfort with the best butter bean recipe that promises hearty satisfaction in every bite. Enhance the creamy texture with bacon, onions, and garlic for a mouthwatering dish. Incorporate ingredients like ham hock for a smoky twist. Don't forget to season with salt, cracked pepper, and brown sugar for a perfect balance. Pair with cornbread or cheddar cheese quick bread to elevate the experience. Experiment with flavors to create the ultimate Southern comfort cuisine. Get ready to elevate your culinary skills and taste buds to the next level with this delicious butter bean recipe!

Key Takeaways

  • Butter beans offer a creamy, buttery flavor ideal for Southern comfort cuisine.
  • Enhance dishes with ingredients like bacon, onions, and garlic for rich flavors.
  • Experiment with flavor combinations like smoky bacon and sweet brown sugar.
  • Pair butter beans with cornbread, rice, or cheddar cheese quick bread for a satisfying meal.
  • Store leftovers in the fridge for up to five days or freeze for later use.

Butter Bean Vs. Lima Bean

legume showdown butter versus lima

When comparing butter beans to lima beans, you'll notice that butter beans are the larger variety, while lima beans are smaller. Both types are creamy beans with a mild, buttery flavor that make them popular in various dishes.

Originating from Lima, Peru over 9000 years ago, these legumes have become a staple in cuisines worldwide. Large lima beans are commonly found at local grocery stores, perfect for incorporating into your favorite recipes.

In terms of size, butter beans offer a heartier bite compared to the smaller lima beans. The creamy texture of both beans is ideal for dishes that require a smooth consistency, such as soups, stews, and casseroles.

Whether you choose butter beans or lima beans for your next meal, you can expect a deliciously rich and buttery undertone that complements a wide range of ingredients. So, next time you're at the store, consider picking up some large lima beans to elevate your culinary creations.

Flavor Profile and Taste

exploring food sensory experience

You'll find that butter beans offer a mild, buttery flavor that adapts well to a variety of dishes. Their creamy texture and delicate taste make them a versatile addition to Southern comfort cuisine.

When exploring the flavor profile of butter beans, consider their culinary appeal in classic dishes and how they complement savory ingredients like bacon and onions.

Advertisement

Taste and Texture

Enhancing the flavor profile of butter beans is essential for creating delicious and satisfying dishes. When you make butter beans, whether using large dried beans or canned ones, you'll notice their creamy texture and mild, buttery taste. These characteristics make butter beans versatile for different recipes.

The rich protein and fiber content in butter beans not only provide long-lasting satisfaction but also offer essential nutrients.

Incorporating ingredients like bacon, ham hock, onions, and garlic can elevate the flavor of butter beans, adding depth and complexity to your dishes. These additions complement the beans' mild taste, creating a harmonious blend of flavors.

Whether you're preparing a hearty soup, a comforting stew, a flavorful casserole, a creamy dip, or a revitalizing salad, butter beans can be the star ingredient that brings everything together.

The smooth texture of butter beans contributes to the overall enjoyment of the dish, making each bite a delightful experience. Their versatility and ability to absorb flavors make them a staple in Southern comfort food recipes.

Advertisement

Flavor Combinations

Creating delicious dishes with butter beans involves combining their mild, buttery flavor with savory ingredients like bacon, ham, and onions for a rich and satisfying taste experience.

When preparing butter beans, consider these flavor combinations to elevate your dish:

  • Smoky Flavors: Incorporating cooked bacon or ham hock adds a delightful smokiness that enhances the overall taste profile of the butter beans.
  • Sweet Elements: Adding a touch of brown sugar complements the natural buttery taste of the beans, creating a harmonious balance of flavors.
  • Seasoning: Enhance the taste of butter beans by seasoning them with salt and cracked pepper, which adds depth and a hint of spice to the dish.
  • Versatility: The creamy texture of butter beans allows them to pair well with various ingredients, making them versatile for both hearty and light dishes.

Experimenting with these flavor combinations will help you create mouthwatering butter bean dishes that are sure to impress your taste buds.

Culinary Appeal

Butter beans' culinary appeal lies in their mild, buttery flavor that effortlessly complements a variety of seasonings and ingredients. These beans, also known as baby lima beans, offer a creamy texture and are a staple in Southern comfort dishes. Originating over 9000 years ago in Lima, Peru, butter beans have a rich history in cuisines worldwide. Young lima beans are tender and mild, ideal for quick cooking methods that preserve their delicate flavor. The versatile nature of butter beans allows them to be used in soups, stews, casseroles, dips, and salads, adding depth and heartiness to meals.

Flavor Texture Versatility
Mild, buttery Creamy Soups, stews, casseroles
Complements seasonings Tender Dips, salads
Rich history Versatile Southern comfort dishes

Home-Style Recipe Ingredients

home cooking ingredient list

You're about to discover the key ingredients that make up a classic home-style butter bean recipe.

Bacon, onion, brown sugar, butter, salt, and cracked pepper all play crucial roles in creating a flavorful and hearty dish.

These essential ingredients work together to enhance the taste profile of the butter beans, ensuring a delicious and satisfying meal.

Advertisement

Recipe Ingredients Breakdown

To make the home-style butter beans recipe, gather bacon, onion, brown sugar, frozen butterbeans, butter, salt, and cracked pepper. When preparing this hearty dish, each ingredient plays an essential role in enhancing the flavors and textures of the butter beans.

Here's a breakdown of the key components:

  • Bacon: Adds a savory smokiness to the dish, infusing it with rich flavors.
  • Brown Sugar: Provides a touch of sweetness that balances out the savory notes in the butter beans.
  • Frozen Butterbeans: Convenient and quick to cook, these big lima beans are perfect for this comforting recipe.
  • Butter, Salt, and Cracked Pepper: Together, these ingredients work harmoniously to elevate the overall taste of the dish, creating a deliciously rich and well-rounded flavor profile.

Key Flavor Enhancements

Enhancing the flavors of the home-style butter beans recipe is essential for creating a delicious and satisfying dish that balances savory and sweet notes. The key to achieving this balance lies in the combination of cooked beans, salt, and pepper.

When seasoning the dish, a pinch of salt and a generous crack of pepper are vital to enhance the natural flavors of the beans and create a well-rounded taste profile.

Cooked beans serve as the hearty base of the dish, providing a robust texture and earthy flavor that pairs perfectly with the other ingredients. Seasoning with salt not only brings out the inherent tastes of the beans but also helps to marry the flavors of the dish together.

Additionally, cracked pepper adds a subtle heat and depth to the butter beans, elevating the overall taste experience. By incorporating these key flavor enhancements into your home-style butter beans recipe, you can enjoy a satisfying and flavorful meal that will leave you craving more.

Advertisement

Cooking Method Details

detailed cooking method explanation

For achieving peak tenderness and flavor infusion, simmering butter beans in a seasoned broth is a fundamental cooking method detail. This process allows the beans to absorb the flavors of the broth while softening to the perfect texture.

To enhance the cooking method further, consider the following tips:

  • Stir well: Regularly stirring the butter beans while simmering helps distribute the flavors evenly and prevents them from sticking to the bottom of the pot.
  • Bring to a boil: Start the cooking process by bringing the seasoned broth and butter beans to a boil, then reduce the heat to a simmer to gently cook the beans.
  • Add complementary ingredients: Incorporating vegetables, meats like ham hocks, or herbs and spices can elevate the flavors of the butter beans during the cooking process.
  • Utilize different cooking techniques: Experiment with stovetop cooking or using a slow cooker to find the method that best suits your preferences and time constraints.

Storage and Reheating Tips

food storage and reheating

Properly storing and reheating your cooked butter beans is essential for maintaining their quality and flavor. After cooking a delicious batch of butter beans, make sure to refrigerate any leftovers promptly in an airtight container. This will help keep them fresh for up to five days. For longer storage, you can freeze the butter beans for up to three months. When you're ready to enjoy them again, simply thaw the frozen beans in the refrigerator before reheating.

To reheat your butter beans, you have the option of using the stovetop or microwave. Reheating on the stovetop is a great way to ensure even heating and prevent the beans from becoming mushy. Heat them until they are hot and ready to serve. Once reheated, you can enjoy your butter beans as a hearty side dish or incorporate them into various recipes for added flavor and texture.

Storage Tips Reheating Tips Freezing Tips
Refrigerate in airtight Reheat on stovetop or Freeze leftovers for up
container for up to five microwave until hot to three months
days
Thaw frozen beans in
the refrigerator before
reheating

Side Dish Pairings

dinner party menu ideas

To create a satisfying and well-rounded meal with butter beans, consider pairing them with traditional Southern sides like cornbread, white rice, and cheddar cheese quick bread. These side dishes perfectly complement the creamy texture and mild, buttery flavor of butter beans, enhancing the overall dining experience.

In addition to these classics, you can also enjoy butter beans with bread and butter or Texas Toast to elevate the Southern comfort food experience.

  • Butter beans are a classic side dish that pairs well with a variety of Southern staples.
  • Traditional accompaniments like cornbread and white rice enhance the rich flavors of butter beans.
  • Cheddar cheese quick bread offers a savory twist to the meal, adding depth to the dish.
  • Experimenting with different side dishes allows for a personalized touch to your butter bean meal, catering to diverse tastes and preferences.

Southern Comfort Classics

comforting southern cuisine favorites

You're about to discover timeless Southern recipes that bring hearty comfort to your table.

These classic dishes embody the warmth and tradition of Southern cooking, offering a taste of nostalgia with every bite.

Get ready to savor the rich flavors and comforting goodness of Southern comfort classics.

Advertisement

Timeless Southern Recipes

When exploring Southern comfort classics, you'll find that butter bean recipes are a beloved staple dish known for their hearty and satisfying nature. These timeless Southern recipes make the most of ingredients like butter beans, which offer a creamy texture and mild, buttery flavor that perfectly complements traditional Southern cooking.

To create an authentic Southern butter bean dish, consider the following:

  • Use High-Quality Ingredients: Opt for fresh or dried butter beans, and don't skimp on flavorful additions like bacon or ham hocks.
  • Slow Cooking Techniques: Embrace slow cooking methods to allow the flavors to meld together and create a rich, comforting dish.
  • Season Thoughtfully: Onions, garlic, and a touch of seasoning can elevate the humble butter bean to new heights of deliciousness.
  • Serve with Cornbread: A classic accompaniment to Southern dishes, cornbread pairs perfectly with butter beans for a complete and satisfying meal.

These Southern comfort dishes are sure to become a favorite at family gatherings, offering a taste of tradition and warmth in every bite.

Hearty Comfort Dishes

For those seeking ultimate comfort in their meals, Southern classics offer a range of hearty dishes that bring warmth and satisfaction with every bite. When it comes to preparing these comforting meals, a Dutch oven can be your best friend. Set it over medium heat, and you're ready to create delicious Southern comfort dishes that will surely become family favorites.

The versatility of butter beans shines in traditional Southern recipes like stews, casseroles, and soups, adding a creamy texture and mild, buttery flavor to every dish. With a rich history deeply rooted in Southern cuisine, butter beans have stood the test of time, proving to be a beloved ingredient for generations.

Incorporating butter beans into your cooking repertoire not only pays homage to Southern culinary traditions but also brings a taste of comfort to your table. So, why not whip up a hearty butter bean stew or casserole in your Dutch oven today? Your taste buds will thank you for the cozy Southern goodness that awaits.

Advertisement

Meat Additions and Enhancements

enhancing meat with additions

Enhance the flavor and richness of your butter bean recipe by incorporating bacon or ham into the dish. These meat additions not only add depth but also infuse the beans with a savory and smoky essence that elevates the overall taste of the dish.

To make the most of these meat additions, consider the following:

  • Bacon: Fry the bacon until crispy, then crumble it into the beans for a burst of salty goodness.
  • Ham: Boil the ham hocks alongside the beans to infuse the broth with a rich, meaty flavor.
  • Leftover Ham: Utilize any leftover ham by adding it towards the end of cooking to retain its tenderness and taste.
  • Butter: If you want to enhance the richness further, reduce the amount of butter needed to add a velvety finish to the beans.

Butter and Oil Options

mixing butter with oil

Consider incorporating butter or oil into your butter bean recipe to enhance its flavor and creaminess.

While adding butter isn't a strict requirement, it can greatly improve the overall taste and texture of your dish. If you prefer a dairy-free option or just want to experiment, using oil as a substitute can also achieve that desired creaminess in your beans.

To make this recipe even more indulgent, you may need to add a tablespoon or two of fat per pound of beans during the cooking process. This addition can infuse a rich flavor into the beans, especially when incorporated midway through cooking.

Don't be afraid to try different types of fats to see which one complements your butter beans the best. By choosing the right butter or oil for your recipe, you can elevate the flavors and create a truly satisfying dish.

Leftover Handling and Reheating

efficiently manage leftovers at home

Store your cooked butter beans in an airtight container in the refrigerator for 3-4 days. When dealing with leftovers, proper handling and reheating techniques can help maintain the delicious taste and texture of your butter beans.

Here are some essential tips to make the most of your leftovers:

Advertisement
  • Freezing Options: You can freeze cooked butter beans for up to 3 months for future use.
  • Thawing Process: Thaw frozen butter beans in the refrigerator before reheating to preserve texture.
  • Reheating Methods: Reheat butter beans in the microwave or on the stovetop until thoroughly heated.
  • Assessing Consistency: Avoid adding water immediately when reheating butter beans; assess consistency as they heat up.

Frequently Asked Questions

Should I Soak Butter Beans Before Cooking?

You don't have to soak butter beans before cooking, but a quick 30-minute soak can help. It's optional, depending on your preference. Soaking may reduce cooking time and improve texture in some recipes, ensuring even tenderness.

Are Butter Beans Good for Your Heart?

Butter beans are like tiny heart superheroes in a pod. They're packed with fiber, potassium, folate, and magnesium—all working together to support your heart health and keep it ticking strong.

Is There a Difference Between Butter Beans and Lima Beans?

Yes, there isn't a difference between butter beans and lima beans. They're the same type of bean, just with varying names based on size. Enjoy their creamy texture and buttery taste in a variety of dishes!

What Is the American Version of Butter Beans?

In the US, butter beans are the American version of lima beans. These creamy legumes, often used in Southern cooking, offer a mild, buttery taste. So, when looking for butter beans, know you're getting a true Southern favorite!

Conclusion

To sum up, whether you choose butter beans or lima beans, the hearty and comforting flavors in this recipe will satisfy your cravings.

From the rich and creamy texture to the savory seasonings, each bite will transport you to a Southern kitchen.

Advertisement

So go ahead, whip up a batch of this classic dish and enjoy the warmth and nostalgia it brings to your table. It's a simple yet delicious way to experience true Southern comfort.

Continue Reading

Recipes & Culinary Uses

Playtime Fun: Best Butter Slime Recipe for Kids!

Are you ready to create the best butter slime for your kids?

Published

on

By

butter slime kids love

Ready to create the best butter slime for your kids? Mix white glue and shaving cream, then add Crayola Model Magic clay for texture. Knead the ingredients until smooth and adjust with more clay if needed. This slime is perfect for sensory play, boosting fine motor skills, and offering stress relief. Get creative by hiding treasures in the slime or making a slime volcano. Enhance tactile exploration and cognitive development with this fun activity. Discover the endless playtime possibilities and benefits of butter slime that will keep your kids entertained and engaged for hours!

Key Takeaways

  • Use white glue, shaving cream, and Model Magic clay for fluffy and buttery texture.
  • Follow 1/2 cup glue, 1/2 cup shaving cream, then slowly add clay.
  • Knead until smooth consistency, adjust with more clay if needed.
  • Store in an airtight container to maintain texture and prevent drying out.
  • Enjoy sensory play, creativity, and stress relief with safe and entertaining butter slime.

Butter Slime Ingredients

slippery recipe for slime

You'll need specific ingredients to create the perfect batch of butter slime for your kids. Start by gathering a cup of white school glue, a cup of Elmer's glue, baking soda, shaving cream, Crayola Model Magic clay, food coloring, lotion, and an airtight container for storage.

The white school glue, also known as PVA glue, forms the base of the slime. Shaving cream adds fluffiness and volume, while the Model Magic clay is essential for achieving that signature buttery texture. Food coloring allows for customization, and lotion can be added for extra stretchiness and softness.

Properly storing your butter slime in an airtight container will help maintain its texture and prevent it from drying out. These specific ingredients, when combined in the right proportions, will result in a delightful batch of butter slime that your kids will love playing with for hours.

How to Make Butter Slime

creating butter slime tutorial

To create butter slime, begin by mixing together the glue and shaving cream in a bowl. Then, add the desired amount of clay to enhance the texture and stretchiness of the slime. Here's a simple guide to help you make your own butter slime:

Ingredients Amount
White Glue 1/2 Cup
Shaving Cream 1/2 Cup
Model Magic Clay As needed

First, pour the white glue and shaving cream into a mixing bowl. Mix them thoroughly until well combined. Next, slowly incorporate the Model Magic clay into the mixture. Knead the slime with your hands until you achieve a smooth and spreadable consistency. If the slime is too sticky, you can add a bit more clay. Once you've reached the desired texture, your butter slime is ready for playtime fun with the kids! Enjoy the process of making and playing with this delightful sensory material.

Benefits of Butter Slime

Butter slime offers children a sensory-rich and therapeutic play experience, promoting creativity and fine motor skill development. Engaging in sensory play with butter slime can help children explore different textures, colors, and scents, stimulating their senses and fostering creativity.

Advertisement

The squishy and stretchy nature of butter slime provides stress relief for children, offering a therapeutic outlet for them to relax and unwind. Manipulating butter slime also helps enhance fine motor skills as kids pinch, squeeze, and mold the slime, improving their hand-eye coordination and dexterity.

Moreover, butter slime is a safe activity suitable for kids of all ages, providing hours of entertainment and learning. By storing butter slime properly in an airtight container, you can guarantee its longevity for continued play over several days.

Playtime Ideas With Butter Slime

fun with butter slime

For an engaging and creative playtime experience with butter slime, consider trying out these fun and educational activities with your child. Using butter slime in play can be a great way to have fun and learn simultaneously. Check out the table below for some exciting ideas to explore with your child:

Playtime Ideas Benefits Keywords
Hide treasures in slime Encourages sensory play and imaginative exploration play,fun,sensory play,imagination
Spell out names with slime Enhances fine motor skills and promotes letter recognition using,butter slime recipe,fine motor skills
Create a slime volcano Hands-on science experiment teaching about chemical reactions creative,science experiment
Slime garden activity Fosters creativity and imagination with the addition of plants and figurines fun,kids activities,imagination
Self-portrait with slime Develops perceptual awareness in children through a sensory play activity sensory play,creative

These activities not only provide entertainment but also offer a chance for your child to learn and grow through play.

Sensory Activities With Butter Slime

butter slime tactile play

Engage your child in sensory activities with butter slime to enhance their tactile exploration and foster creativity. Kids love the smooth and spreadable texture of butter slime, making it perfect for sensory play. This type of slime offers a unique sensory experience, encouraging children to touch and manipulate it, stimulating their fine motor skills development.

By incorporating butter slime into playtime, you can create a calming and engaging sensory play session that promotes hands-on learning and cognitive development. These sensory activities not only provide a fun and interactive way for kids to play but also help in boosting their cognitive skills through sensory exploration.

Let your child immerse themselves in the world of sensory play with butter slime, where they can explore, create, and learn in a tactile and exciting manner. Make playtime fun and educational with sensory activities that spark imagination and creativity.

Advertisement

Frequently Asked Questions

How to Make Butter Slime for Kids?

To make butter slime for kids, you'll need white school glue, shaving cream, cornstarch, lotion, and Model Magic clay for stretchiness. Customize with colors, glitter, or sequins. Encourage fine motor skills and creativity through fun sensory play.

How to Make Butter Slime With 3 Ingredients?

To make butter slime with 3 ingredients, grab white glue, shaving cream, and cornstarch. Mix them together for a smooth, cloud-like texture. Remember, simplicity is key – less is more when it comes to creating this fun sensory play material!

What Is the Best Activator for Butter Slime?

To make the best butter slime, experiment with Borax, saline solution, or liquid starch as activators. Find what works for you, whether it's Borax for effectiveness, saline for gentleness, or liquid starch for good results.

How to Make Butter Slime With 2 Ingredients?

Mix hair conditioner and cornstarch in a bowl. Knead the soft dough until smooth. Add sparkles for extra flair. Immerse yourself in this easy, no-cook activity with your kids for a sensory delight that's bound to be a hit!

Conclusion

Now that you've got your butter slime ready, get ready for hours of squishy, stretchy fun!

Advertisement

Let your imagination run wild as you mold and shape this creamy concoction.

Remember, the possibilities are as endless as the buttery swirls in your slime.

So go ahead, immerse yourself and let your creativity flow like a river of melted butter!

Continue Reading

Recipes & Culinary Uses

Cookie Mastery: Best Recipe for Peanut Butter Cookies!

Fulfill your cookie cravings with the ultimate peanut butter cookies recipe that promises a decadent symphony of flavors – you won't want to miss out!

Published

on

By

peanut butter cookie perfection

Get ready for the ultimate peanut butter cookies! Combine peanut butter, brown sugar, egg, and baking soda. Mix in chocolate chips and bake at 350°F. Enjoy a soft, chewy treat with a golden brown color. The robust peanut butter taste, sweet brown sugar, and rich chocolate chips create a decadent symphony of flavors. Each cookie provides 245 calories, with a balance of carbohydrates, protein, and fat. Pair with milk or coffee for an enhanced experience. Stay tuned for more serving suggestions and detailed reviews to keep your cookie cravings satisfied.

Key Takeaways

  • Soft and chewy texture with golden brown color for irresistible appeal.
  • Robust peanut butter taste complemented by sweet brown sugar.
  • Decadent chocolate chips offer bursts of rich flavor.
  • Thick cookies with crisp edges and soft centers for a delightful mouthfeel.
  • Easy to make, perfect for parties, and pairs well with milk or coffee.

Recipe Ingredients and Preparation

cooking instructions and ingredients

To make these delicious peanut butter cookies, gather creamy peanut butter, brown sugar, a large egg, baking soda, and chocolate chips.

Start by mixing the peanut butter, brown sugar, egg, and baking soda until well combined.

Then, gently fold in the chocolate chips to ensure uniform distribution of the sweet morsels throughout the dough.

Roll the dough into balls and place them on a baking sheet lined with parchment paper.

Bake the cookies at 350°F for 10-12 minutes until they're soft, thick, and golden brown.

Advertisement

As they bake, the aroma of peanut butter and chocolate will fill your kitchen, making it hard to resist peeking into the oven.

Once done, allow the cookies to cool slightly before indulging in their rich peanut butter taste, sweetness from the brown sugar, and bursts of flavor from the chocolate chips.

These peanut butter cookies are the perfect treat for any occasion, offering a satisfying blend of flavors in every bite.

Texture and Appearance Details

textural and visual characteristics

The soft and chewy texture of these peanut butter cookies, coupled with their golden brown color and delightful chocolate chip accents, make them a visually appealing and irresistible treat. As you bite into these cookies, you'll experience a satisfying thickness that offers a substantial chewiness, creating a delightful mouthfeel. The golden brown hue of the cookies, with crisp edges and a soft center, invites you to indulge in their homemade goodness. Chocolate chips scattered throughout each cookie not only enhance the flavor but also provide a pop of visual interest, adding to the overall allure of these treats. Additionally, the aroma that fills your kitchen as these cookies bake is simply irresistible, with the rich scent of peanut butter enveloping your senses. Below is a table summarizing the key texture and appearance details of these peanut butter cookies:

Texture Appearance Additions
Soft Golden brown Chocolate chips
Chewy Crisp edges
Substantial Soft center

Flavor Profile Description

tasting notes and analysis

Peanut butter takes center stage in every decadent bite of these cookies, enchanting your taste buds with its rich and nutty essence. The flavor profile of these peanut butter cookies is a delightful symphony of tastes that will leave you craving more.

Here's why:

  1. Peanut Butter Taste: The unmistakable flavor of creamy peanut butter is the star of these cookies, providing a robust and nutty undertone that lingers with each bite.
  2. Brown Sugar Sweetness: The addition of brown sugar adds a perfect touch of sweetness that complements the peanut butter taste, creating a well-balanced and indulgent flavor profile.
  3. Chocolate Chips: The chocolate chips scattered throughout the cookie dough offer bursts of rich and decadent flavor, contrasting beautifully with the nuttiness of the peanut butter and adding an extra layer of deliciousness to each cookie.

Together, these elements harmonize to create a flavor profile that's both comforting and irresistible, making these peanut butter cookies a favorite treat for any occasion.

Nutrition Information Breakdown

nutrition facts analysis breakdown

Shifting from the flavor profile description, let's now take a closer look at the nutrition information breakdown of these delectable peanut butter cookies. Each serving of these cookies contains 245 calories, making them a reasonable treat for your sweet cravings.

The 27g of carbohydrates offer a delightful sweetness, while the 4g of protein in a single cookie contributes to a balanced snack option. With 13g of fat per cookie, these treats provide a rich and flavorful experience that has garnered rave reviews.

Advertisement

To bake these scrumptious cookies, make sure you use a cookie sheet lined with parchment paper to prevent sticking. The recipe calls for unsalted butter to control the sodium content, which amounts to 152mg per serving.

It's important to enjoy these cookies in moderation due to their calorie and fat content. However, their protein and carbohydrate balance makes them a satisfying indulgence for any cookie lover.

Serving Suggestions and Reviews

creative culinary ideas shared

Enhance your cookie-eating experience by pairing these delightful peanut butter cookies with a glass of milk or a cup of coffee. Reviewers have expressed positive feedback on the cookies' taste and texture, with many delighted by the recipe's success. Taking the time to bake these cookies will be well worth it based on the glowing reviews and high ratings they've received.

Here are some things reviewers liked about this recipe:

  1. The cookies' soft and thick texture that makes them perfect for parties or gatherings.
  2. The cookies' ability to pair exceptionally well with a glass of milk or a cup of coffee, enhancing the overall flavor experience.
  3. The ease of storing the cookies for a few days without compromising on freshness, allowing for continued enjoyment over time.

Frequently Asked Questions

Is It Better to Use Butter or Shortening in Peanut Butter Cookies?

For peanut butter cookies, use butter for flavor and richness, or shortening to maintain shape. Butter yields softer texture, while shortening gives a firmer bite. The choice depends on your preference for taste and texture.

Why Are My Peanut Butter Cookies Always Hard?

Overbaking leads to hard cookies. Guarantee precise baking time. Too much flour or insufficient fat causes dry dough and hardness. Cream butter and sugar moderately to prevent crumbliness. Excessive mix-ins make cookies dense. Improper storage dries out cookies, making them hard.

Why Are My Peanut Butter Cookies Crumbling and Falling Apart?

Your peanut butter cookies may be crumbling due to overbaking, excess flour, insufficient fat, too much leavening agent, or inadequate mixing. Adjust baking time, ingredients, and mixing technique to achieve cookies that hold together perfectly.

Advertisement

What Are the Basic Ingredients for Peanut Butter Cookies?

You need creamy peanut butter, brown sugar, egg, and baking soda for peanut butter cookies. They taste nutty and sweet, with a soft, chewy texture. Add chocolate chips for extra flavor. Just mix, bake, and enjoy these delicious treats!

Conclusion

You've mastered the art of baking with this peanut butter cookie recipe!

Did you know that Americans consume over 7 billion cookies a year?

So next time you whip up a batch of these delicious treats, know that you're contributing to that sweet statistic.

Keep baking and enjoy every bite of these irresistible peanut butter cookies!

Advertisement
Continue Reading
Advertisement

Affiliate disclaimer

As an affiliate, we may earn a commission from qualifying purchases. We get commissions for purchases made through links on this website from Amazon and other third parties.

Vetted

Vetted2 months ago

Infusion Buds Butter Infuser & Decarboxylator – 2024 Review

I recently got to try out the Infusion Buds Butter Infuser & Decarboxylator Machine Combo, and I am excited to...

Vetted2 months ago

LEVO Lux – Premium Herbal Oil Infusion Machine – Review [2024]

I recently got to try out the LEVO Lux – Premium Herbal Oil Infusion Machine – Botanical Extractor – Herb...

Vetted2 months ago

STX Infuzium & Decarboxylator Bundle Review [2024]

Today, I am thrilled to share my thoughts on the PREMIUM PACK • STX Infuzium Butter-Oil-Tincture Infuser & STX Activation...

Vetted2 months ago

Review: ONGROK Small Butter Infuser [2024]

Introduction: I am thrilled to share my experience with the ONGROK Small Butter Infuser in this post. This device has...

Vetted2 months ago

Herbal Infuser Hi – Innovative Botanical Butter Maker [2024]

Today, I am thrilled to share with you my experiences with the Herbal Infuser Hi Countertop Botanical Butter Maker, Tincture...

Vetted2 months ago

Ardent FX Decarboxylator Review: Quick & Effortless! [2024]

I recently had the opportunity to try out the Ardent FX Decarboxylator 110V With Bluetooth Connectivity, and I must say,...

Vetted2 months ago

Infusion Buds Butter Infuser – Review & Accessories [2024]

Thank you for joining me as we explore a review of the Infusion Buds Butter Infuser & Decarboxylator Machine Combo....

Vetted2 months ago

Decarboxylator Machine Review: Easy & Odorless Herb Activation [2024]

I recently had the opportunity to try out the Decarboxylator Machine for Herbs, and I have to admit, it really...

Vetted2 months ago

Decarb Mini System Review: All-in-One Herbal Processing Solution [2024]

Today, I will be giving my thoughts on the Decarb Mini System. As someone who enjoys herbal infusions and tinctures,...

elevate steak with butter elevate steak with butter
Vetted2 months ago

12 Best Compound Butter Recipes for Elevating Your Steak Game

Kick your steak game up a notch with these 12 mouthwatering compound butter recipes that will take your taste buds...

mouthwatering butter cookie taste mouthwatering butter cookie taste
Vetted2 months ago

15 Best Butter Cookies That Will Melt In Your Mouth – Taste Test Results

Tantalize your taste buds with the top 15 butter cookies that promise a melt-in-your-mouth experience - a delightful journey awaits!

peanut butter ice cream peanut butter ice cream
Vetted2 months ago

15 Best Peanut Butter Ice Cream Flavors You Need to Try This Summer

Craving a creamy and decadent summer treat?

Advertisement

Trending