Connect with us

Recipes & Culinary Uses

Shea Butter: Origins and How to Source It

Published

on

An image featuring a vast African landscape, with a radiant sun setting behind a majestic shea tree

As a fan of natural skincare products, I have always been intrigued by the origins of Shea Butter. Come along with me as we explore the rich history and global industry surrounding this versatile beauty ingredient.

From its African roots to the intricate process of harvesting and extraction, we will explore the traditional and modern uses of Shea Butter.

Get ready to delve into the world of Shea Butter and uncover the secrets of its origins.

Key Takeaways

  • Shea butter traces its origins back to ancient African civilizations and is native to several countries in West Africa.
  • The production process of shea butter has been passed down through generations and is valued for its historical significance and cultural heritage.
  • Shea butter has numerous benefits for skincare, haircare, and medicinal purposes, including deep moisturization, reducing inflammation, and promoting healthy skin cell growth.
  • Africa is the largest producer and exporter of shea butter, and its global market is expected to reach a value of $XX billion by 2025, creating job opportunities and improving socio-economic conditions in shea-producing countries.

Shea Butter: An Overview

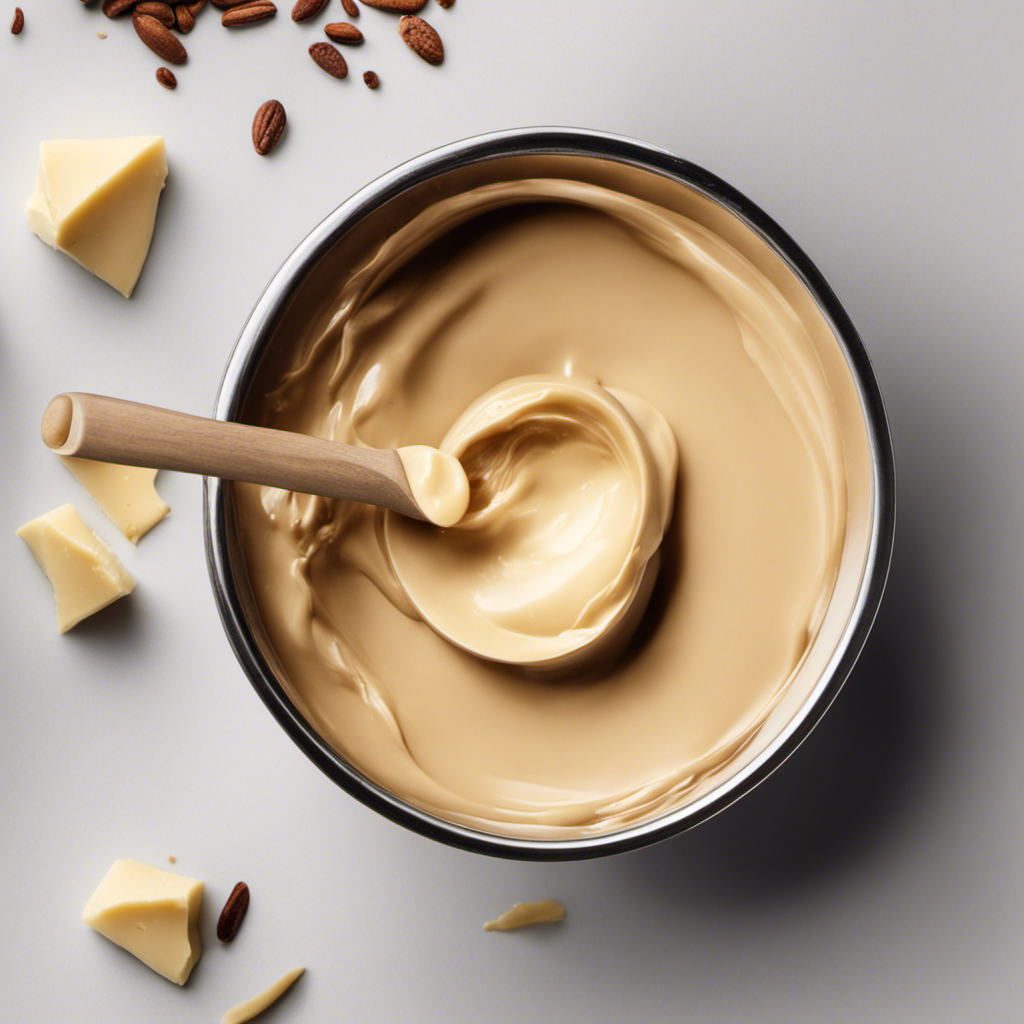
Shea butter is a popular natural ingredient that is derived from the nuts of the shea tree. It has been used for centuries in natural skincare due to its amazing benefits for the skin.

Advertisement

Shea butter is rich in vitamins A, E, and F, as well as essential fatty acids, making it incredibly nourishing and moisturizing. It helps to soothe and heal dry, damaged skin, while also improving its elasticity and reducing the appearance of wrinkles. Additionally, shea butter has anti-inflammatory properties that can calm irritated skin and even help with conditions like eczema and psoriasis.

With its versatility, shea butter can be used in various skincare recipes, such as homemade body butters, lip balms, and even hair masks.

Historical Origins of Shea Butter

You can trace the historical origins of shea butter back to ancient African civilizations. This natural product has a rich history and holds great cultural significance.

Shea butter is derived from the nuts of the shea tree, which is native to several countries in West Africa. For centuries, African communities have utilized shea butter for its numerous benefits. It was not only used as a skin moisturizer and conditioner, but also played a vital role in traditional medicine and cultural practices.

The production of shea butter involved a meticulous process, which was passed down through generations and became an integral part of African heritage. Today, shea butter continues to be highly valued for its historical significance and is widely used in the beauty and cosmetic industries.

Advertisement

Shea Butter Production Process

When making shea butter, it’s important to first harvest and collect the nuts from the shea tree. These nuts are then processed to extract the butter, which is used for various purposes such as skincare and cooking. The production process involves several steps to ensure the quality of the final product.

  • Harvesting and Collection: The nuts are carefully handpicked from the shea tree, ensuring that only mature nuts are selected.

  • Dehusking and Washing: The outer shell of the nut is removed, and the nuts are thoroughly washed to remove any dirt or impurities.

  • Drying and Grinding: The nuts are dried under the sun and then ground into a fine powder, which is later roasted to enhance the aroma and flavor.

Shea butter market trends are constantly evolving, with a growing demand for natural and organic skincare products. To meet these demands, quality control measures are implemented throughout the production process. This includes testing the raw materials for purity, monitoring the temperature during roasting, and conducting regular quality checks to ensure that the shea butter meets the highest standards.

Shea Butter: A Global Industry

The global industry for shea butter has experienced significant growth in recent years, driven by the increasing demand for natural and organic skincare products. This versatile ingredient, derived from the nuts of the shea tree, is known for its moisturizing and nourishing properties. It has gained popularity not only in the beauty and cosmetics industry, but also in the food and pharmaceutical sectors.

Advertisement

Let’s take a closer look at the global market for shea butter and its economic impact:

Region Key Market Players
Africa Global Shea Alliance
Europe L’OCCITANE
North America The Body Shop
Asia-Pacific NOW Foods

The global market for shea butter is expected to reach a value of $XX billion by 2025, with Africa being the largest producer and exporter. This growth has had a positive economic impact on shea-producing countries, creating job opportunities and improving the socio-economic conditions of local communities. Additionally, the sustainable cultivation and production of shea butter contribute to environmental conservation and support the livelihoods of millions of women who play a significant role in the shea industry.

Shea Butter: African Origins

As an expert in the field of shea butter, I’m excited to delve into the natural benefits of this incredible ingredient and explore the intricate process of shea production.

Advertisement

Shea butter is renowned for its numerous skincare benefits, such as moisturizing, anti-inflammatory, and anti-aging properties.

Understanding the production process, from harvesting the shea nuts to the refinement of the butter, provides valuable insight into the craftsmanship and sustainability behind this African treasure.

Natural Benefits of Shea

You’ll love the natural benefits of shea, such as its moisturizing and anti-inflammatory properties. Shea butter is a fantastic ingredient for natural skincare, providing numerous healing properties that can improve the health and appearance of your skin. Here are some of the key benefits:

  • Deeply moisturizes and nourishes the skin, keeping it soft, supple, and hydrated.
  • Helps reduce inflammation and soothes irritated skin, making it great for conditions like eczema and psoriasis.
  • Contains vitamins A and E, which promote healthy skin cell growth and repair.

Shea butter is a versatile ingredient that can be used in various ways, including as a moisturizer, lip balm, or even to treat minor cuts and burns. Its natural healing properties make it a must-have for anyone looking to improve their skincare routine.

Shea Production Process

To make shea butter, the nuts from the shea tree are harvested, dried, and then crushed to extract the rich oils within. Shea butter processing techniques play a crucial role in ensuring the quality and efficacy of the final product. These techniques involve several steps that are carefully executed to obtain the highest quality shea butter.

One of the key steps in the processing is roasting the shea nuts. This helps to remove any impurities and enhance the aroma and flavor of the butter. After roasting, the nuts are ground into a fine powder using specialized machinery. This powder is then mixed with water to form a paste, which is further kneaded to release the oils. The oil is then separated from the paste and allowed to solidify to obtain the final shea butter product.

Advertisement

Table: Shea Butter Processing Techniques

Processing Step Description
Harvesting Nuts are collected from shea trees
Drying Nuts are dried to reduce moisture content
Roasting Nuts are roasted to remove impurities and enhance aroma and flavor
Crushing and Extraction Nuts are crushed and oils are extracted to obtain shea butter

Quality control is an integral part of shea butter production. It involves rigorous testing and inspection to ensure that the butter meets the required standards. This includes checking for purity, consistency, and absence of contaminants. Additionally, the shea butter is evaluated for its color, texture, and fragrance to ensure that it is of the highest quality. By implementing these quality control measures, producers can guarantee the excellence of their shea butter products.

With the shea butter processing techniques and quality control in place, it is now time to delve into the next step: shea butter harvesting and extraction.

Shea Butter: Harvesting and Extraction

When it comes to harvesting and extracting shea butter, there are specific techniques used in cultivating the shea tree and traditional methods for extracting the butter.

To ensure successful cultivation, shea trees require specific growing conditions such as well-drained soil and a subtropical climate.

Advertisement

Traditional extraction methods involve the labor-intensive process of collecting shea nuts, cracking them open, and grinding them into a paste before extracting the butter through boiling and cooling.

Shea Tree Cultivation Techniques

Shea butter is made from the nuts of the shea tree, which is cultivated using various techniques. When it comes to shea tree propagation, there are a few methods that are commonly used. These include grafting, where a small branch of a desired variety is attached to a rootstock, and seed propagation, where seeds are collected and germinated in a nursery before being transplanted into the field.

However, it’s important to note that shea trees are susceptible to certain diseases, such as anthracnose and root rot. To prevent these diseases, farmers often employ practices like regular pruning, proper drainage, and applying fungicides when necessary.

Overall, proper cultivation techniques are crucial for ensuring healthy shea trees and a good yield of shea nuts for making shea butter.

Now that we understand the cultivation techniques for shea trees, let’s delve into the traditional extraction methods for obtaining shea butter.

Advertisement

Traditional Extraction Methods

Now that we’ve covered the cultivation techniques, let’s explore how shea butter is traditionally extracted. Shea butter is a versatile and highly prized natural ingredient that is derived from the nuts of the shea tree. Traditional extraction methods have been passed down through generations and hold great cultural significance. These techniques involve several steps, including harvesting the nuts, drying them, roasting them, and finally grinding and kneading the roasted nuts to extract the rich butter. The process is labor-intensive and requires great skill and patience. To give you a better understanding, here is a table outlining the traditional extraction techniques:

Step Description
1 Harvesting the shea nuts from the trees
2 Drying the nuts to reduce moisture content
3 Roasting the nuts to enhance the butter’s aroma and color
4 Grinding and kneading the roasted nuts to extract the butter

These traditional methods not only produce high-quality shea butter but also preserve the cultural heritage and practices of the communities that rely on this valuable resource.

Shea Butter: Traditional and Modern Uses

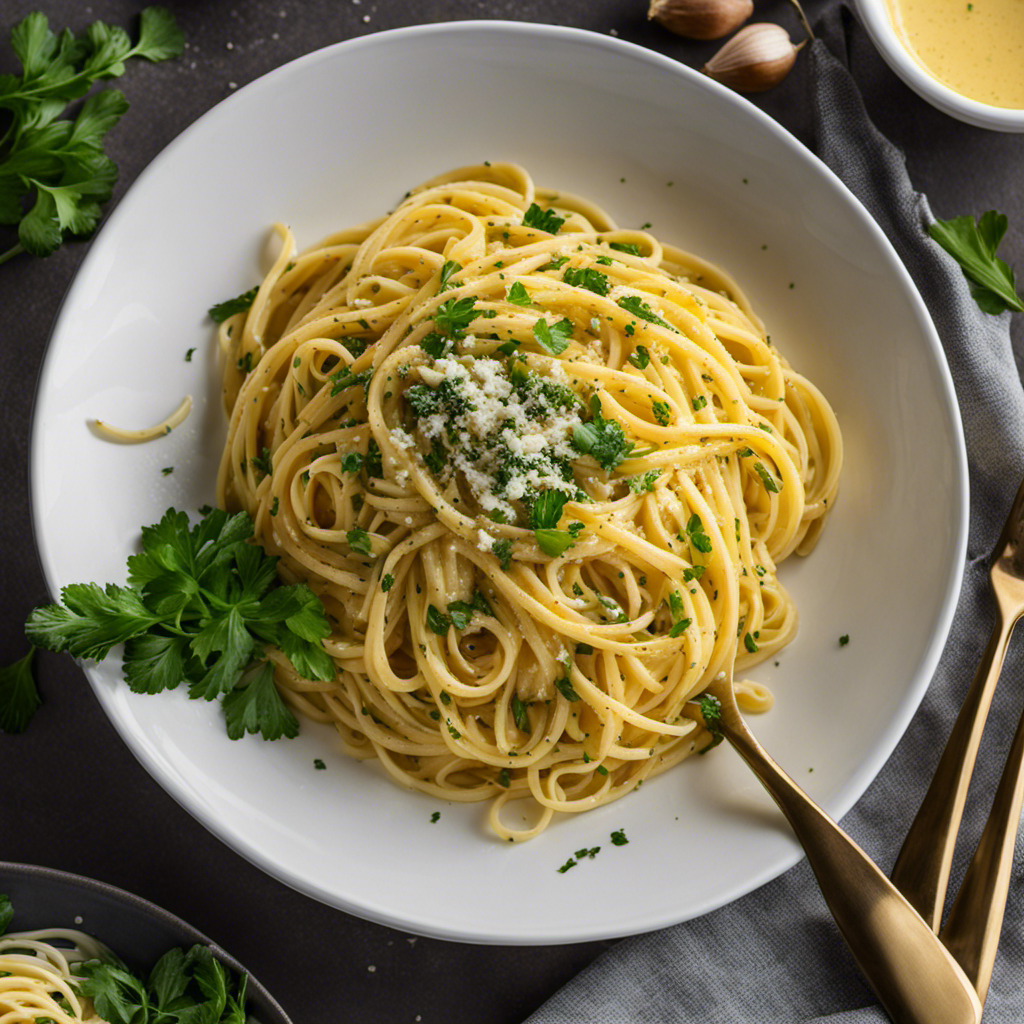
You can find traditional and modern uses for shea butter in various skincare and haircare products.

Shea butter is a versatile ingredient that has been used for centuries due to its numerous benefits. In modern skincare, shea butter is valued for its moisturizing properties and ability to nourish and protect the skin. Its high concentration of vitamins A and E, as well as essential fatty acids, make it an excellent choice for promoting healthy and youthful-looking skin.

Shea butter also has medicinal properties, such as anti-inflammatory and healing effects, making it an ideal ingredient for treating conditions like eczema and psoriasis.

Advertisement

Additionally, shea butter can be used to improve the appearance and manageability of hair, providing hydration and reducing frizz.

  • Moisturizes and nourishes the skin
  • Promotes healthy and youthful-looking skin
  • Provides healing and anti-inflammatory effects

Frequently Asked Questions

Is Shea Butter Suitable for All Skin Types?

Yes, shea butter is suitable for all skin types. Its moisturizing properties benefit dry skin, while its anti-inflammatory properties soothe sensitive skin. Alternatives to shea butter include cocoa butter and mango butter.

Can Shea Butter Be Used as a Natural Hair Conditioner?

Shea butter is a fantastic natural hair conditioner. It deeply moisturizes, reduces frizz, and promotes hair growth. Compared to other natural conditioners, shea butter stands out for its rich vitamins and fatty acids that nourish and protect the hair.

What Are the Main Differences Between Unrefined and Refined Shea Butter?

Unrefined vs Refined Shea Butter: Which is better for skincare? Unrefined Shea Butter is minimally processed, retaining more nutrients and natural scent. Refined Shea Butter is processed to remove impurities and scent. Both have benefits for moisturizing skin.

Does Shea Butter Have Any Potential Side Effects or Allergic Reactions?

Potential side effects and allergic reactions can occur when using shea butter. It’s important to patch test before using it to check for any adverse reactions. Allergies to shea butter are rare, but some people may experience skin irritation or redness.

Are There Any Sustainable Practices in Place to Ensure the Long-Term Availability of Shea Butter?

There are sustainable practices in place to ensure the long-term availability of shea butter. Through responsible sourcing and economic impact, we can protect this valuable resource for future generations.

Advertisement

Conclusion

After delving into the historical origins and production process of shea butter, it becomes clear that this remarkable ingredient has a rich and deep-rooted history.

With its African origins and traditional extraction methods, shea butter has stood the test of time and continues to be a global industry today.

Its versatility in both traditional and modern uses speaks to its enduring popularity.

So, the next time you use shea butter, ask yourself, can you feel the ancient wisdom and beauty it holds within?

Advertisement
Continue Reading
Advertisement

Recipes & Culinary Uses

How to Make Creamy Butter Garlic Pasta

Published

on

By

An image of a steaming plate of al dente pasta twirled with a rich, golden butter garlic sauce

I am going to reveal to you the secret to making the most delicious butter garlic pasta you have ever tried.

Get ready to indulge in a symphony of flavors as tender pasta gets enveloped in a rich, velvety butter garlic sauce.

This recipe is simple yet sophisticated, perfect for impressing guests or treating yourself to a truly decadent meal.

So grab your apron and let’s dive into the magic of homemade butter garlic pasta.

Trust me, you won’t be able to resist.

Advertisement

Key Takeaways

  • Choose long and thin pasta like spaghetti or linguine for the best texture.
  • Cook the pasta al dente to prevent mushiness and allow the sauce to cling to the strands.
  • Prepare a well-seasoned and fragrant garlic butter sauce with sautéed minced garlic and optional herbs and spices.
  • Combine the cooked pasta with the simmered sauce, ensuring every strand is coated, and garnish with Parmesan cheese and parsley.

Choosing the Right Pasta

I’ll pick out the perfect type of pasta for my butter garlic pasta. When it comes to choosing the right pasta, there are so many options to consider. Different types of pasta shapes can greatly impact the overall texture and taste of the dish.

For a butter garlic pasta, I’d opt for a long and thin pasta shape like spaghetti or linguine. These types of pasta allow the butter garlic sauce to cling onto the strands, ensuring each bite is full of flavor.

Additionally, the importance of cooking the pasta until it’s al dente can’t be understated. Al dente pasta has a slight bite to it, providing a satisfying texture and preventing it from becoming mushy when combined with the butter garlic sauce.

Preparing the Garlic Butter Sauce

To start, I’ll heat up the olive oil in a skillet and sauté the minced garlic until it becomes fragrant. This step is crucial as it will infuse the sauce with a rich, savory flavor.

Advertisement

Once the garlic is golden and aromatic, I’ll enhance the garlic butter sauce by adding a handful of fresh herbs, such as chopped parsley or basil. These herbs not only add a burst of freshness but also contribute to the overall visual appeal of the dish.

Next, I’ll pour in a splash of white wine to the garlic butter sauce. The wine adds a subtle tanginess and complexity that elevates the flavors. This step is optional, but it truly takes the sauce to another level.

With the garlic butter sauce now perfectly seasoned and fragrant, it’s time to move on to boiling the pasta.

Boiling the Pasta

Advertisement

Once the water reaches a rolling boil, I add a generous amount of salt before adding the pasta. Achieving the perfect al dente texture is essential for a delicious butter garlic pasta. I carefully follow the instructions on the pasta package, cooking it for the recommended time minus a minute or two. This ensures that the pasta is cooked, but still firm to the bite.

To add a twist to the traditional garlic butter pasta, I sometimes incorporate a variety of herbs and spices into the boiling water. A pinch of red pepper flakes adds a subtle kick, while a handful of fresh basil leaves brings a refreshing aroma. These additions elevate the flavors and take the dish to a whole new level.

Cooking the Garlic Butter Sauce

While simmering the sauce, I stir in a knob of butter until it melts and blends seamlessly with the other ingredients. This step is crucial for creating a rich and flavorful garlic butter sauce that will elevate your pasta dish to new heights.

Here are three cooking techniques and flavor variations that you can experiment with to enhance the taste of your butter garlic pasta:

  • Sautéing the garlic: Instead of simply adding minced garlic to the sauce, try sautéing it in the butter until fragrant and golden brown. This will bring out the natural sweetness and depth of flavor in the garlic.

  • Adding herbs and spices: To take your sauce to the next level, consider incorporating herbs like parsley or basil, and spices like red pepper flakes or black pepper. These additions will add complexity and a touch of heat to your butter garlic pasta.

  • Using flavored butter: If you want to get creative with your flavor profile, try using flavored butter. You can find a wide variety of options at the grocery store or make your own by mixing in herbs, spices, or even cheese. This will infuse your sauce with a unique and delicious taste.

Combining the Pasta and Sauce

Advertisement

After the sauce has simmered to perfection, I pour it over the cooked pasta and toss until every strand is coated in the creamy goodness.

The combination of the rich butter and aromatic garlic creates a delectable flavor that’s hard to resist.

To enhance the dish even further, I like to garnish it with a sprinkle of freshly grated Parmesan cheese and a handful of chopped parsley. This adds a touch of freshness and brings out the flavors of the sauce.

As for serving suggestions, this butter garlic pasta pairs well with a simple green salad or some crusty garlic bread on the side.

Advertisement

For variations and substitutions, you can experiment with different types of pasta, such as spaghetti or fettuccine, and add in ingredients like sautéed mushrooms or grilled chicken for added protein.

The possibilities are endless, but one thing is for sure: this butter garlic pasta is a crowd-pleaser that will leave everyone wanting more.

Frequently Asked Questions

How Can I Make This Recipe Vegan-Friendly?

To make this recipe vegan-friendly, you can use vegan substitutes for butter, such as plant-based margarine or coconut oil. Additionally, opt for dairy-free options like almond milk or cashew cream instead of regular milk or cream.

Can I Use Gluten-Free Pasta for This Recipe?

Sure, you can use gluten-free pasta for this recipe. Just remember to follow the cooking instructions for gluten-free pasta and consider alternatives like rice or quinoa pasta for a delicious, gluten-free version.

Can I Substitute Olive Oil for Butter in the Garlic Butter Sauce?

Substituting olive oil or vegan butter in the garlic butter sauce can alter the taste and texture of the dish. Olive oil adds a rich, fruity flavor, while vegan butter provides a creamy and buttery texture.

Advertisement

How Can I Make This Dish Spicier?

To make this dish spicier, there are several ways to add heat. You can incorporate hot chili flakes, spicy red pepper sauce, or even diced jalapeños. Another alternative to garlic could be using ginger for a flavorful twist.

Can I Add Vegetables or Protein to This Pasta Dish?

Adding vegetables and protein to this pasta dish is a great idea. It not only enhances the nutritional value but also adds texture and flavor. I recommend sautéing some bell peppers and adding cooked chicken for a delicious and balanced meal.

Conclusion

In conclusion, making butter garlic pasta is a simple yet delicious dish that can be enjoyed by everyone.

The rich and creamy garlic butter sauce perfectly coats the al dente pasta, creating a mouthwatering combination of flavors.

This recipe allows you to indulge in a culinary experience that’s both satisfying and comforting, like a warm embrace on a chilly evening.

Advertisement

So why not give it a try and treat yourself to a delightful meal?

Continue Reading

Recipes & Culinary Uses

Easy Steps to Make Butter from Raw Milk Using a Mixer

Published

on

By

An image showcasing the step-by-step process of transforming creamy raw milk into luscious butter using a mixer

As I immerse myself in the realm of culinary exploration, I came across a hidden treasure: crafting butter from raw milk using a mixer. With just a few basic ingredients and my reliable mixer, I unveiled the key to producing smooth, homemade butter that would impress any chef.

In this article, I will guide you through the precise steps, from gathering the ingredients to storing the final product. Get ready to churn and savor the rich rewards of your own creation.

Let’s butter up!

Key Takeaways

  • Choose a mixer with a powerful motor and sturdy construction
  • Strain and pasteurize the raw milk before churning
  • Use a high-speed setting on the mixer for faster butter formation
  • Store homemade butter in airtight containers to maintain flavor and freshness

Gathering the Ingredients and Equipment

I’m gathering the ingredients and equipment needed to make butter from raw milk in my mixer.

Advertisement

To ensure a successful butter-making process, it’s crucial to choose the right mixer. Look for a mixer with a powerful motor and a sturdy construction that can handle the thick consistency of the cream. A high-speed setting is also desirable to expedite the churning process.

When it comes to sourcing raw milk, it’s important to prioritize safety and quality. Look for local farms or dairies that follow strict hygiene practices and ensure the cows are healthy and well-cared for. Freshness is key, so opt for milk that has been recently produced and stored properly.

Preparing the Raw Milk for Churning

To start preparing the raw milk for churning, I’ll first need to strain out any impurities. This ensures that the milk is clean and safe for consumption.

Before churning, it’s important to pasteurize the raw milk to eliminate any harmful bacteria that may be present. Pasteurization involves heating the milk to a specific temperature and holding it there for a set period of time. This process helps to destroy any potential pathogens without significantly altering the taste or nutritional composition of the milk.

Once the raw milk is pasteurized, there are different methods of churning it into butter. One method involves using a mixer, which agitates the milk until the fat globules separate from the liquid, forming butter.

Advertisement

Churning the Raw Milk in the Mixer

Using a high-speed setting, I’ll let the mixer agitate the milk until the fat globules separate and butter forms. The speed of the mixer plays a crucial role in the churning process. A higher speed will help the fat globules to separate more quickly, resulting in butter formation. The churning time will vary depending on the mixer speed and the amount of milk being churned. It is important to monitor the process closely to avoid over-churning, which can lead to a grainy texture. To give you an idea of the correlation between mixer speed and churning time, here is a table that summarizes the approximate time required for butter formation at different speeds:

Mixer Speed Churning Time (minutes)
Low 20-30
Medium 15-20
High 10-15
Very High 5-10
Turbo 2-5

Separating the Butter From the Buttermilk

After the churning process, I strain the mixture through a fine-mesh sieve to separate the butter from the buttermilk. The creamy liquid slowly drips down, leaving behind the beautiful golden butter. It’s a delicate process, requiring patience and precision.

As I watch the buttermilk flow through the sieve, I can’t help but appreciate the benefits of using raw milk for making butter. The rich and complex flavors of raw milk add depth and character to the final product. It’s like tasting a piece of the farm, with its grassy undertones and hints of sweetness.

Advertisement

To further enhance the butter’s taste, there are various methods for flavoring homemade butter. From the simplicity of sprinkling salt to the creativity of adding herbs and spices, the possibilities are endless.

Storing and Using Your Homemade Butter

When storing my homemade butter, I prefer to use airtight containers to keep it fresh and prevent any unwanted odors from seeping in. It’s important to protect the butter’s flavor and texture, as well as extend its shelf life. Additionally, I like to experiment with different flavors to add a unique twist to my butter. Some creative ways to flavor homemade butter include incorporating herbs like rosemary or thyme, adding spices like cinnamon or garlic powder, or mixing in sweet ingredients like honey or maple syrup. This allows me to customize my butter based on my preferences and the dishes I plan to use it in. Speaking of which, homemade butter has a multitude of uses in cooking and baking. It can be spread on toast, melted over vegetables, used as a base for sauces, or incorporated into pastry dough for flakier results. The possibilities are endless!

Flavor Ingredients Recommended Uses
Herb-infused Rosemary, thyme Mashed potatoes, roasted vegetables
Spiced Cinnamon, garlic powder Toast, pancakes
Sweet Honey, maple syrup Baked goods, waffles

Frequently Asked Questions

How Long Does It Take for the Raw Milk to Turn Into Butter in the Mixer?

To speed up the process of turning raw milk into butter in a mixer, you can increase the speed and duration of mixing. It is not possible to make butter in a mixer without using raw milk.

Advertisement

Can I Use Pasteurized Milk Instead of Raw Milk for Making Butter in a Mixer?

Using raw milk instead of pasteurized milk for making butter in a mixer has several benefits. It enhances the flavor and nutritional value of the butter. To achieve the best consistency, ensure the milk is fresh and at room temperature before churning.

What Is the Ideal Temperature for the Raw Milk Before Churning It in the Mixer?

The ideal temperature for raw milk before churning it in the mixer is around 50-55°F. This ensures proper fat separation and reduces churning time. It’s crucial to maintain the correct temperature for the best results.

Can I Add Flavorings or Herbs to the Butter While Churning It in the Mixer?

Yes, you can add flavorings or herbs to the butter while churning it in the mixer. This is a great way to incorporate flavor into homemade butter and experiment with different tastes.

Can I Use a Hand Mixer Instead of a Stand Mixer to Churn the Raw Milk Into Butter?

Using a hand mixer for churning raw milk into butter has its pros and cons. It can be more convenient and easier to handle, but may take longer and require more effort compared to a stand mixer. Other methods without a mixer include shaking in a jar or using a food processor.

Conclusion

In conclusion, making butter from raw milk in a mixer is a simple and rewarding process. By following the steps outlined above and using the right ingredients and equipment, you can transform fresh raw milk into delicious homemade butter.

Advertisement

Remember, practice makes perfect, so don’t be discouraged if your first attempt isn’t perfect. With a little patience and perseverance, you’ll be churning out creamy butter in no time, and soon you’ll be able to spread it on toast and enjoy the fruits of your labor.

Continue Reading

Recipes & Culinary Uses

Make Rich Butter from Raw Milk

Published

on

By

An image capturing the process of making butter from raw milk

Hey! Have you ever thought about how to turn raw milk into homemade butter? Look no further, I’ve got the solution for you.

In this article, I’ll take you through the step-by-step process of turning that creamy goodness into delicious homemade butter.

We’ll explore the benefits of using raw milk, learn how to separate the cream, and even discover different flavors you can infuse into your butter.

So, grab your apron and let’s get churning!

Key Takeaways

  • Raw milk contains essential vitamins, minerals, and enzymes that are destroyed during pasteurization.
  • Separating the cream from raw milk can be done through gravity separation, centrifugal separation, or cold separation.
  • Churning the cream into butter can be done through hand churning, using a stand mixer with a whisk attachment, or using a food processor with a blade attachment.
  • Washing and storing the freshly made butter involves cleaning the butter container and preserving its freshness by wrapping it tightly in wax paper or using an airtight container.

Understanding the Benefits of Raw Milk

Advertisement

Raw milk has numerous health benefits that are not found in pasteurized milk. Understanding the nutritional value of raw milk is important for those seeking a natural and wholesome source of nutrients.

Contrary to popular belief, raw milk is not a dangerous product when handled and consumed properly. In fact, it contains essential vitamins, minerals, and enzymes that are destroyed during the pasteurization process.

Raw milk is rich in beneficial bacteria and probiotics, which can support a healthy gut microbiome and enhance digestion. Additionally, raw milk is a good source of bioavailable nutrients such as calcium, protein, and healthy fats.

Debunking myths about raw milk is crucial to prevent misinformation and promote informed choices regarding our food.

Preparing the Raw Milk for Butter Making

To prepare the milk for butter making, it’s important to first skim off the cream. This step is crucial as it allows us to separate the high-fat cream from the milk, which is necessary for obtaining a good quality butter.

Advertisement

Here are three separating techniques to help you achieve the best results:

  1. Gravity separation: After allowing the milk to stand undisturbed for a few hours, the cream naturally rises to the top, making it easy to skim off with a spoon or ladle.

  2. Centrifugal separation: Using a cream separator machine, the milk is spun at high speeds, causing the heavier cream to separate from the lighter milk. This method is efficient and yields a higher cream quality.

  3. Cold separation: By refrigerating the milk overnight, the cream becomes denser and easier to separate. Skimming off the cold cream results in a richer and creamier butter.

Separating the Cream From the Raw Milk

If you want to achieve the best results when separating the cream from the milk, try using gravity separation, centrifugal separation, or cold separation techniques.

Gravity separation involves allowing the milk to sit undisturbed in a container for a period of time, allowing the cream to rise to the top.

Advertisement

Centrifugal separation utilizes a machine that spins the milk at high speeds, forcing the cream to separate from the milk.

Cold separation involves chilling the milk to a low temperature, causing the cream to solidify and separate from the milk.

These techniques are beneficial because consuming raw dairy has numerous health benefits, such as improved digestion, increased nutrient absorption, and enhanced immune function.

Additionally, if you don’t have access to a churn, these separation methods provide alternatives for obtaining cream for making butter.

Churning the Cream Into Butter

Once the cream has separated from the milk, you can start churning it into delicious butter. Churning is the process of agitating the cream until it transforms into butter.

Advertisement

Here are three techniques to help you achieve the perfect consistency:

  1. Hand Churning: This traditional method involves using a small churn or jar and physically shaking or rocking it back and forth until the cream turns into butter.

  2. Stand Mixer: If you have a stand mixer with a whisk attachment, you can use it to churn the cream. Start at a low speed and gradually increase until the butter forms.

  3. Food Processor: Another option is to use a food processor with a blade attachment. Pulse the cream until it separates into butter and buttermilk.

Troubleshooting common butter making problems:

  • If the cream isn’t thickening, ensure it is at the right temperature (around 50-55°F) and give it more time to churn.
  • If the butter is too soft, refrigerate it for a while before churning again.
  • If the butter is too hard, let it soften at room temperature or add a small amount of buttermilk to adjust the consistency.

After churning the cream into butter, it’s time to move on to the next step of washing and storing the freshly made butter.

Washing and Storing the Freshly Made Butter

When it comes to washing and storing freshly made butter, there are a few key points to consider.

Advertisement

First, cleaning the butter container is essential to maintain the quality of the butter. I recommend using warm soapy water and a soft sponge to remove any residue before drying it thoroughly.

Second, preserving the butter’s freshness is crucial to prolong its shelf life. To do this, I suggest wrapping the butter tightly in wax paper or placing it in an airtight container to protect it from air and odors.

Lastly, it’s important to store butter at the proper temperature. The recommended storage temperature for butter is between 32-40°F (0-4°C), as this helps to maintain its texture and prevent spoilage.

Cleaning the Butter Container

Before cleaning the butter container, make sure to remove any leftover butter residue. Cleaning the butter container is essential to maintain its freshness and prevent any cross-contamination. Here are three effective cleaning techniques to ensure a clean and sanitized container:

  1. Soak in hot, soapy water: Fill the container with hot water and add a few drops of dish soap. Let it sit for a few minutes to loosen any residue, then scrub with a sponge or brush.

  2. Use vinegar solution: Mix equal parts white vinegar and water in the container. Let it sit for about 15 minutes to dissolve any stubborn residue. Scrub with a sponge or brush, then rinse thoroughly.

  3. Bleach solution: Mix 1 tablespoon of bleach with 1 gallon of water. Let the container soak in the solution for 10 minutes, then scrub and rinse well.

Preserving Butter’s Freshness

After cleaning the butter container, the next step is to ensure that the butter stays fresh and maintains its texture for as long as possible. This is important because nobody wants to end up with rancid butter. To preserve the butter’s freshness, there are a few key things you can do. Firstly, storing the butter in an airtight container or wrapping it tightly in wax paper will help prevent it from being exposed to air and developing off flavors. Secondly, keeping the butter refrigerated at a consistent temperature, ideally around 40°F (4°C), will slow down the process of it going rancid. Lastly, if you want to store butter for an extended period of time, freezing it is a great option as it can extend its shelf life for several months. By following these steps, you can enjoy fresh and flavorful butter for all your culinary needs.

Advertisement
Preserving Butter’s Freshness
Store butter in an airtight container or wrap tightly in wax paper.
Refrigerate butter at a consistent temperature of around 40°F (4°C).
Freeze butter for extended storage, which can extend its shelf life for several months.
Follow these steps to enjoy fresh and flavorful butter for all your culinary needs.

Recommended Storage Temperature

Storing butter in the refrigerator at a consistent temperature of around 40°F (4°C) helps to maintain its freshness and prevent it from going rancid. Here are three recommended storage methods and the ideal temperature range for butter:

  1. Wrap it properly: Use parchment paper or airtight containers to wrap the butter. This will protect it from absorbing odors and prevent it from drying out.

  2. Keep it away from light: Exposure to light can cause butter to spoil faster. Store it in a cool, dark place, like the refrigerator’s butter compartment or a covered butter dish.

  3. Avoid temperature fluctuations: Butter can easily absorb flavors and odors from other foods in the fridge. To maintain its quality, store it away from strong-smelling foods and make sure the temperature remains constant.

Following these recommended storage methods and keeping the butter at the ideal temperature range will help to preserve its freshness and taste for longer periods.

Using Leftover Buttermilk in Recipes

You can easily use leftover buttermilk in recipes to add a tangy flavor. Buttermilk is a versatile ingredient that can enhance the taste and texture of various baked goods. It’s a great substitute for regular milk in recipes because it adds a unique tanginess and richness. Here are some creative uses for leftover buttermilk in baking:

Row Buttermilk Recipe Result
1 Pancakes Fluffy and Light and
tender texture fluffy pancakes
2 Biscuits Tender and Flaky and
flaky texture buttery biscuits
3 Cakes Moist and Moist and
tender texture tender cakes
4 Fried chicken Crispy and Juicy and
flavorful coating flavorful chicken

Exploring Variations and Flavors in Homemade Butter

When it comes to homemade butter, there are endless possibilities for adding unique flavors and enhancing its taste.

One way to do this is through unique butter infusions, where you can mix in various ingredients like garlic, herbs, or even fruit zest to create a personalized flavor profile.

Advertisement

Another option is to enhance the taste of your homemade butter by incorporating herbs such as rosemary, thyme, or basil, which can add a delightful aroma and taste.

Lastly, experimenting with flavored salts like smoked sea salt or truffle salt can take your butter to a whole new level, adding a burst of flavor that will elevate any dish.

Unique Butter Infusions

To add unique flavors to your butter, try infusing it with herbs or spices. Butter infusion techniques offer a creative way to elevate the taste of your homemade butter. Here are three ideas to get you started:

  1. Garlic and Herb Butter: Melt your butter, then add minced garlic and chopped fresh herbs like rosemary, thyme, or parsley. Let the flavors infuse for a few hours before refrigerating.

  2. Citrus Zest Butter: Grate the zest of an orange, lemon, or lime into your softened butter. Mix well and let it sit in the fridge for a while to let the citrus flavors infuse.

  3. Spiced Butter: Add a pinch of your favorite spices, such as cinnamon, nutmeg, or cardamom, to your softened butter. Mix thoroughly and let it sit in the fridge to develop the flavors.

Enhancing Taste With Herbs

Adding herbs to your butter is a simple and effective way to enhance the taste of your culinary creations. Not only does it add a burst of flavor, but it also adds a touch of freshness and complexity to your dishes. Experimenting with different herbal blends can elevate your butter to a whole new level. Whether you prefer a savory blend of rosemary and thyme or a more exotic combination of cilantro and lime, the possibilities are endless. To help you get started, here is a table showcasing some popular herb and spice combinations that you can try in your butter:

Herb/Spice Flavor Profile Best Pairings
Rosemary Earthy, piney Potatoes, lamb
Basil Sweet, peppery Tomatoes, mozzarella
Dill Fresh, tangy Fish, cucumbers
Cinnamon Warm, sweet Apples, baked goods

Experimenting With Flavored Salts

After experimenting with herbs to enhance the taste of my homemade butter, I decided to take my flavor exploration to the next level by experimenting with flavored salts. Flavored salts can add a unique and exciting twist to butter, elevating its taste and making it even more delicious.

Advertisement

Here are three ways I incorporated different salts into my flavored butter recipes:

  1. Smoked Salt Butter: I mixed smoked salt into softened butter, creating a smoky and savory spread that pairs perfectly with grilled meats and vegetables.

  2. Truffle Salt Butter: By combining truffle salt with butter, I created a luxurious and indulgent spread that adds a hint of earthy and aromatic flavor to any dish.

  3. Citrus Salt Butter: I zested some fresh citrus fruits and mixed the zest with sea salt before incorporating it into butter. The result was a bright and tangy butter that adds a burst of freshness to baked goods and seafood.

Frequently Asked Questions

Can I Make Butter From Pasteurized Milk?

Yes, you can make butter from pasteurized milk. It’s a simple process of churning the cream until it separates into butter and buttermilk. Homemade butter can be healthier than store-bought due to its freshness and lack of additives.

How Long Does It Take to Separate the Cream From the Raw Milk?

Separating cream from raw milk depends on various factors, such as temperature and milk fat content. Once separated, the cream can be churned into butter. The churning process can take anywhere from 10 to 30 minutes.

Can I Use an Electric Mixer Instead of a Churn to Make Butter?

Yes, you can use an electric mixer to make butter. However, it’s important to note that the process may differ slightly between churning raw milk and pasteurized milk.

How Long Can I Store Freshly Made Butter?

Freshly made butter can be stored in the refrigerator for up to two weeks. However, its shelf life can be extended by freezing it. Proper storage is essential to maintain its freshness and quality.

Advertisement

What Other Uses Are There for Leftover Buttermilk Besides Using It in Recipes?

Leftover buttermilk can be used in pancakes, biscuits, or even as a marinade for fried chicken. As for alternative methods for making butter, you can also use heavy cream and a mixer.

Conclusion

In conclusion, making butter from raw milk is a delightful and rewarding process. The benefits of raw milk are numerous, as it contains valuable enzymes and nutrients that are lost during pasteurization.

By separating the cream from the raw milk and churning it vigorously, you can easily transform it into creamy and delicious homemade butter.

Don’t forget to wash and store the butter properly to ensure its freshness. And don’t discard the leftover buttermilk! It can be used in various recipes to add flavor and moisture.

So, grab some raw milk and start your butter-making adventure today!

Advertisement
Continue Reading

Trending