Connect with us

Recipes & Culinary Uses

How to Do Delicious Apple Butter Pancakes

Published

on

An image that showcases a slice of warm, buttered toast topped with a generous dollop of velvety apple butter

As a kitchen enthusiast who enjoys trying out new flavors, I was excited to learn about the many ways to savor apple butter. Were you aware that every year, more than 200 million pounds of apples are converted into this tasty spread?

From spreading it on warm toast to incorporating it into baked goods, the possibilities are endless. In this article, I will share some creative and mouthwatering ideas on what to do with apple butter.

Get ready to elevate your meals and satisfy your taste buds!

Key Takeaways

  • Apple butter can be used as a spread or topping for breakfast foods like toast, bagels, and pancakes.
  • It can be incorporated into various breakfast dishes such as waffles, crepes, and oatmeal to add flavor.
  • Apple butter is versatile and can be used in meal prep, including adding it to yogurt or using it as a glaze for roasted meats.
  • It can also be used in baked goods, mixed with cream cheese for a dip, or drizzled over roasted vegetables to add sweetness.

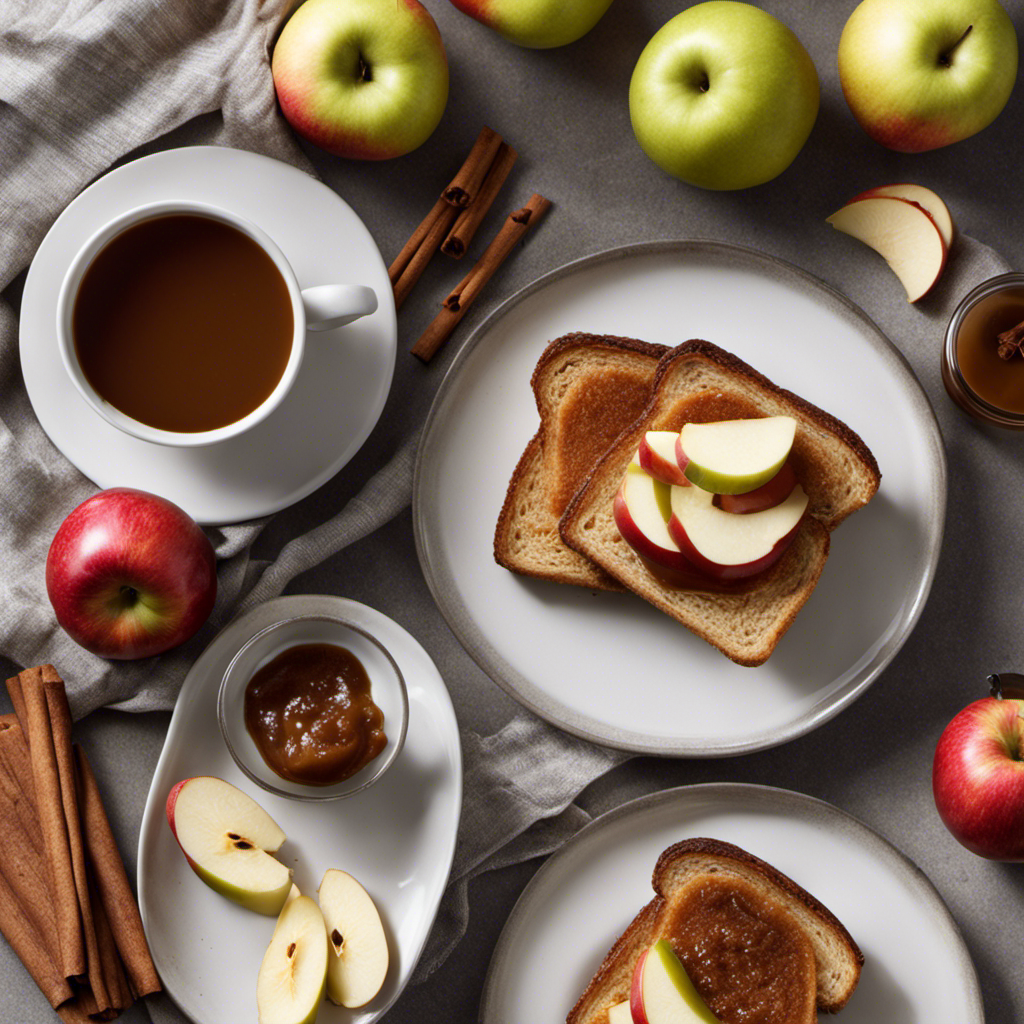
Spread It on Toast or Bagels

You should spread it on your toast or bagels to enjoy the deliciousness of apple butter.

Advertisement

Apple butter is a versatile condiment that can enhance your breakfast spreads and add a burst of flavor to your morning routine. The smooth and velvety texture of apple butter spreads effortlessly onto your favorite bread, creating a delectable combination of sweet and tangy flavors.

Whether you prefer a simple slice of toast or a hearty bagel, apple butter adds a unique twist to your morning meal. It’s not just limited to breakfast either; apple butter makes for creative sandwich toppings as well. The rich, caramel-like taste pairs perfectly with both sweet and savory ingredients, making it a delightful addition to any sandwich.

Use It as a Topping for Pancakes or Waffles

To make your breakfast even more delicious, spread some of that apple butter on top of your pancakes or waffles. The rich, velvety texture of the apple butter adds a burst of flavor that perfectly complements the fluffy goodness of the pancakes or the crispy edges of the waffles.

But don’t stop there! Get creative with your apple butter and use it as a filling for pancakes or crepes. Imagine biting into a warm, fluffy pancake with a sweet and tangy apple butter filling oozing out. It’s pure bliss.

And if you’re feeling indulgent, drizzle some of that apple butter over a scoop of vanilla ice cream or frozen yogurt. The combination of the creamy, cold dessert with the warm, spiced apple butter is simply heavenly.

Advertisement

Mix It Into Oatmeal or Yogurt

When it comes to breakfast, I’m always looking for ways to enhance the flavors and make my meals more exciting.

One of my favorite ways to do this is by mixing apple butter into my oatmeal or yogurt. The sweet and tangy flavor of the apple butter adds a burst of deliciousness to every bite, making my breakfasts feel like a special treat.

Plus, the versatility of apple butter allows me to get creative with my meal prep, whether I’m adding it to overnight oats or layering it in a parfait.

Advertisement

Enhancing Breakfast Flavors

Adding apple butter to your morning toast or pancakes can really elevate the flavors and make breakfast more delicious. Here are a few breakfast recipe ideas and flavor pairing suggestions to make the most of your apple butter:

  1. Apple Butter French Toast: Dip thick slices of bread in a mixture of beaten eggs, milk, and a spoonful of apple butter. Cook until golden brown and top with a dollop of apple butter for a sweet and tangy twist.

  2. Apple Butter Smoothie Bowl: Blend frozen banana, yogurt, and a spoonful of apple butter for a creamy and nutritious breakfast. Top with granola, sliced apples, and a drizzle of apple butter for added crunch and flavor.

  3. Apple Butter Pancakes: Stir apple butter into your pancake batter for a burst of apple flavor. Serve with a generous spread of apple butter and a sprinkle of cinnamon for a cozy and comforting breakfast treat.

  4. Apple Butter Breakfast Parfait: Layer Greek yogurt, granola, and diced apples in a glass. Drizzle each layer with apple butter for a sweet and satisfying breakfast parfait.

With these breakfast ideas and flavor pairings, you can truly transform your morning meal into a delicious apple-infused delight.

Versatility in Meal Prep

One way you can really maximize your meal prep is by exploring the versatility of different ingredients. Take apple butter, for example. This delicious spread can be used in a variety of ways to enhance the flavors of your meals.

Not only can you enjoy it on toast or pancakes, but you can also incorporate it into savory dishes. For instance, adding a spoonful of apple butter to soups can add a hint of sweetness and depth of flavor. It can also be used as a glaze for roasted meats or as a marinade for grilled chicken.

Additionally, apple butter can be a great addition to stir-fries, providing a unique twist to the dish. It adds a touch of sweetness and helps balance out the flavors.

Advertisement

Incorporate It Into Baked Goods Like Muffins or Cookies

When it comes to food, I love exploring different flavor combinations that can take a dish to the next level.

One of my favorite things to experiment with is sweet and savory pairings. There’s something magical about the way contrasting flavors can come together to create a truly unique and delicious experience.

Whether it’s adding a touch of honey to a savory dish or pairing chocolate with salty ingredients, these unexpected combinations can elevate any meal to new heights.

Sweet and Savory Pairings

To enhance the flavors of apple butter, it’s great to experiment with sweet and savory pairings. Here are some creative ways to use apple butter in unique flavor combinations:

  1. Spread it on a grilled cheese sandwich for a delightful mix of sweet and savory.
  2. Mix it with cream cheese to create a delicious and versatile dip for crackers or fresh fruit.
  3. Drizzle it over roasted vegetables, like Brussels sprouts or sweet potatoes, to add a touch of sweetness.
  4. Use it as a glaze for meats, such as pork chops or chicken, to add a burst of flavor.

These sweet and savory flavor combinations not only enhance the taste of apple butter, but they also add a new dimension to your dishes.

Now, let’s explore some other unique flavor combinations using apple butter.

Advertisement

Unique Flavor Combinations

If you’re looking for unique flavor combinations, try adding apple butter to a spicy chili or a tangy barbecue sauce for a delicious twist. The sweet and tangy flavor of apple butter adds a depth of flavor that enhances the richness of these savory dishes.

But did you know that apple butter can also be used to enhance cocktails and pair with cheese? Imagine a refreshing apple butter margarita, where the sweetness of the apple butter balances out the tartness of the lime juice. Or how about a cheese board with a dollop of apple butter alongside a sharp cheddar or creamy brie? The combination of the sweet apple butter and the savory cheese creates a mouthwatering contrast that is sure to impress your guests.

Speaking of sweet treats, let’s dive into the next section and learn how to make apple butter swirl ice cream!

Make Apple Butter Swirl Ice Cream

Let’s start by making the apple butter swirl for the ice cream. It’s a delicious addition that adds a burst of flavor to every creamy bite.

Here’s how you can make it:

Advertisement
  1. Begin by whisking together apple butter, sugar, and a splash of lemon juice in a small saucepan over medium heat. Cook the mixture until it thickens slightly and the flavors meld together, stirring occasionally.

  2. Once the apple butter mixture is ready, let it cool completely before swirling it into your homemade ice cream base.

  3. Gently fold the apple butter swirl into the ice cream mixture, making sure not to overmix.

The result is a delectable treat that combines the rich creaminess of ice cream with the sweet and tangy flavors of apple butter. It’s perfect on its own or as a topping for apple butter cocktails or apple butter bread pudding.

Use It as a Filling for Crepes or Turnovers

After indulging in a bowl of homemade Apple Butter Swirl Ice Cream, my mind started to wander about other creative uses for this delectable spread.

One idea that immediately came to mind was using apple butter as a filling for pastries like crepes or turnovers. Imagine biting into a warm, flaky pastry and being greeted with a burst of sweet and tangy apple goodness.

The creamy texture of the apple butter would perfectly complement the delicate pastry, creating a mouthwatering combination. Whether you’re hosting a brunch or simply looking for a delicious treat, using apple butter as a filling for pastries is a surefire way to impress your guests and satisfy your cravings.

Add It to a Cheese or Charcuterie Board

When it comes to creating the perfect cheese pairing, I love exploring the delightful combination of savory and sweet flavors. There’s something truly magical about the way a savory cheese can be elevated by the addition of a sweet accompaniment.

Advertisement

Whether it’s a tangy blue cheese with a drizzle of honey or a creamy brie with a dollop of fig jam, these combinations never fail to excite the taste buds and create a truly memorable culinary experience.

Join me as we dive into the world of perfect cheese pairings and discover the endless possibilities of this savory and sweet combo.

Perfect Cheese Pairing

The perfect cheese pairing for apple butter is a creamy brie. This combination creates a delightful balance of flavors that enhances breakfast dishes. Here’s why it’s the perfect choice:

  1. Creamy Texture: The smooth and creamy texture of brie complements the velvety consistency of apple butter, creating a luxurious mouthfeel.

  2. Sweet and Savory: The sweet and tangy notes of apple butter beautifully contrast with the rich and slightly salty taste of brie, making each bite a delightful experience.

  3. Toasted Bread: Pairing brie and apple butter with a slice of toasted bread adds a subtle crunch that enhances the overall flavors and creates a satisfying breakfast option.

  4. Versatility: Brie can be enjoyed on its own or combined with other ingredients like nuts or dried fruits, allowing you to experiment and create your own unique flavor combinations.

Savory and Sweet Combo

Now that we’ve explored the perfect cheese pairing for apple butter, let’s delve into the exciting world of sweet and savory flavor combinations.

Apple butter’s versatility extends beyond the realm of spreads and condiments. It can be used in innovative culinary ways to create mouthwatering dishes that balance the sweetness of the apple with savory ingredients.

Advertisement

One delightful example is using apple butter as a glaze for roasted meats like pork or chicken. The natural sweetness of the apple butter caramelizes beautifully, creating a sticky and savory crust that adds depth to the dish.

Another inventive use is incorporating apple butter into marinades or dressings, adding a tangy sweetness that complements vegetables like Brussels sprouts or kale.

Don’t limit your creativity when it comes to apple butter. Explore the possibilities and let it inspire you to create unique and delicious flavor combinations that will tantalize your taste buds.

Make a Savory Glaze for Roasted Meats or Vegetables

To make a savory glaze for roasted meats or vegetables, you can combine apple butter with Dijon mustard, soy sauce, and garlic. This unexpected combination of ingredients creates a deliciously unique flavor profile that will elevate your dishes to a whole new level.

Here are four reasons why you should try using apple butter as a savory glaze alternative:

Advertisement
  1. Sweet and tangy: The natural sweetness of apple butter pairs perfectly with the tanginess of Dijon mustard, creating a well-balanced flavor that will enhance the taste of your roasted meats or vegetables.

  2. Umami richness: The addition of soy sauce adds depth and richness to the glaze, giving your dishes a savory and umami-packed punch.

  3. Aromatic garlic: The minced garlic adds a fragrant and pungent note to the glaze, enhancing the overall flavor and adding complexity to your roasted meats or vegetables.

  4. Versatility: This savory glaze is incredibly versatile and can be used on a variety of meats and vegetables. From roasted chicken to grilled vegetables, the possibilities are endless.

Mix It Into a Salad Dressing or Vinaigrette

You can elevate your salads by mixing apple butter glaze into your dressing or vinaigrette for a unique burst of flavor. The rich and sweet taste of apple butter adds depth and complexity to your usual salad dressing.

Simply whisk together your favorite dressing ingredients, like olive oil, vinegar, mustard, and a spoonful of apple butter glaze. The result is a tangy, slightly sweet dressing that pairs perfectly with fresh greens, fruits, and nuts.

Not only does it add a delicious twist to your salads, but apple butter glaze can also be used as a marinade for grilled chicken or pork. The natural sweetness of the glaze caramelizes beautifully on the grill, creating a mouthwatering crust on the meat.

Use It as a Base for a Barbecue Sauce or Marinade

Mixing apple butter glaze into your barbecue sauce or marinade adds a rich and sweet flavor that will take your grilled dishes to the next level. Here are four reasons why you should try incorporating apple butter into your barbecue sauce or marinade:

  1. Enhanced flavor: The natural sweetness of apple butter complements the smoky and tangy flavors of barbecue sauce, creating a perfect balance of taste.

  2. Caramelization: The sugars in apple butter help to caramelize the meat, giving it a deliciously sticky and slightly charred exterior.

  3. Moisture and tenderness: The sugars and natural juices in apple butter help to tenderize the meat, resulting in juicy and succulent grilled dishes.

  4. Versatility: Apple butter can be used as a base for various barbecue sauce recipes and marinade ideas, allowing you to experiment and create your own unique flavors.

Now that you know how apple butter can elevate your grilled dishes, let’s explore another exciting way to use it – by creating a flavorful dip by combining it with cream cheese or sour cream.

Advertisement

Create a Flavorful Dip by Combining It With Cream Cheese or Sour Cream

After exploring the delicious possibilities of using apple butter as a base for barbecue sauce or marinade, I couldn’t wait to discover more ways to incorporate this versatile ingredient into my meals. That’s when I stumbled upon the idea of creating a flavorful dip by combining apple butter with cream cheese or sour cream. The thought of a creamy pairing with a hint of sweet and tangy apple flavors was simply irresistible.

To give you an idea of the mouthwatering options, let me present a table showcasing some fantastic dip combinations using apple butter:

Dip Combinations Cream Cheese Sour Cream
Apple Butter & Chives YES YES
Apple Butter & Bacon YES YES
Apple Butter & Jalapeno YES YES
Apple Butter & Caramelized Onion YES YES

These flavorful dip options are perfect for parties, gatherings, or even a simple snack. The creamy texture of the cream cheese or sour cream, combined with the rich and tangy apple butter, creates a tantalizing taste experience that will leave you craving for more. So go ahead, dip in and enjoy!

Frequently Asked Questions

Can Apple Butter Be Used in Savory Dishes?

Yes, apple butter can be used in savory dishes. It adds a sweet and tangy flavor as a glaze for roasted meats or in savory marinades. It brings a delicious twist to your savory creations.

Can Apple Butter Be Used as a Base for Barbecue Sauce?

Yes, apple butter can be used as a base for barbecue sauce. Its sweet and tangy flavor adds depth to the sauce, making it perfect for glazing roasted meats. It can also be used as a delicious topping for pancakes.

Advertisement

How Can Apple Butter Be Incorporated Into Salad Dressings?

Apple butter is a versatile ingredient that can be used in various ways. For salad dressings, try making an apple butter vinaigrette for a tangy and sweet flavor. It can also be used as a glaze for roasted vegetables or grilled proteins, adding a creative twist to your dishes.

Can Apple Butter Be Used as a Filling for Turnovers?

Sure, apple butter can definitely be used as a filling for turnovers! It adds a sweet and tangy flavor that pairs well with the flaky pastry. Check out some apple butter recipes for more delicious uses!

What Other Types of Baked Goods Can Apple Butter Be Incorporated Into, Besides Muffins and Cookies?

When it comes to apple butter, the possibilities are endless. From apple butter infused bread recipes to creative apple butter dessert ideas, there are so many delicious ways to incorporate this tasty spread into your baking.

Conclusion

In conclusion, apple butter is a versatile and delicious condiment that can be enjoyed in a variety of ways. From spreading it on warm toast to swirling it into homemade ice cream, the possibilities are endless.

Its sweet and tangy flavor adds a burst of excitement to any dish. So why not get creative and explore the different ways you can incorporate apple butter into your meals? It’s like having a jar of autumnal bliss at your fingertips.

Advertisement

So go ahead, indulge in the magic of apple butter and let your taste buds dance with delight.

Continue Reading
Advertisement

Recipes & Culinary Uses

How to Make Creamy Butter Garlic Pasta

Published

on

By

An image of a steaming plate of al dente pasta twirled with a rich, golden butter garlic sauce

I am going to reveal to you the secret to making the most delicious butter garlic pasta you have ever tried.

Get ready to indulge in a symphony of flavors as tender pasta gets enveloped in a rich, velvety butter garlic sauce.

This recipe is simple yet sophisticated, perfect for impressing guests or treating yourself to a truly decadent meal.

So grab your apron and let’s dive into the magic of homemade butter garlic pasta.

Trust me, you won’t be able to resist.

Advertisement

Key Takeaways

  • Choose long and thin pasta like spaghetti or linguine for the best texture.
  • Cook the pasta al dente to prevent mushiness and allow the sauce to cling to the strands.
  • Prepare a well-seasoned and fragrant garlic butter sauce with sautéed minced garlic and optional herbs and spices.
  • Combine the cooked pasta with the simmered sauce, ensuring every strand is coated, and garnish with Parmesan cheese and parsley.

Choosing the Right Pasta

I’ll pick out the perfect type of pasta for my butter garlic pasta. When it comes to choosing the right pasta, there are so many options to consider. Different types of pasta shapes can greatly impact the overall texture and taste of the dish.

For a butter garlic pasta, I’d opt for a long and thin pasta shape like spaghetti or linguine. These types of pasta allow the butter garlic sauce to cling onto the strands, ensuring each bite is full of flavor.

Additionally, the importance of cooking the pasta until it’s al dente can’t be understated. Al dente pasta has a slight bite to it, providing a satisfying texture and preventing it from becoming mushy when combined with the butter garlic sauce.

Preparing the Garlic Butter Sauce

To start, I’ll heat up the olive oil in a skillet and sauté the minced garlic until it becomes fragrant. This step is crucial as it will infuse the sauce with a rich, savory flavor.

Advertisement

Once the garlic is golden and aromatic, I’ll enhance the garlic butter sauce by adding a handful of fresh herbs, such as chopped parsley or basil. These herbs not only add a burst of freshness but also contribute to the overall visual appeal of the dish.

Next, I’ll pour in a splash of white wine to the garlic butter sauce. The wine adds a subtle tanginess and complexity that elevates the flavors. This step is optional, but it truly takes the sauce to another level.

With the garlic butter sauce now perfectly seasoned and fragrant, it’s time to move on to boiling the pasta.

Boiling the Pasta

Advertisement

Once the water reaches a rolling boil, I add a generous amount of salt before adding the pasta. Achieving the perfect al dente texture is essential for a delicious butter garlic pasta. I carefully follow the instructions on the pasta package, cooking it for the recommended time minus a minute or two. This ensures that the pasta is cooked, but still firm to the bite.

To add a twist to the traditional garlic butter pasta, I sometimes incorporate a variety of herbs and spices into the boiling water. A pinch of red pepper flakes adds a subtle kick, while a handful of fresh basil leaves brings a refreshing aroma. These additions elevate the flavors and take the dish to a whole new level.

Cooking the Garlic Butter Sauce

While simmering the sauce, I stir in a knob of butter until it melts and blends seamlessly with the other ingredients. This step is crucial for creating a rich and flavorful garlic butter sauce that will elevate your pasta dish to new heights.

Here are three cooking techniques and flavor variations that you can experiment with to enhance the taste of your butter garlic pasta:

  • Sautéing the garlic: Instead of simply adding minced garlic to the sauce, try sautéing it in the butter until fragrant and golden brown. This will bring out the natural sweetness and depth of flavor in the garlic.

  • Adding herbs and spices: To take your sauce to the next level, consider incorporating herbs like parsley or basil, and spices like red pepper flakes or black pepper. These additions will add complexity and a touch of heat to your butter garlic pasta.

  • Using flavored butter: If you want to get creative with your flavor profile, try using flavored butter. You can find a wide variety of options at the grocery store or make your own by mixing in herbs, spices, or even cheese. This will infuse your sauce with a unique and delicious taste.

Combining the Pasta and Sauce

Advertisement

After the sauce has simmered to perfection, I pour it over the cooked pasta and toss until every strand is coated in the creamy goodness.

The combination of the rich butter and aromatic garlic creates a delectable flavor that’s hard to resist.

To enhance the dish even further, I like to garnish it with a sprinkle of freshly grated Parmesan cheese and a handful of chopped parsley. This adds a touch of freshness and brings out the flavors of the sauce.

As for serving suggestions, this butter garlic pasta pairs well with a simple green salad or some crusty garlic bread on the side.

Advertisement

For variations and substitutions, you can experiment with different types of pasta, such as spaghetti or fettuccine, and add in ingredients like sautéed mushrooms or grilled chicken for added protein.

The possibilities are endless, but one thing is for sure: this butter garlic pasta is a crowd-pleaser that will leave everyone wanting more.

Frequently Asked Questions

How Can I Make This Recipe Vegan-Friendly?

To make this recipe vegan-friendly, you can use vegan substitutes for butter, such as plant-based margarine or coconut oil. Additionally, opt for dairy-free options like almond milk or cashew cream instead of regular milk or cream.

Can I Use Gluten-Free Pasta for This Recipe?

Sure, you can use gluten-free pasta for this recipe. Just remember to follow the cooking instructions for gluten-free pasta and consider alternatives like rice or quinoa pasta for a delicious, gluten-free version.

Can I Substitute Olive Oil for Butter in the Garlic Butter Sauce?

Substituting olive oil or vegan butter in the garlic butter sauce can alter the taste and texture of the dish. Olive oil adds a rich, fruity flavor, while vegan butter provides a creamy and buttery texture.

Advertisement

How Can I Make This Dish Spicier?

To make this dish spicier, there are several ways to add heat. You can incorporate hot chili flakes, spicy red pepper sauce, or even diced jalapeños. Another alternative to garlic could be using ginger for a flavorful twist.

Can I Add Vegetables or Protein to This Pasta Dish?

Adding vegetables and protein to this pasta dish is a great idea. It not only enhances the nutritional value but also adds texture and flavor. I recommend sautéing some bell peppers and adding cooked chicken for a delicious and balanced meal.

Conclusion

In conclusion, making butter garlic pasta is a simple yet delicious dish that can be enjoyed by everyone.

The rich and creamy garlic butter sauce perfectly coats the al dente pasta, creating a mouthwatering combination of flavors.

This recipe allows you to indulge in a culinary experience that’s both satisfying and comforting, like a warm embrace on a chilly evening.

Advertisement

So why not give it a try and treat yourself to a delightful meal?

Continue Reading

Recipes & Culinary Uses

Easy Steps to Make Butter from Raw Milk Using a Mixer

Published

on

By

An image showcasing the step-by-step process of transforming creamy raw milk into luscious butter using a mixer

As I immerse myself in the realm of culinary exploration, I came across a hidden treasure: crafting butter from raw milk using a mixer. With just a few basic ingredients and my reliable mixer, I unveiled the key to producing smooth, homemade butter that would impress any chef.

In this article, I will guide you through the precise steps, from gathering the ingredients to storing the final product. Get ready to churn and savor the rich rewards of your own creation.

Let’s butter up!

Key Takeaways

  • Choose a mixer with a powerful motor and sturdy construction
  • Strain and pasteurize the raw milk before churning
  • Use a high-speed setting on the mixer for faster butter formation
  • Store homemade butter in airtight containers to maintain flavor and freshness

Gathering the Ingredients and Equipment

I’m gathering the ingredients and equipment needed to make butter from raw milk in my mixer.

Advertisement

To ensure a successful butter-making process, it’s crucial to choose the right mixer. Look for a mixer with a powerful motor and a sturdy construction that can handle the thick consistency of the cream. A high-speed setting is also desirable to expedite the churning process.

When it comes to sourcing raw milk, it’s important to prioritize safety and quality. Look for local farms or dairies that follow strict hygiene practices and ensure the cows are healthy and well-cared for. Freshness is key, so opt for milk that has been recently produced and stored properly.

Preparing the Raw Milk for Churning

To start preparing the raw milk for churning, I’ll first need to strain out any impurities. This ensures that the milk is clean and safe for consumption.

Before churning, it’s important to pasteurize the raw milk to eliminate any harmful bacteria that may be present. Pasteurization involves heating the milk to a specific temperature and holding it there for a set period of time. This process helps to destroy any potential pathogens without significantly altering the taste or nutritional composition of the milk.

Once the raw milk is pasteurized, there are different methods of churning it into butter. One method involves using a mixer, which agitates the milk until the fat globules separate from the liquid, forming butter.

Advertisement

Churning the Raw Milk in the Mixer

Using a high-speed setting, I’ll let the mixer agitate the milk until the fat globules separate and butter forms. The speed of the mixer plays a crucial role in the churning process. A higher speed will help the fat globules to separate more quickly, resulting in butter formation. The churning time will vary depending on the mixer speed and the amount of milk being churned. It is important to monitor the process closely to avoid over-churning, which can lead to a grainy texture. To give you an idea of the correlation between mixer speed and churning time, here is a table that summarizes the approximate time required for butter formation at different speeds:

Mixer Speed Churning Time (minutes)
Low 20-30
Medium 15-20
High 10-15
Very High 5-10
Turbo 2-5

Separating the Butter From the Buttermilk

After the churning process, I strain the mixture through a fine-mesh sieve to separate the butter from the buttermilk. The creamy liquid slowly drips down, leaving behind the beautiful golden butter. It’s a delicate process, requiring patience and precision.

As I watch the buttermilk flow through the sieve, I can’t help but appreciate the benefits of using raw milk for making butter. The rich and complex flavors of raw milk add depth and character to the final product. It’s like tasting a piece of the farm, with its grassy undertones and hints of sweetness.

Advertisement

To further enhance the butter’s taste, there are various methods for flavoring homemade butter. From the simplicity of sprinkling salt to the creativity of adding herbs and spices, the possibilities are endless.

Storing and Using Your Homemade Butter

When storing my homemade butter, I prefer to use airtight containers to keep it fresh and prevent any unwanted odors from seeping in. It’s important to protect the butter’s flavor and texture, as well as extend its shelf life. Additionally, I like to experiment with different flavors to add a unique twist to my butter. Some creative ways to flavor homemade butter include incorporating herbs like rosemary or thyme, adding spices like cinnamon or garlic powder, or mixing in sweet ingredients like honey or maple syrup. This allows me to customize my butter based on my preferences and the dishes I plan to use it in. Speaking of which, homemade butter has a multitude of uses in cooking and baking. It can be spread on toast, melted over vegetables, used as a base for sauces, or incorporated into pastry dough for flakier results. The possibilities are endless!

Flavor Ingredients Recommended Uses
Herb-infused Rosemary, thyme Mashed potatoes, roasted vegetables
Spiced Cinnamon, garlic powder Toast, pancakes
Sweet Honey, maple syrup Baked goods, waffles

Frequently Asked Questions

How Long Does It Take for the Raw Milk to Turn Into Butter in the Mixer?

To speed up the process of turning raw milk into butter in a mixer, you can increase the speed and duration of mixing. It is not possible to make butter in a mixer without using raw milk.

Advertisement

Can I Use Pasteurized Milk Instead of Raw Milk for Making Butter in a Mixer?

Using raw milk instead of pasteurized milk for making butter in a mixer has several benefits. It enhances the flavor and nutritional value of the butter. To achieve the best consistency, ensure the milk is fresh and at room temperature before churning.

What Is the Ideal Temperature for the Raw Milk Before Churning It in the Mixer?

The ideal temperature for raw milk before churning it in the mixer is around 50-55°F. This ensures proper fat separation and reduces churning time. It’s crucial to maintain the correct temperature for the best results.

Can I Add Flavorings or Herbs to the Butter While Churning It in the Mixer?

Yes, you can add flavorings or herbs to the butter while churning it in the mixer. This is a great way to incorporate flavor into homemade butter and experiment with different tastes.

Can I Use a Hand Mixer Instead of a Stand Mixer to Churn the Raw Milk Into Butter?

Using a hand mixer for churning raw milk into butter has its pros and cons. It can be more convenient and easier to handle, but may take longer and require more effort compared to a stand mixer. Other methods without a mixer include shaking in a jar or using a food processor.

Conclusion

In conclusion, making butter from raw milk in a mixer is a simple and rewarding process. By following the steps outlined above and using the right ingredients and equipment, you can transform fresh raw milk into delicious homemade butter.

Advertisement

Remember, practice makes perfect, so don’t be discouraged if your first attempt isn’t perfect. With a little patience and perseverance, you’ll be churning out creamy butter in no time, and soon you’ll be able to spread it on toast and enjoy the fruits of your labor.

Continue Reading

Recipes & Culinary Uses

Make Rich Butter from Raw Milk

Published

on

By

An image capturing the process of making butter from raw milk

Hey! Have you ever thought about how to turn raw milk into homemade butter? Look no further, I’ve got the solution for you.

In this article, I’ll take you through the step-by-step process of turning that creamy goodness into delicious homemade butter.

We’ll explore the benefits of using raw milk, learn how to separate the cream, and even discover different flavors you can infuse into your butter.

So, grab your apron and let’s get churning!

Key Takeaways

  • Raw milk contains essential vitamins, minerals, and enzymes that are destroyed during pasteurization.
  • Separating the cream from raw milk can be done through gravity separation, centrifugal separation, or cold separation.
  • Churning the cream into butter can be done through hand churning, using a stand mixer with a whisk attachment, or using a food processor with a blade attachment.
  • Washing and storing the freshly made butter involves cleaning the butter container and preserving its freshness by wrapping it tightly in wax paper or using an airtight container.

Understanding the Benefits of Raw Milk

Advertisement

Raw milk has numerous health benefits that are not found in pasteurized milk. Understanding the nutritional value of raw milk is important for those seeking a natural and wholesome source of nutrients.

Contrary to popular belief, raw milk is not a dangerous product when handled and consumed properly. In fact, it contains essential vitamins, minerals, and enzymes that are destroyed during the pasteurization process.

Raw milk is rich in beneficial bacteria and probiotics, which can support a healthy gut microbiome and enhance digestion. Additionally, raw milk is a good source of bioavailable nutrients such as calcium, protein, and healthy fats.

Debunking myths about raw milk is crucial to prevent misinformation and promote informed choices regarding our food.

Preparing the Raw Milk for Butter Making

To prepare the milk for butter making, it’s important to first skim off the cream. This step is crucial as it allows us to separate the high-fat cream from the milk, which is necessary for obtaining a good quality butter.

Advertisement

Here are three separating techniques to help you achieve the best results:

  1. Gravity separation: After allowing the milk to stand undisturbed for a few hours, the cream naturally rises to the top, making it easy to skim off with a spoon or ladle.

  2. Centrifugal separation: Using a cream separator machine, the milk is spun at high speeds, causing the heavier cream to separate from the lighter milk. This method is efficient and yields a higher cream quality.

  3. Cold separation: By refrigerating the milk overnight, the cream becomes denser and easier to separate. Skimming off the cold cream results in a richer and creamier butter.

Separating the Cream From the Raw Milk

If you want to achieve the best results when separating the cream from the milk, try using gravity separation, centrifugal separation, or cold separation techniques.

Gravity separation involves allowing the milk to sit undisturbed in a container for a period of time, allowing the cream to rise to the top.

Advertisement

Centrifugal separation utilizes a machine that spins the milk at high speeds, forcing the cream to separate from the milk.

Cold separation involves chilling the milk to a low temperature, causing the cream to solidify and separate from the milk.

These techniques are beneficial because consuming raw dairy has numerous health benefits, such as improved digestion, increased nutrient absorption, and enhanced immune function.

Additionally, if you don’t have access to a churn, these separation methods provide alternatives for obtaining cream for making butter.

Churning the Cream Into Butter

Once the cream has separated from the milk, you can start churning it into delicious butter. Churning is the process of agitating the cream until it transforms into butter.

Advertisement

Here are three techniques to help you achieve the perfect consistency:

  1. Hand Churning: This traditional method involves using a small churn or jar and physically shaking or rocking it back and forth until the cream turns into butter.

  2. Stand Mixer: If you have a stand mixer with a whisk attachment, you can use it to churn the cream. Start at a low speed and gradually increase until the butter forms.

  3. Food Processor: Another option is to use a food processor with a blade attachment. Pulse the cream until it separates into butter and buttermilk.

Troubleshooting common butter making problems:

  • If the cream isn’t thickening, ensure it is at the right temperature (around 50-55°F) and give it more time to churn.
  • If the butter is too soft, refrigerate it for a while before churning again.
  • If the butter is too hard, let it soften at room temperature or add a small amount of buttermilk to adjust the consistency.

After churning the cream into butter, it’s time to move on to the next step of washing and storing the freshly made butter.

Washing and Storing the Freshly Made Butter

When it comes to washing and storing freshly made butter, there are a few key points to consider.

Advertisement

First, cleaning the butter container is essential to maintain the quality of the butter. I recommend using warm soapy water and a soft sponge to remove any residue before drying it thoroughly.

Second, preserving the butter’s freshness is crucial to prolong its shelf life. To do this, I suggest wrapping the butter tightly in wax paper or placing it in an airtight container to protect it from air and odors.

Lastly, it’s important to store butter at the proper temperature. The recommended storage temperature for butter is between 32-40°F (0-4°C), as this helps to maintain its texture and prevent spoilage.

Cleaning the Butter Container

Before cleaning the butter container, make sure to remove any leftover butter residue. Cleaning the butter container is essential to maintain its freshness and prevent any cross-contamination. Here are three effective cleaning techniques to ensure a clean and sanitized container:

  1. Soak in hot, soapy water: Fill the container with hot water and add a few drops of dish soap. Let it sit for a few minutes to loosen any residue, then scrub with a sponge or brush.

  2. Use vinegar solution: Mix equal parts white vinegar and water in the container. Let it sit for about 15 minutes to dissolve any stubborn residue. Scrub with a sponge or brush, then rinse thoroughly.

  3. Bleach solution: Mix 1 tablespoon of bleach with 1 gallon of water. Let the container soak in the solution for 10 minutes, then scrub and rinse well.

Preserving Butter’s Freshness

After cleaning the butter container, the next step is to ensure that the butter stays fresh and maintains its texture for as long as possible. This is important because nobody wants to end up with rancid butter. To preserve the butter’s freshness, there are a few key things you can do. Firstly, storing the butter in an airtight container or wrapping it tightly in wax paper will help prevent it from being exposed to air and developing off flavors. Secondly, keeping the butter refrigerated at a consistent temperature, ideally around 40°F (4°C), will slow down the process of it going rancid. Lastly, if you want to store butter for an extended period of time, freezing it is a great option as it can extend its shelf life for several months. By following these steps, you can enjoy fresh and flavorful butter for all your culinary needs.

Advertisement
Preserving Butter’s Freshness
Store butter in an airtight container or wrap tightly in wax paper.
Refrigerate butter at a consistent temperature of around 40°F (4°C).
Freeze butter for extended storage, which can extend its shelf life for several months.
Follow these steps to enjoy fresh and flavorful butter for all your culinary needs.

Recommended Storage Temperature

Storing butter in the refrigerator at a consistent temperature of around 40°F (4°C) helps to maintain its freshness and prevent it from going rancid. Here are three recommended storage methods and the ideal temperature range for butter:

  1. Wrap it properly: Use parchment paper or airtight containers to wrap the butter. This will protect it from absorbing odors and prevent it from drying out.

  2. Keep it away from light: Exposure to light can cause butter to spoil faster. Store it in a cool, dark place, like the refrigerator’s butter compartment or a covered butter dish.

  3. Avoid temperature fluctuations: Butter can easily absorb flavors and odors from other foods in the fridge. To maintain its quality, store it away from strong-smelling foods and make sure the temperature remains constant.

Following these recommended storage methods and keeping the butter at the ideal temperature range will help to preserve its freshness and taste for longer periods.

Using Leftover Buttermilk in Recipes

You can easily use leftover buttermilk in recipes to add a tangy flavor. Buttermilk is a versatile ingredient that can enhance the taste and texture of various baked goods. It’s a great substitute for regular milk in recipes because it adds a unique tanginess and richness. Here are some creative uses for leftover buttermilk in baking:

Row Buttermilk Recipe Result
1 Pancakes Fluffy and Light and
tender texture fluffy pancakes
2 Biscuits Tender and Flaky and
flaky texture buttery biscuits
3 Cakes Moist and Moist and
tender texture tender cakes
4 Fried chicken Crispy and Juicy and
flavorful coating flavorful chicken

Exploring Variations and Flavors in Homemade Butter

When it comes to homemade butter, there are endless possibilities for adding unique flavors and enhancing its taste.

One way to do this is through unique butter infusions, where you can mix in various ingredients like garlic, herbs, or even fruit zest to create a personalized flavor profile.

Advertisement

Another option is to enhance the taste of your homemade butter by incorporating herbs such as rosemary, thyme, or basil, which can add a delightful aroma and taste.

Lastly, experimenting with flavored salts like smoked sea salt or truffle salt can take your butter to a whole new level, adding a burst of flavor that will elevate any dish.

Unique Butter Infusions

To add unique flavors to your butter, try infusing it with herbs or spices. Butter infusion techniques offer a creative way to elevate the taste of your homemade butter. Here are three ideas to get you started:

  1. Garlic and Herb Butter: Melt your butter, then add minced garlic and chopped fresh herbs like rosemary, thyme, or parsley. Let the flavors infuse for a few hours before refrigerating.

  2. Citrus Zest Butter: Grate the zest of an orange, lemon, or lime into your softened butter. Mix well and let it sit in the fridge for a while to let the citrus flavors infuse.

  3. Spiced Butter: Add a pinch of your favorite spices, such as cinnamon, nutmeg, or cardamom, to your softened butter. Mix thoroughly and let it sit in the fridge to develop the flavors.

Enhancing Taste With Herbs

Adding herbs to your butter is a simple and effective way to enhance the taste of your culinary creations. Not only does it add a burst of flavor, but it also adds a touch of freshness and complexity to your dishes. Experimenting with different herbal blends can elevate your butter to a whole new level. Whether you prefer a savory blend of rosemary and thyme or a more exotic combination of cilantro and lime, the possibilities are endless. To help you get started, here is a table showcasing some popular herb and spice combinations that you can try in your butter:

Herb/Spice Flavor Profile Best Pairings
Rosemary Earthy, piney Potatoes, lamb
Basil Sweet, peppery Tomatoes, mozzarella
Dill Fresh, tangy Fish, cucumbers
Cinnamon Warm, sweet Apples, baked goods

Experimenting With Flavored Salts

After experimenting with herbs to enhance the taste of my homemade butter, I decided to take my flavor exploration to the next level by experimenting with flavored salts. Flavored salts can add a unique and exciting twist to butter, elevating its taste and making it even more delicious.

Advertisement

Here are three ways I incorporated different salts into my flavored butter recipes:

  1. Smoked Salt Butter: I mixed smoked salt into softened butter, creating a smoky and savory spread that pairs perfectly with grilled meats and vegetables.

  2. Truffle Salt Butter: By combining truffle salt with butter, I created a luxurious and indulgent spread that adds a hint of earthy and aromatic flavor to any dish.

  3. Citrus Salt Butter: I zested some fresh citrus fruits and mixed the zest with sea salt before incorporating it into butter. The result was a bright and tangy butter that adds a burst of freshness to baked goods and seafood.

Frequently Asked Questions

Can I Make Butter From Pasteurized Milk?

Yes, you can make butter from pasteurized milk. It’s a simple process of churning the cream until it separates into butter and buttermilk. Homemade butter can be healthier than store-bought due to its freshness and lack of additives.

How Long Does It Take to Separate the Cream From the Raw Milk?

Separating cream from raw milk depends on various factors, such as temperature and milk fat content. Once separated, the cream can be churned into butter. The churning process can take anywhere from 10 to 30 minutes.

Can I Use an Electric Mixer Instead of a Churn to Make Butter?

Yes, you can use an electric mixer to make butter. However, it’s important to note that the process may differ slightly between churning raw milk and pasteurized milk.

How Long Can I Store Freshly Made Butter?

Freshly made butter can be stored in the refrigerator for up to two weeks. However, its shelf life can be extended by freezing it. Proper storage is essential to maintain its freshness and quality.

Advertisement

What Other Uses Are There for Leftover Buttermilk Besides Using It in Recipes?

Leftover buttermilk can be used in pancakes, biscuits, or even as a marinade for fried chicken. As for alternative methods for making butter, you can also use heavy cream and a mixer.

Conclusion

In conclusion, making butter from raw milk is a delightful and rewarding process. The benefits of raw milk are numerous, as it contains valuable enzymes and nutrients that are lost during pasteurization.

By separating the cream from the raw milk and churning it vigorously, you can easily transform it into creamy and delicious homemade butter.

Don’t forget to wash and store the butter properly to ensure its freshness. And don’t discard the leftover buttermilk! It can be used in various recipes to add flavor and moisture.

So, grab some raw milk and start your butter-making adventure today!

Advertisement
Continue Reading

Trending