Connect with us

Recipes & Culinary Uses

How to Tell if Almond Butter Is Bad: A Simple Guide

Published

on

An image showcasing a jar of almond butter with a pungent, off-putting odor emanating from it

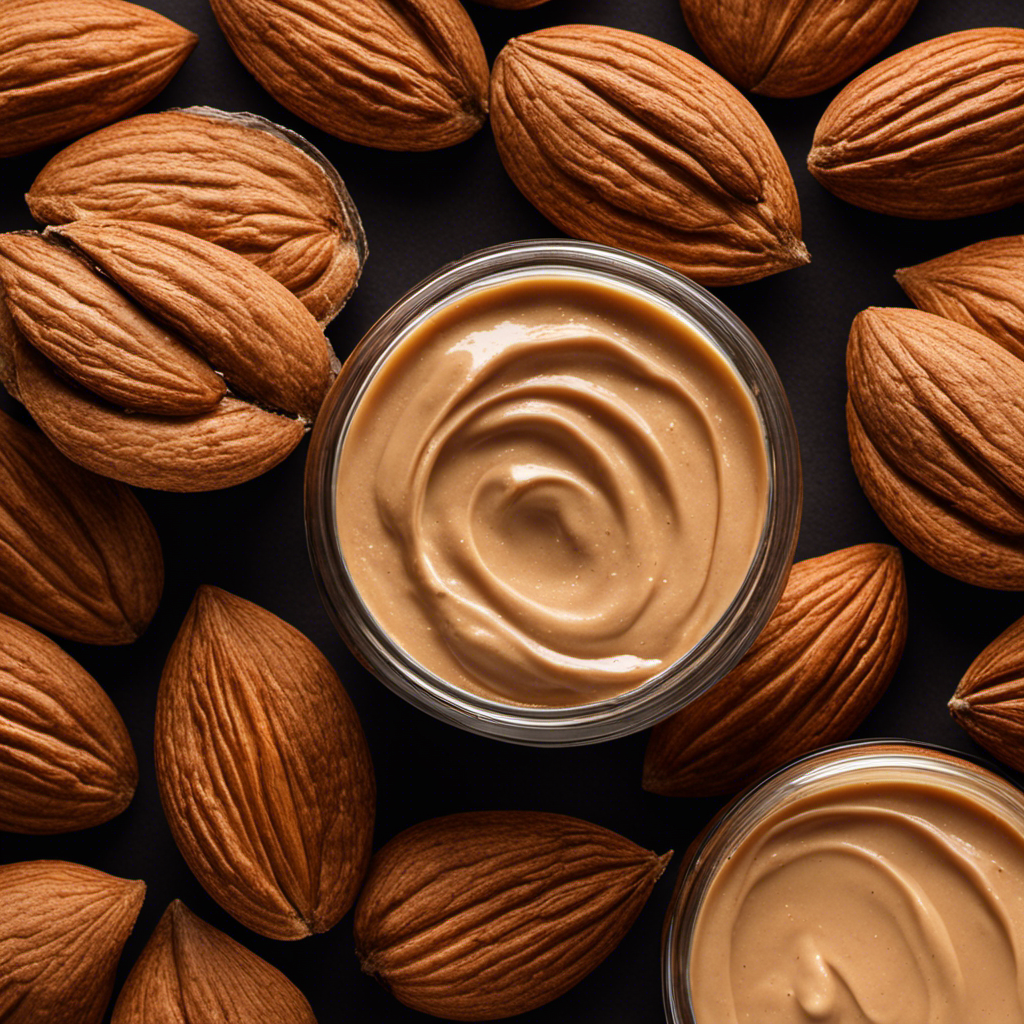
As a lover of almonds, I often contemplate the dangers of spoiled butter. Today, my fellow almond fans, we set out to uncover the indications of rancidity in our cherished almond butter.

From the expiration date to the appearance, texture, smell, and taste, we shall leave no stone unturned. Prepare yourselves for a journey through the realms of oil separation, mold, discoloration, and rancid flavors.

Fear not, for armed with knowledge, we shall conquer any bad almond butter that dares cross our palates.

Key Takeaways

  • Pay attention to the expiration date and consume almond butter within 3 to 6 months after opening for the best flavor.
  • Store almond butter in a cool, dry place to prevent mold growth and discoloration.
  • Check for a rancid smell or taste, as well as any mold or discoloration, to determine if almond butter is spoiled.
  • Proper storage, such as refrigeration and tightly sealing the jar, can help maintain the freshness and prevent an unpleasant odor in almond butter.

Expiration Date

The expiration date on almond butter indicates when it’s no longer fresh. It is important to pay attention to this date to ensure the quality and taste of the almond butter.

Advertisement

The shelf life of almond butter can vary depending on the brand and storage conditions. Generally, unopened almond butter can last for about six months to a year past its expiration date. However, once opened, it is recommended to consume it within three to six months for the best flavor.

To extend the shelf life of almond butter, it is important to store it properly. Keep it in a cool, dry place away from direct sunlight. It is also advisable to refrigerate the almond butter after opening to slow down the oxidation process and maintain its freshness.

Appearance

When it comes to determining the quality of almond butter, there are a few key points to consider.

First, check for any signs of mold or discoloration. If you notice any growth or a change in color, it’s a clear indication that the almond butter has gone bad.

Additionally, pay attention to the smell and taste. If the almond butter has a rancid odor or taste, it’s best to discard it.

Advertisement

Mold or Discoloration

If you see any mold or discoloration in your almond butter, it’s time to throw it out. Mold can develop on almond butter when it is exposed to moisture or if it is stored improperly. To prevent mold growth, it is important to store your almond butter in a cool, dry place. Avoid exposing it to direct sunlight or high temperatures, as this can cause the oil in the almond butter to separate and create an ideal environment for mold growth.

Additionally, make sure to always use a clean utensil when scooping out almond butter to prevent any contamination. If you notice any discoloration, such as a green or black tint, it is a clear sign that mold has started to grow, and it is best to discard the entire jar to avoid any potential health risks.

Rancid Smell or Taste

Check for a strong, unpleasant smell or taste in your almond butter – it’s a clear indication that it has gone rancid and should be discarded. Rancidity occurs when the natural fats in the almond butter break down, resulting in a foul odor and taste.

To determine if your almond butter has gone bad, follow these steps:

  • Smell: Take a whiff of the almond butter. If it smells off, sour, or generally unpleasant, it’s a sign of rancidity.

  • Taste: If you’re brave enough, give the almond butter a small taste. Rancid almond butter will have a bitter, metallic, or soapy taste that is unmistakable.

  • Visual inspection: While not always a reliable indicator, check for any visible signs of mold or discoloration. Rancid almond butter may appear darker in color or have a slimy texture.

Separation or Clumping

To fix the separation or clumping in your almond butter, simply give it a good stir or mix it well to restore its smooth consistency.

Advertisement

Separation or clumping is a common issue with natural almond butter due to the absence of stabilizers. Over time, the oils in the almond butter tend to rise to the top, causing separation. This is a natural process and does not indicate that the almond butter has gone bad.

However, if the separation or clumping is accompanied by an off smell or taste, it may be a sign of spoilage.

To prevent this, make sure to store your almond butter in a cool, dry place away from direct sunlight. Proper storage conditions and a sealed container can help extend the shelf life of your almond butter and maintain its smooth texture.

Texture

You can tell if your almond butter has gone bad by feeling for any clumps or graininess in its texture. Over time, almond butter may undergo textural changes that indicate it is no longer safe to consume. Here are three signs to look out for:

  • Presence of clumps or graininess: If your almond butter feels lumpy or has a gritty texture, it may have spoiled. This can occur when the oils in the almond butter separate and solidify.

  • Mold or discoloration: Inspect the almond butter for any signs of mold growth or unusual colors. These are clear indications that it has gone bad and should be discarded.

  • Rancid smell: A strong, unpleasant odor coming from the almond butter is another indicator that it is no longer fresh. This smell is caused by the oils in the almonds oxidizing over time.

It is important to note that the shelf life of almond butter can vary depending on factors such as the brand, storage conditions, and whether it is homemade or store-bought. Always check the expiration date and use your senses to determine if it is still safe to eat.

Advertisement

Smell

When it comes to determining whether a food is spoiled or not, smell plays a crucial role. An off-putting odor can be a clear indicator that something is wrong with the food.

Whether it’s a rancid scent or an unpleasant smell, our noses are often the first line of defense in detecting spoiled food and protecting ourselves from potential harm.

Off-Putting Odor Indicator

If almond butter has a strong, unpleasant odor, it’s a clear sign that it may be bad. The smell of almond butter should be nutty and slightly sweet, so any off-putting odors should not be ignored.

Here are some remedies to consider if you encounter this issue:

  • Store the almond butter in the refrigerator: This can help preserve its freshness and prevent the development of a rancid smell.

  • Check the expiration date: Almond butter, like any other food product, has a shelf life. Make sure to consume it before the expiration date to avoid any unpleasant smells.

  • Consider alternative almond butter options: If you consistently experience bad odors with your almond butter, it might be worth trying different brands or making your own at home.

Rancid Scent Detection

Detecting a rancid scent in your almond butter is a clear sign that it may have gone bad. The quality of almond butter can be greatly affected by improper storage conditions. When exposed to air, light, and heat, the oil in almond butter can become oxidized, leading to a rancid smell and taste.

Advertisement

To ensure the best quality and prolong the shelf life of your almond butter, it is important to store it in a cool, dark place, away from direct sunlight and heat sources. Additionally, tightly sealing the jar after each use can help prevent air from entering and causing oxidation.

By following these storage guidelines, you can minimize the chances of encountering a rancid scent in your almond butter and enjoy its fresh and delicious flavor for longer.

However, an unpleasant smell is not the only warning sign that your almond butter may have gone bad.

Unpleasant Smell Warning

Storing almond butter in improper conditions can greatly affect its quality, leading to an unpleasant smell and taste. Detecting an unpleasant odor is a clear indication that the almond butter has gone bad.

To help you determine if your almond butter is still fresh, here are some freshness indicators to look out for:

Advertisement
  • Visual Inspection: Check for any discoloration or mold growth on the surface of the almond butter.

  • Texture Test: Feel the consistency of the almond butter. If it has become grainy or clumpy, it may be a sign of spoilage.

  • Taste Test: Take a small amount and taste it. If it tastes rancid or has a bitter flavor, it’s best to discard it.

Taste

To determine if your almond butter has gone bad, simply taste it and see if it has a rancid or off flavor. Off flavor detection is an important aspect of sensory evaluation when it comes to food products.

When I taste the almond butter, I pay close attention to any unusual or unpleasant taste. A rancid or off flavor can be a sign that the almond butter is spoiled or has been stored improperly. It might have a sour, bitter, or metallic taste that is different from the usual nutty flavor.

Additionally, spoiled almond butter can have a greasy or slimy texture. If I detect any of these signs, it’s best to discard the almond butter to avoid any potential health risks.

Oil Separation

When you see oil separation in your almond butter, simply give it a stir before using to redistribute the oils. This is a common occurrence in natural almond butter due to its high oil content. It is not a sign of spoilage or a decrease in oil quality, but rather a natural process.

However, the presence of oil separation can be influenced by storage conditions. To ensure the best quality and taste of your almond butter, it is recommended to store it in a cool, dry place away from direct sunlight and heat sources. Avoid exposing it to fluctuating temperatures or humidity, as this can accelerate oil separation.

Advertisement

Mold or Discoloration

As I mentioned earlier, one of the signs that almond butter has gone bad is the presence of mold or discoloration. Mold can develop on almond butter if it has been stored improperly or for too long. To prevent mold growth, it is important to store almond butter in a cool, dry place away from direct sunlight. Additionally, make sure to tightly seal the jar after each use to minimize exposure to air and moisture.

Here is a table summarizing some tips for mold prevention and proper storage of almond butter:

Mold Prevention Tips Proper Storage
Store in a cool, dry place Keep away from direct sunlight
Ensure jar is tightly sealed Minimize exposure to air and moisture
Check for signs of mold or discoloration before consuming Use within the recommended shelf life

Rancid or Off Flavors

One indicator that almond butter may have spoiled is if it has a rancid or off taste. This is crucial to detecting the quality of the almond butter.

To ensure that your almond butter is still fresh and safe to consume, consider the following points:

  • Check the expiration date: Always look for the expiration date on the packaging. If the almond butter has expired, it is more likely to have developed off flavors.

  • Smell test: Take a whiff of the almond butter. If it has a sour or unpleasant odor, it may have gone bad.

  • Taste test: Take a small amount of the almond butter and taste it. If it has a strange or off flavor, it is a clear sign that it is no longer good to eat.

Allergen Testing

Now that we have discussed the potential for rancid or off flavors in almond butter, let’s shift our focus to allergen testing.

Advertisement

It is crucial for individuals with allergies to know if a product contains allergens that could trigger a reaction. Allergen labeling is required by law in many countries, including the United States. This means that almond butter manufacturers must clearly indicate if their product contains common allergens such as peanuts or tree nuts.

However, it’s important to note that cross-contamination risks can still exist, especially in facilities that process multiple types of nuts. To mitigate these risks, some manufacturers conduct allergen testing to ensure that their almond butter is free from any traces of allergens.

This additional step provides peace of mind to consumers with allergies, allowing them to confidently enjoy their almond butter without worrying about potential reactions.

Frequently Asked Questions

Can I Still Consume Almond Butter if It Has Passed Its Expiration Date?

I can still consume expired almond butter, but it may not taste as fresh or have the same texture. To properly store almond butter, keep it in a cool, dry place and refrigerate after opening.

Is It Normal for Almond Butter to Have a Slightly Grainy Texture?

Yes, it’s normal for almond butter to have a slightly grainy texture. To prevent this, store it properly by keeping it in a cool, dry place. For homemade almond butter, blend it longer for a smoother texture.

Advertisement

Can the Smell of Almond Butter Indicate Whether It Has Gone Bad or Not?

The smell of almond butter can indicate spoilage. If it smells rancid or off, it’s best to discard it. To prevent almond butter from going bad, store it in a cool, dry place and keep it tightly sealed.

What Should I Do if My Almond Butter Tastes Slightly Bitter or Sour?

If my almond butter tastes slightly bitter or sour, I would check the expiration date and storage conditions. To prevent this, store almond butter in a cool, dry place and avoid exposing it to heat or moisture.

Are There Any Common Allergens That May Be Present in Almond Butter?

There are potential allergic reactions to almond butter due to cross contamination risks with other allergens. It’s important to read labels and check for any potential allergens before consuming almond butter.

Conclusion

In conclusion, determining if almond butter has gone bad requires keen observation of various factors. Just like a seasoned detective solving a mysterious case, you must carefully examine the expiration date, appearance, texture, smell, and taste.

Pay attention to any signs of oil separation, mold, or discoloration, as well as the presence of rancid or off flavors. Additionally, allergen testing can provide further assurance.

Advertisement

By taking these steps, you can ensure your almond butter is fresh and delicious, like a perfectly baked batch of cookies.

Continue Reading
Advertisement

Recipes & Culinary Uses

How to Make Creamy Butter Garlic Pasta

Published

on

By

An image of a steaming plate of al dente pasta twirled with a rich, golden butter garlic sauce

I am going to reveal to you the secret to making the most delicious butter garlic pasta you have ever tried.

Get ready to indulge in a symphony of flavors as tender pasta gets enveloped in a rich, velvety butter garlic sauce.

This recipe is simple yet sophisticated, perfect for impressing guests or treating yourself to a truly decadent meal.

So grab your apron and let’s dive into the magic of homemade butter garlic pasta.

Trust me, you won’t be able to resist.

Advertisement

Key Takeaways

  • Choose long and thin pasta like spaghetti or linguine for the best texture.
  • Cook the pasta al dente to prevent mushiness and allow the sauce to cling to the strands.
  • Prepare a well-seasoned and fragrant garlic butter sauce with sautéed minced garlic and optional herbs and spices.
  • Combine the cooked pasta with the simmered sauce, ensuring every strand is coated, and garnish with Parmesan cheese and parsley.

Choosing the Right Pasta

I’ll pick out the perfect type of pasta for my butter garlic pasta. When it comes to choosing the right pasta, there are so many options to consider. Different types of pasta shapes can greatly impact the overall texture and taste of the dish.

For a butter garlic pasta, I’d opt for a long and thin pasta shape like spaghetti or linguine. These types of pasta allow the butter garlic sauce to cling onto the strands, ensuring each bite is full of flavor.

Additionally, the importance of cooking the pasta until it’s al dente can’t be understated. Al dente pasta has a slight bite to it, providing a satisfying texture and preventing it from becoming mushy when combined with the butter garlic sauce.

Preparing the Garlic Butter Sauce

To start, I’ll heat up the olive oil in a skillet and sauté the minced garlic until it becomes fragrant. This step is crucial as it will infuse the sauce with a rich, savory flavor.

Advertisement

Once the garlic is golden and aromatic, I’ll enhance the garlic butter sauce by adding a handful of fresh herbs, such as chopped parsley or basil. These herbs not only add a burst of freshness but also contribute to the overall visual appeal of the dish.

Next, I’ll pour in a splash of white wine to the garlic butter sauce. The wine adds a subtle tanginess and complexity that elevates the flavors. This step is optional, but it truly takes the sauce to another level.

With the garlic butter sauce now perfectly seasoned and fragrant, it’s time to move on to boiling the pasta.

Boiling the Pasta

Advertisement

Once the water reaches a rolling boil, I add a generous amount of salt before adding the pasta. Achieving the perfect al dente texture is essential for a delicious butter garlic pasta. I carefully follow the instructions on the pasta package, cooking it for the recommended time minus a minute or two. This ensures that the pasta is cooked, but still firm to the bite.

To add a twist to the traditional garlic butter pasta, I sometimes incorporate a variety of herbs and spices into the boiling water. A pinch of red pepper flakes adds a subtle kick, while a handful of fresh basil leaves brings a refreshing aroma. These additions elevate the flavors and take the dish to a whole new level.

Cooking the Garlic Butter Sauce

While simmering the sauce, I stir in a knob of butter until it melts and blends seamlessly with the other ingredients. This step is crucial for creating a rich and flavorful garlic butter sauce that will elevate your pasta dish to new heights.

Here are three cooking techniques and flavor variations that you can experiment with to enhance the taste of your butter garlic pasta:

  • Sautéing the garlic: Instead of simply adding minced garlic to the sauce, try sautéing it in the butter until fragrant and golden brown. This will bring out the natural sweetness and depth of flavor in the garlic.

  • Adding herbs and spices: To take your sauce to the next level, consider incorporating herbs like parsley or basil, and spices like red pepper flakes or black pepper. These additions will add complexity and a touch of heat to your butter garlic pasta.

  • Using flavored butter: If you want to get creative with your flavor profile, try using flavored butter. You can find a wide variety of options at the grocery store or make your own by mixing in herbs, spices, or even cheese. This will infuse your sauce with a unique and delicious taste.

Combining the Pasta and Sauce

Advertisement

After the sauce has simmered to perfection, I pour it over the cooked pasta and toss until every strand is coated in the creamy goodness.

The combination of the rich butter and aromatic garlic creates a delectable flavor that’s hard to resist.

To enhance the dish even further, I like to garnish it with a sprinkle of freshly grated Parmesan cheese and a handful of chopped parsley. This adds a touch of freshness and brings out the flavors of the sauce.

As for serving suggestions, this butter garlic pasta pairs well with a simple green salad or some crusty garlic bread on the side.

Advertisement

For variations and substitutions, you can experiment with different types of pasta, such as spaghetti or fettuccine, and add in ingredients like sautéed mushrooms or grilled chicken for added protein.

The possibilities are endless, but one thing is for sure: this butter garlic pasta is a crowd-pleaser that will leave everyone wanting more.

Frequently Asked Questions

How Can I Make This Recipe Vegan-Friendly?

To make this recipe vegan-friendly, you can use vegan substitutes for butter, such as plant-based margarine or coconut oil. Additionally, opt for dairy-free options like almond milk or cashew cream instead of regular milk or cream.

Can I Use Gluten-Free Pasta for This Recipe?

Sure, you can use gluten-free pasta for this recipe. Just remember to follow the cooking instructions for gluten-free pasta and consider alternatives like rice or quinoa pasta for a delicious, gluten-free version.

Can I Substitute Olive Oil for Butter in the Garlic Butter Sauce?

Substituting olive oil or vegan butter in the garlic butter sauce can alter the taste and texture of the dish. Olive oil adds a rich, fruity flavor, while vegan butter provides a creamy and buttery texture.

Advertisement

How Can I Make This Dish Spicier?

To make this dish spicier, there are several ways to add heat. You can incorporate hot chili flakes, spicy red pepper sauce, or even diced jalapeños. Another alternative to garlic could be using ginger for a flavorful twist.

Can I Add Vegetables or Protein to This Pasta Dish?

Adding vegetables and protein to this pasta dish is a great idea. It not only enhances the nutritional value but also adds texture and flavor. I recommend sautéing some bell peppers and adding cooked chicken for a delicious and balanced meal.

Conclusion

In conclusion, making butter garlic pasta is a simple yet delicious dish that can be enjoyed by everyone.

The rich and creamy garlic butter sauce perfectly coats the al dente pasta, creating a mouthwatering combination of flavors.

This recipe allows you to indulge in a culinary experience that’s both satisfying and comforting, like a warm embrace on a chilly evening.

Advertisement

So why not give it a try and treat yourself to a delightful meal?

Continue Reading

Recipes & Culinary Uses

Easy Steps to Make Butter from Raw Milk Using a Mixer

Published

on

By

An image showcasing the step-by-step process of transforming creamy raw milk into luscious butter using a mixer

As I immerse myself in the realm of culinary exploration, I came across a hidden treasure: crafting butter from raw milk using a mixer. With just a few basic ingredients and my reliable mixer, I unveiled the key to producing smooth, homemade butter that would impress any chef.

In this article, I will guide you through the precise steps, from gathering the ingredients to storing the final product. Get ready to churn and savor the rich rewards of your own creation.

Let’s butter up!

Key Takeaways

  • Choose a mixer with a powerful motor and sturdy construction
  • Strain and pasteurize the raw milk before churning
  • Use a high-speed setting on the mixer for faster butter formation
  • Store homemade butter in airtight containers to maintain flavor and freshness

Gathering the Ingredients and Equipment

I’m gathering the ingredients and equipment needed to make butter from raw milk in my mixer.

Advertisement

To ensure a successful butter-making process, it’s crucial to choose the right mixer. Look for a mixer with a powerful motor and a sturdy construction that can handle the thick consistency of the cream. A high-speed setting is also desirable to expedite the churning process.

When it comes to sourcing raw milk, it’s important to prioritize safety and quality. Look for local farms or dairies that follow strict hygiene practices and ensure the cows are healthy and well-cared for. Freshness is key, so opt for milk that has been recently produced and stored properly.

Preparing the Raw Milk for Churning

To start preparing the raw milk for churning, I’ll first need to strain out any impurities. This ensures that the milk is clean and safe for consumption.

Before churning, it’s important to pasteurize the raw milk to eliminate any harmful bacteria that may be present. Pasteurization involves heating the milk to a specific temperature and holding it there for a set period of time. This process helps to destroy any potential pathogens without significantly altering the taste or nutritional composition of the milk.

Once the raw milk is pasteurized, there are different methods of churning it into butter. One method involves using a mixer, which agitates the milk until the fat globules separate from the liquid, forming butter.

Advertisement

Churning the Raw Milk in the Mixer

Using a high-speed setting, I’ll let the mixer agitate the milk until the fat globules separate and butter forms. The speed of the mixer plays a crucial role in the churning process. A higher speed will help the fat globules to separate more quickly, resulting in butter formation. The churning time will vary depending on the mixer speed and the amount of milk being churned. It is important to monitor the process closely to avoid over-churning, which can lead to a grainy texture. To give you an idea of the correlation between mixer speed and churning time, here is a table that summarizes the approximate time required for butter formation at different speeds:

Mixer Speed Churning Time (minutes)
Low 20-30
Medium 15-20
High 10-15
Very High 5-10
Turbo 2-5

Separating the Butter From the Buttermilk

After the churning process, I strain the mixture through a fine-mesh sieve to separate the butter from the buttermilk. The creamy liquid slowly drips down, leaving behind the beautiful golden butter. It’s a delicate process, requiring patience and precision.

As I watch the buttermilk flow through the sieve, I can’t help but appreciate the benefits of using raw milk for making butter. The rich and complex flavors of raw milk add depth and character to the final product. It’s like tasting a piece of the farm, with its grassy undertones and hints of sweetness.

Advertisement

To further enhance the butter’s taste, there are various methods for flavoring homemade butter. From the simplicity of sprinkling salt to the creativity of adding herbs and spices, the possibilities are endless.

Storing and Using Your Homemade Butter

When storing my homemade butter, I prefer to use airtight containers to keep it fresh and prevent any unwanted odors from seeping in. It’s important to protect the butter’s flavor and texture, as well as extend its shelf life. Additionally, I like to experiment with different flavors to add a unique twist to my butter. Some creative ways to flavor homemade butter include incorporating herbs like rosemary or thyme, adding spices like cinnamon or garlic powder, or mixing in sweet ingredients like honey or maple syrup. This allows me to customize my butter based on my preferences and the dishes I plan to use it in. Speaking of which, homemade butter has a multitude of uses in cooking and baking. It can be spread on toast, melted over vegetables, used as a base for sauces, or incorporated into pastry dough for flakier results. The possibilities are endless!

Flavor Ingredients Recommended Uses
Herb-infused Rosemary, thyme Mashed potatoes, roasted vegetables
Spiced Cinnamon, garlic powder Toast, pancakes
Sweet Honey, maple syrup Baked goods, waffles

Frequently Asked Questions

How Long Does It Take for the Raw Milk to Turn Into Butter in the Mixer?

To speed up the process of turning raw milk into butter in a mixer, you can increase the speed and duration of mixing. It is not possible to make butter in a mixer without using raw milk.

Advertisement

Can I Use Pasteurized Milk Instead of Raw Milk for Making Butter in a Mixer?

Using raw milk instead of pasteurized milk for making butter in a mixer has several benefits. It enhances the flavor and nutritional value of the butter. To achieve the best consistency, ensure the milk is fresh and at room temperature before churning.

What Is the Ideal Temperature for the Raw Milk Before Churning It in the Mixer?

The ideal temperature for raw milk before churning it in the mixer is around 50-55°F. This ensures proper fat separation and reduces churning time. It’s crucial to maintain the correct temperature for the best results.

Can I Add Flavorings or Herbs to the Butter While Churning It in the Mixer?

Yes, you can add flavorings or herbs to the butter while churning it in the mixer. This is a great way to incorporate flavor into homemade butter and experiment with different tastes.

Can I Use a Hand Mixer Instead of a Stand Mixer to Churn the Raw Milk Into Butter?

Using a hand mixer for churning raw milk into butter has its pros and cons. It can be more convenient and easier to handle, but may take longer and require more effort compared to a stand mixer. Other methods without a mixer include shaking in a jar or using a food processor.

Conclusion

In conclusion, making butter from raw milk in a mixer is a simple and rewarding process. By following the steps outlined above and using the right ingredients and equipment, you can transform fresh raw milk into delicious homemade butter.

Advertisement

Remember, practice makes perfect, so don’t be discouraged if your first attempt isn’t perfect. With a little patience and perseverance, you’ll be churning out creamy butter in no time, and soon you’ll be able to spread it on toast and enjoy the fruits of your labor.

Continue Reading

Recipes & Culinary Uses

Make Rich Butter from Raw Milk

Published

on

By

An image capturing the process of making butter from raw milk

Hey! Have you ever thought about how to turn raw milk into homemade butter? Look no further, I’ve got the solution for you.

In this article, I’ll take you through the step-by-step process of turning that creamy goodness into delicious homemade butter.

We’ll explore the benefits of using raw milk, learn how to separate the cream, and even discover different flavors you can infuse into your butter.

So, grab your apron and let’s get churning!

Key Takeaways

  • Raw milk contains essential vitamins, minerals, and enzymes that are destroyed during pasteurization.
  • Separating the cream from raw milk can be done through gravity separation, centrifugal separation, or cold separation.
  • Churning the cream into butter can be done through hand churning, using a stand mixer with a whisk attachment, or using a food processor with a blade attachment.
  • Washing and storing the freshly made butter involves cleaning the butter container and preserving its freshness by wrapping it tightly in wax paper or using an airtight container.

Understanding the Benefits of Raw Milk

Advertisement

Raw milk has numerous health benefits that are not found in pasteurized milk. Understanding the nutritional value of raw milk is important for those seeking a natural and wholesome source of nutrients.

Contrary to popular belief, raw milk is not a dangerous product when handled and consumed properly. In fact, it contains essential vitamins, minerals, and enzymes that are destroyed during the pasteurization process.

Raw milk is rich in beneficial bacteria and probiotics, which can support a healthy gut microbiome and enhance digestion. Additionally, raw milk is a good source of bioavailable nutrients such as calcium, protein, and healthy fats.

Debunking myths about raw milk is crucial to prevent misinformation and promote informed choices regarding our food.

Preparing the Raw Milk for Butter Making

To prepare the milk for butter making, it’s important to first skim off the cream. This step is crucial as it allows us to separate the high-fat cream from the milk, which is necessary for obtaining a good quality butter.

Advertisement

Here are three separating techniques to help you achieve the best results:

  1. Gravity separation: After allowing the milk to stand undisturbed for a few hours, the cream naturally rises to the top, making it easy to skim off with a spoon or ladle.

  2. Centrifugal separation: Using a cream separator machine, the milk is spun at high speeds, causing the heavier cream to separate from the lighter milk. This method is efficient and yields a higher cream quality.

  3. Cold separation: By refrigerating the milk overnight, the cream becomes denser and easier to separate. Skimming off the cold cream results in a richer and creamier butter.

Separating the Cream From the Raw Milk

If you want to achieve the best results when separating the cream from the milk, try using gravity separation, centrifugal separation, or cold separation techniques.

Gravity separation involves allowing the milk to sit undisturbed in a container for a period of time, allowing the cream to rise to the top.

Advertisement

Centrifugal separation utilizes a machine that spins the milk at high speeds, forcing the cream to separate from the milk.

Cold separation involves chilling the milk to a low temperature, causing the cream to solidify and separate from the milk.

These techniques are beneficial because consuming raw dairy has numerous health benefits, such as improved digestion, increased nutrient absorption, and enhanced immune function.

Additionally, if you don’t have access to a churn, these separation methods provide alternatives for obtaining cream for making butter.

Churning the Cream Into Butter

Once the cream has separated from the milk, you can start churning it into delicious butter. Churning is the process of agitating the cream until it transforms into butter.

Advertisement

Here are three techniques to help you achieve the perfect consistency:

  1. Hand Churning: This traditional method involves using a small churn or jar and physically shaking or rocking it back and forth until the cream turns into butter.

  2. Stand Mixer: If you have a stand mixer with a whisk attachment, you can use it to churn the cream. Start at a low speed and gradually increase until the butter forms.

  3. Food Processor: Another option is to use a food processor with a blade attachment. Pulse the cream until it separates into butter and buttermilk.

Troubleshooting common butter making problems:

  • If the cream isn’t thickening, ensure it is at the right temperature (around 50-55°F) and give it more time to churn.
  • If the butter is too soft, refrigerate it for a while before churning again.
  • If the butter is too hard, let it soften at room temperature or add a small amount of buttermilk to adjust the consistency.

After churning the cream into butter, it’s time to move on to the next step of washing and storing the freshly made butter.

Washing and Storing the Freshly Made Butter

When it comes to washing and storing freshly made butter, there are a few key points to consider.

Advertisement

First, cleaning the butter container is essential to maintain the quality of the butter. I recommend using warm soapy water and a soft sponge to remove any residue before drying it thoroughly.

Second, preserving the butter’s freshness is crucial to prolong its shelf life. To do this, I suggest wrapping the butter tightly in wax paper or placing it in an airtight container to protect it from air and odors.

Lastly, it’s important to store butter at the proper temperature. The recommended storage temperature for butter is between 32-40°F (0-4°C), as this helps to maintain its texture and prevent spoilage.

Cleaning the Butter Container

Before cleaning the butter container, make sure to remove any leftover butter residue. Cleaning the butter container is essential to maintain its freshness and prevent any cross-contamination. Here are three effective cleaning techniques to ensure a clean and sanitized container:

  1. Soak in hot, soapy water: Fill the container with hot water and add a few drops of dish soap. Let it sit for a few minutes to loosen any residue, then scrub with a sponge or brush.

  2. Use vinegar solution: Mix equal parts white vinegar and water in the container. Let it sit for about 15 minutes to dissolve any stubborn residue. Scrub with a sponge or brush, then rinse thoroughly.

  3. Bleach solution: Mix 1 tablespoon of bleach with 1 gallon of water. Let the container soak in the solution for 10 minutes, then scrub and rinse well.

Preserving Butter’s Freshness

After cleaning the butter container, the next step is to ensure that the butter stays fresh and maintains its texture for as long as possible. This is important because nobody wants to end up with rancid butter. To preserve the butter’s freshness, there are a few key things you can do. Firstly, storing the butter in an airtight container or wrapping it tightly in wax paper will help prevent it from being exposed to air and developing off flavors. Secondly, keeping the butter refrigerated at a consistent temperature, ideally around 40°F (4°C), will slow down the process of it going rancid. Lastly, if you want to store butter for an extended period of time, freezing it is a great option as it can extend its shelf life for several months. By following these steps, you can enjoy fresh and flavorful butter for all your culinary needs.

Advertisement
Preserving Butter’s Freshness
Store butter in an airtight container or wrap tightly in wax paper.
Refrigerate butter at a consistent temperature of around 40°F (4°C).
Freeze butter for extended storage, which can extend its shelf life for several months.
Follow these steps to enjoy fresh and flavorful butter for all your culinary needs.

Recommended Storage Temperature

Storing butter in the refrigerator at a consistent temperature of around 40°F (4°C) helps to maintain its freshness and prevent it from going rancid. Here are three recommended storage methods and the ideal temperature range for butter:

  1. Wrap it properly: Use parchment paper or airtight containers to wrap the butter. This will protect it from absorbing odors and prevent it from drying out.

  2. Keep it away from light: Exposure to light can cause butter to spoil faster. Store it in a cool, dark place, like the refrigerator’s butter compartment or a covered butter dish.

  3. Avoid temperature fluctuations: Butter can easily absorb flavors and odors from other foods in the fridge. To maintain its quality, store it away from strong-smelling foods and make sure the temperature remains constant.

Following these recommended storage methods and keeping the butter at the ideal temperature range will help to preserve its freshness and taste for longer periods.

Using Leftover Buttermilk in Recipes

You can easily use leftover buttermilk in recipes to add a tangy flavor. Buttermilk is a versatile ingredient that can enhance the taste and texture of various baked goods. It’s a great substitute for regular milk in recipes because it adds a unique tanginess and richness. Here are some creative uses for leftover buttermilk in baking:

Row Buttermilk Recipe Result
1 Pancakes Fluffy and Light and
tender texture fluffy pancakes
2 Biscuits Tender and Flaky and
flaky texture buttery biscuits
3 Cakes Moist and Moist and
tender texture tender cakes
4 Fried chicken Crispy and Juicy and
flavorful coating flavorful chicken

Exploring Variations and Flavors in Homemade Butter

When it comes to homemade butter, there are endless possibilities for adding unique flavors and enhancing its taste.

One way to do this is through unique butter infusions, where you can mix in various ingredients like garlic, herbs, or even fruit zest to create a personalized flavor profile.

Advertisement

Another option is to enhance the taste of your homemade butter by incorporating herbs such as rosemary, thyme, or basil, which can add a delightful aroma and taste.

Lastly, experimenting with flavored salts like smoked sea salt or truffle salt can take your butter to a whole new level, adding a burst of flavor that will elevate any dish.

Unique Butter Infusions

To add unique flavors to your butter, try infusing it with herbs or spices. Butter infusion techniques offer a creative way to elevate the taste of your homemade butter. Here are three ideas to get you started:

  1. Garlic and Herb Butter: Melt your butter, then add minced garlic and chopped fresh herbs like rosemary, thyme, or parsley. Let the flavors infuse for a few hours before refrigerating.

  2. Citrus Zest Butter: Grate the zest of an orange, lemon, or lime into your softened butter. Mix well and let it sit in the fridge for a while to let the citrus flavors infuse.

  3. Spiced Butter: Add a pinch of your favorite spices, such as cinnamon, nutmeg, or cardamom, to your softened butter. Mix thoroughly and let it sit in the fridge to develop the flavors.

Enhancing Taste With Herbs

Adding herbs to your butter is a simple and effective way to enhance the taste of your culinary creations. Not only does it add a burst of flavor, but it also adds a touch of freshness and complexity to your dishes. Experimenting with different herbal blends can elevate your butter to a whole new level. Whether you prefer a savory blend of rosemary and thyme or a more exotic combination of cilantro and lime, the possibilities are endless. To help you get started, here is a table showcasing some popular herb and spice combinations that you can try in your butter:

Herb/Spice Flavor Profile Best Pairings
Rosemary Earthy, piney Potatoes, lamb
Basil Sweet, peppery Tomatoes, mozzarella
Dill Fresh, tangy Fish, cucumbers
Cinnamon Warm, sweet Apples, baked goods

Experimenting With Flavored Salts

After experimenting with herbs to enhance the taste of my homemade butter, I decided to take my flavor exploration to the next level by experimenting with flavored salts. Flavored salts can add a unique and exciting twist to butter, elevating its taste and making it even more delicious.

Advertisement

Here are three ways I incorporated different salts into my flavored butter recipes:

  1. Smoked Salt Butter: I mixed smoked salt into softened butter, creating a smoky and savory spread that pairs perfectly with grilled meats and vegetables.

  2. Truffle Salt Butter: By combining truffle salt with butter, I created a luxurious and indulgent spread that adds a hint of earthy and aromatic flavor to any dish.

  3. Citrus Salt Butter: I zested some fresh citrus fruits and mixed the zest with sea salt before incorporating it into butter. The result was a bright and tangy butter that adds a burst of freshness to baked goods and seafood.

Frequently Asked Questions

Can I Make Butter From Pasteurized Milk?

Yes, you can make butter from pasteurized milk. It’s a simple process of churning the cream until it separates into butter and buttermilk. Homemade butter can be healthier than store-bought due to its freshness and lack of additives.

How Long Does It Take to Separate the Cream From the Raw Milk?

Separating cream from raw milk depends on various factors, such as temperature and milk fat content. Once separated, the cream can be churned into butter. The churning process can take anywhere from 10 to 30 minutes.

Can I Use an Electric Mixer Instead of a Churn to Make Butter?

Yes, you can use an electric mixer to make butter. However, it’s important to note that the process may differ slightly between churning raw milk and pasteurized milk.

How Long Can I Store Freshly Made Butter?

Freshly made butter can be stored in the refrigerator for up to two weeks. However, its shelf life can be extended by freezing it. Proper storage is essential to maintain its freshness and quality.

Advertisement

What Other Uses Are There for Leftover Buttermilk Besides Using It in Recipes?

Leftover buttermilk can be used in pancakes, biscuits, or even as a marinade for fried chicken. As for alternative methods for making butter, you can also use heavy cream and a mixer.

Conclusion

In conclusion, making butter from raw milk is a delightful and rewarding process. The benefits of raw milk are numerous, as it contains valuable enzymes and nutrients that are lost during pasteurization.

By separating the cream from the raw milk and churning it vigorously, you can easily transform it into creamy and delicious homemade butter.

Don’t forget to wash and store the butter properly to ensure its freshness. And don’t discard the leftover buttermilk! It can be used in various recipes to add flavor and moisture.

So, grab some raw milk and start your butter-making adventure today!

Advertisement
Continue Reading

Trending