Connect with us

Recipes & Culinary Uses

Create Delicious Lobster Butter in 7 Easy Steps

Published

on

An image showcasing the art of making lobster butter: a close-up shot of a pair of expert hands skillfully breaking open a fresh lobster, delicately extracting its succulent meat, and blending it into a rich, creamy butter

I have always thought that the key to a truly luxurious seafood dish is butter.

And when it comes to lobster, there’s no better way to enhance its rich, delicate flavor than with homemade lobster butter.

In this article, I’ll share with you my tried-and-true method for making the most luscious, flavorful lobster butter right in your own kitchen.

Get ready to elevate your lobster dishes to a whole new level of deliciousness.

Key Takeaways

  • Choosing a lobster: Consider size and freshness, look for lively and active lobsters with shiny shells and clear eyes.
  • Extracting lobster meat: Twist off claws and legs, crack open body shell, use a small knife to remove remaining meat from crevices, check the tail for majority of the meat.
  • Making the base for lobster butter: Gather lobster shells, simmer with water, onions, carrots, and celery, strain the liquid and enhance with herbs and spices.
  • Infusing butter with lobster flavor: Infuse melted butter with lobster meat, experiment with alternative seafood options and herbs/spices, use in dishes like lobster bisque or grilled seafood.

Choosing the Best Lobster

Advertisement

When choosing the best lobster, it’s important to consider the size and freshness. The size of the lobster determines the amount of meat you will get, so it’s essential to choose one that is big enough to satisfy your appetite.

As for freshness, look for lobsters that are lively and active, with shiny shells and clear eyes.

Now, let’s talk about the best lobster types and cooking techniques. The Maine lobster is known for its sweet, tender meat, making it a popular choice. Another great option is the spiny lobster, which has a delicate flavor and firm texture.

When it comes to cooking, steaming and grilling are popular techniques that preserve the natural flavors of the lobster.

Preparing the Lobster for Butter

First, you’ll need to start by removing the meat from the lobster shells. This is an essential step in preparing lobster shells for creating a rich and flavorful lobster stock. To do this, you’ll need a sharp knife and a little patience. Carefully crack open the shells and extract every bit of meat, being careful not to leave any behind. Once you have separated the meat from the shells, set the meat aside for another use, such as lobster butter or a delicious lobster salad. Now, you can move on to creating the lobster stock. This is done by simmering the shells with aromatic vegetables, such as onions, carrots, and celery, along with herbs and spices, in a large pot of water. The result is a fragrant and savory liquid that forms the base for many seafood dishes.

Advertisement

To engage you further, here’s a table summarizing the steps to prepare lobster shells and create lobster stock:

Steps to Prepare Lobster Shells Steps to Create Lobster Stock
1. Remove the meat from the shells. 1. Simmer shells with vegetables, herbs, and spices.
2. Set the meat aside for later use. 2. Allow the mixture to cook for at least an hour.
3. Crack open the shells carefully. 3. Strain the stock to remove solids.
4. Ensure no meat is left behind. 4. Use the lobster stock as a base for seafood dishes.

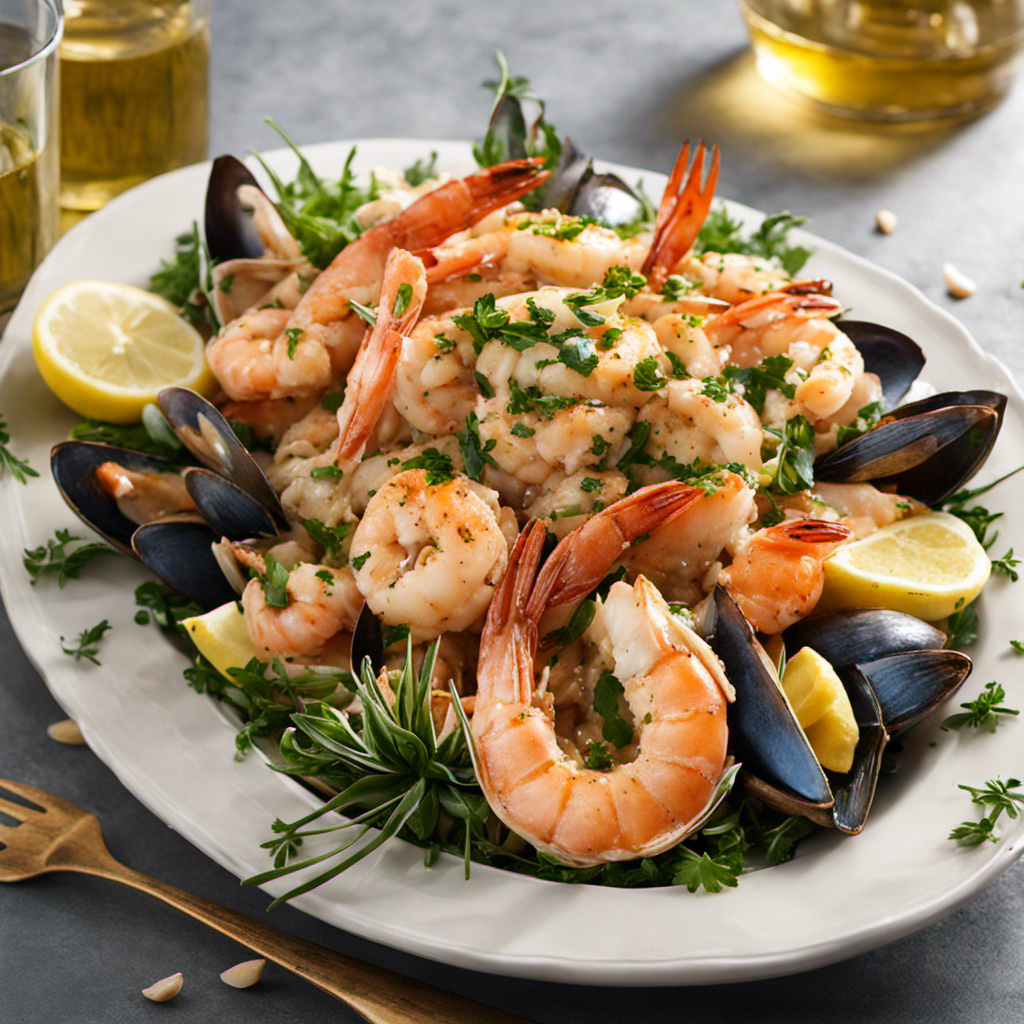
Extracting the Lobster Meat

To extract the tender lobster meat, carefully crack open the shells and use a sharp knife to separate every bit from the shells.

There’s something incredibly satisfying about cracking open a lobster shell and discovering the succulent meat hidden within. It takes a bit of patience and finesse, but the reward is well worth it.

Advertisement

Start by twisting off the claws and legs, then gently crack open the body shell to reveal the sweet, delicate meat. Use a small sharp knife to carefully remove any remaining meat from the crevices. Don’t forget to check the tail, where the majority of the meat is found.

Once you have extracted all the meat, set it aside and get ready to make the base for the lobster butter.

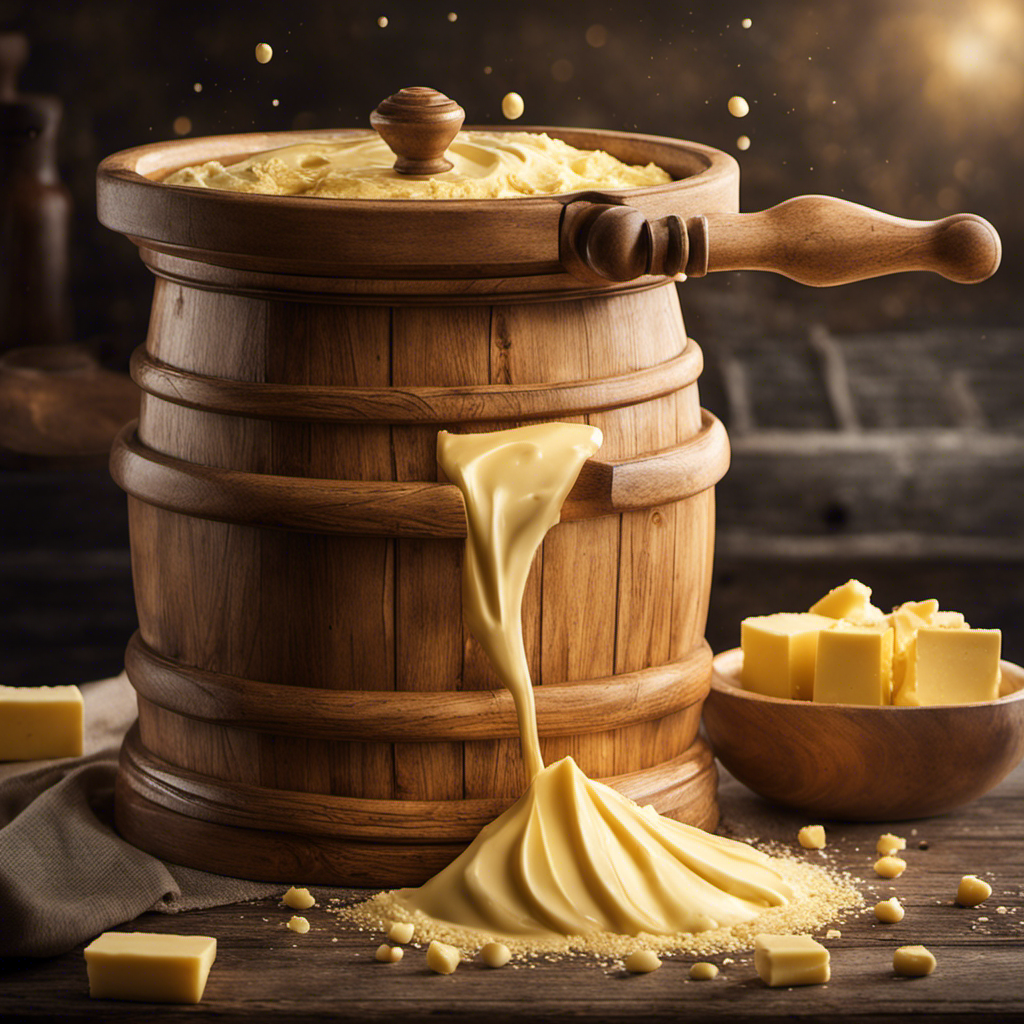
Making the Base for the Lobster Butter

Once you’ve extracted all the meat, it’s time to start creating the base for your delicious lobster butter. Making lobster stock is the key to achieving that rich and flavorful taste.

To begin, gather the lobster shells and place them in a large pot. Add water, onions, carrots, and celery to the pot and bring it to a simmer. Let it cook for about an hour, allowing the flavors to meld together.

Once done, strain the liquid, discarding the solids. Now, it’s time to enhance the stock with herbs and spices. Add a sprig of fresh thyme, a couple of bay leaves, and a pinch of crushed red pepper flakes. Finally, season with salt and pepper to taste.

Advertisement

Your lobster stock is now ready to be used as the base for your delectable lobster butter.

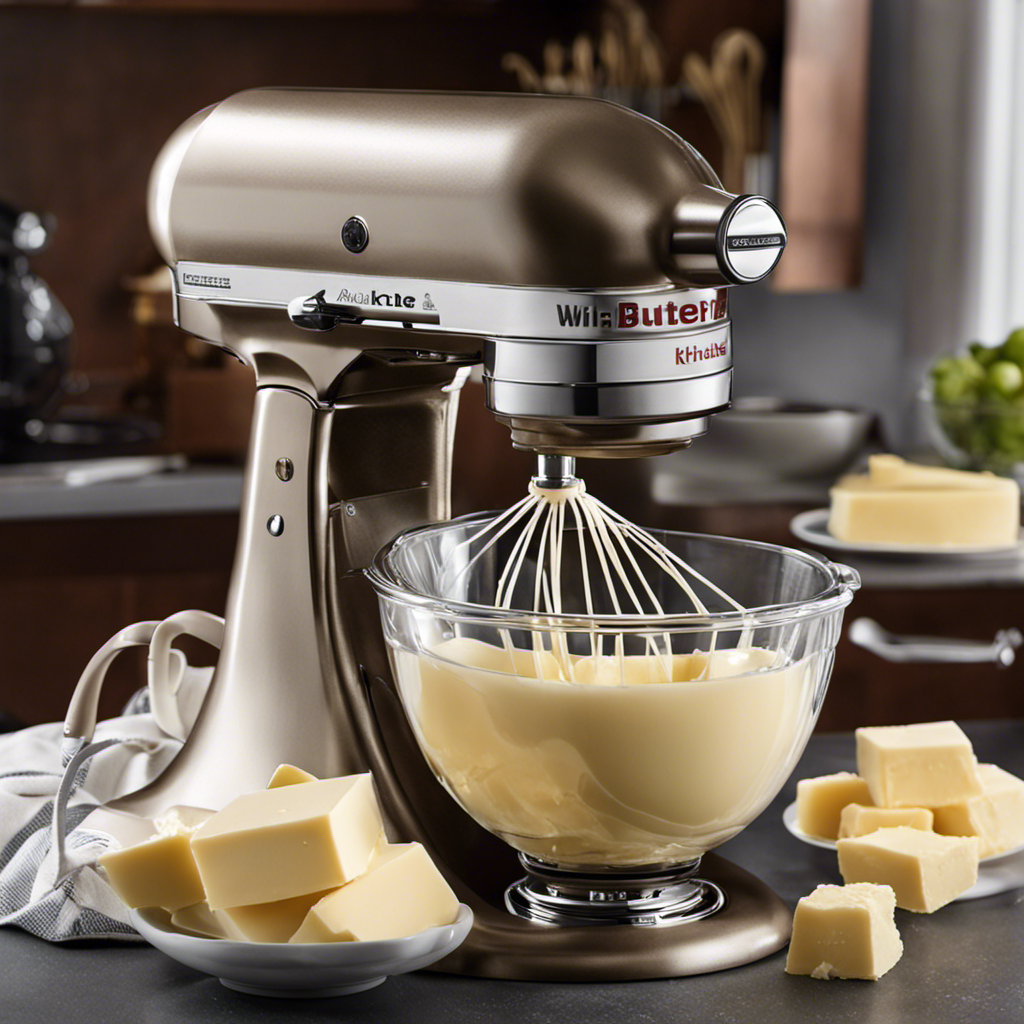
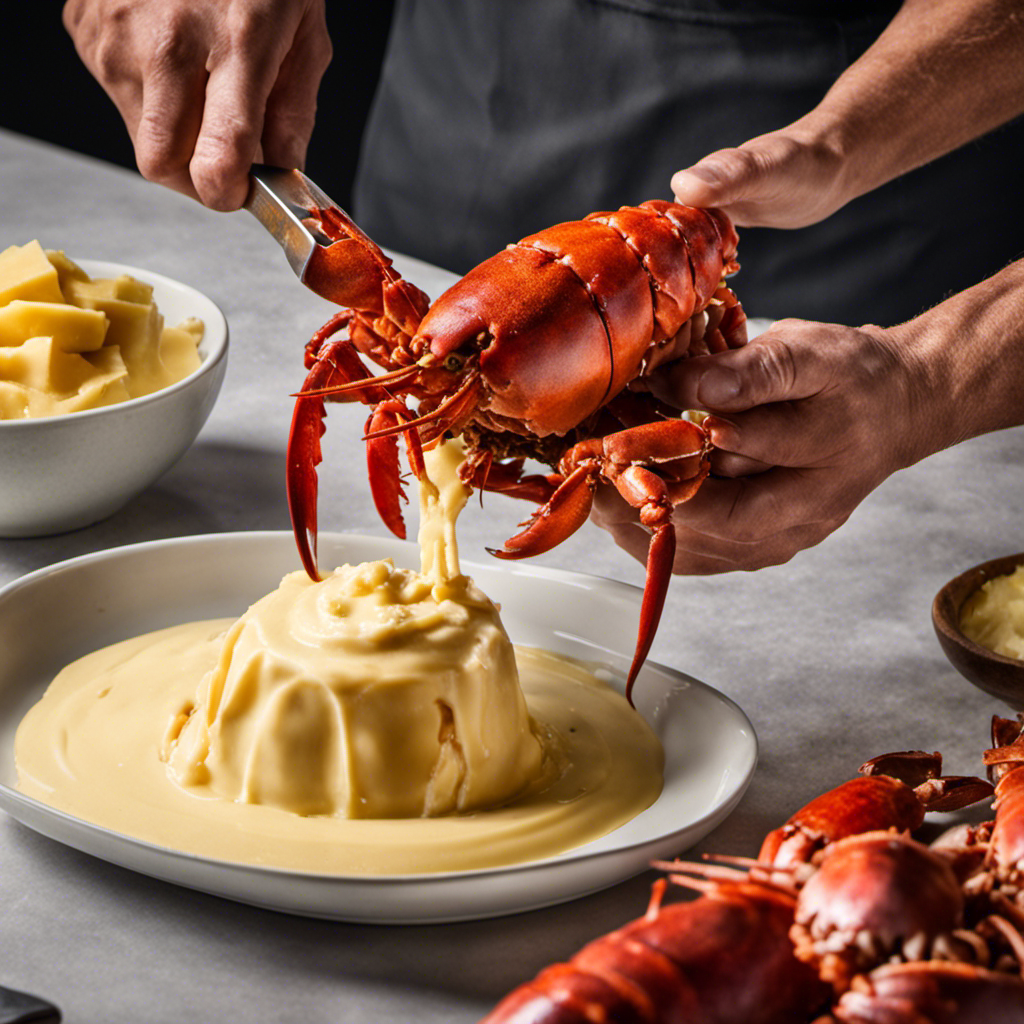
Infusing the Butter With Lobster Flavor

I love the rich and indulgent flavor of lobster. One of my favorite ways to incorporate it into my cooking is by infusing butter with its delicious taste.

The lobster-infused butter technique is a simple yet effective way to elevate any dish. It adds a luxurious and decadent flavor that enhances the overall dining experience.

Advertisement

Lobster-Infused Butter Technique

Mix the melted butter with the lobster meat to infuse the flavors. This technique is a game-changer when it comes to adding a rich and luxurious taste of lobster to your dishes. But what if you don’t have lobster on hand or want to explore alternatives? Fear not, there are several options that can give you a similar taste and elevate your recipes. Consider using shrimp, crab, or even scallops to create a seafood-infused butter. You can also experiment with herbs and spices like tarragon, dill, or paprika to enhance the flavors. Once you have your lobster-infused butter ready, the possibilities are endless. Use it to make lobster bisque, drizzle it over grilled seafood, or spread it on warm crusty bread. Get creative and let the decadent flavors of lobster butter take your culinary creations to new heights.

Lobster-Infused Butter Alternatives Using Lobster Butter in Recipes
Shrimp Lobster Bisque
Crab Grilled Seafood
Scallops Warm Crusty Bread
Herbs (Tarragon, Dill)
Spices (Paprika)

Enhancing Butter With Lobster

To enhance the flavor of your butter, consider infusing it with the decadent taste of lobster. Lobster butter adds a rich and luxurious twist to your dishes, elevating them to a whole new level of deliciousness.

One way to use lobster butter is in seafood pasta. Imagine the creamy, buttery sauce coating every strand of pasta, perfectly complementing the briny sweetness of the seafood. The lobster-infused butter adds depth and complexity that takes the dish to a whole new level.

But lobster butter isn’t just for seafood. It can also be used in steak recipes. The buttery richness of the lobster pairs beautifully with the savory flavors of a perfectly cooked steak, creating a mouthwatering combination that will have your taste buds singing.

Flavorful Lobster Butter

After creating the delicious lobster butter, I couldn’t wait to explore all the ways I could incorporate its rich, savory flavor into my favorite seafood dishes. The possibilities seemed endless!

Advertisement

One of the easiest ways to use lobster butter is by simply melting it and drizzling it over grilled lobster tails or steamed crab legs. The butter enhances the natural sweetness of the seafood, adding a luxurious touch to every bite.

But that’s not all. I also discovered that incorporating lobster butter into sauces and dressings takes them to a whole new level. I started by adding a spoonful of lobster butter to a creamy garlic sauce for pasta, and the result was absolutely divine. The butter gave the sauce a velvety texture and a depth of flavor that was unmatched.

I also experimented with lobster butter vinaigrette dressings for salads. The combination of the butter, lemon juice, and herbs created a tangy and luxurious dressing that elevated simple greens into something extraordinary.

Incorporating lobster butter into seafood dishes, sauces, and dressings is a surefire way to take your culinary creations to new heights. The possibilities are endless, and each bite will be a delight for your taste buds.

Storing and Using Your Homemade Lobster Butter

When it comes to homemade lobster butter, knowing how to properly store it is key to maintaining its freshness and flavor. The shelf life of lobster butter can vary, but it typically lasts for about one to two weeks when stored in an airtight container in the refrigerator.

Advertisement

As for its culinary applications, lobster butter is incredibly versatile and can be used to enhance the flavor of various dishes. For example, it can be added to seafood pastas to give them a rich and savory taste. It can also be used to add a delicious twist to grilled vegetables, providing them with a buttery and slightly sweet flavor. Additionally, lobster butter can be spread onto freshly baked bread, creating a delectable and indulgent treat.

With its rich and flavorful profile, lobster butter is a wonderful addition to any kitchen. Its versatility and ability to elevate dishes make it a favorite among seafood enthusiasts. So, next time you make lobster butter, remember to store it properly and explore the many culinary possibilities it offers.

Shelf Life and Storage

The shelf life of lobster butter is typically around 1 to 2 weeks if stored in an airtight container in the refrigerator. Proper storage is essential to maintain its freshness and flavor.

Here are some tips to ensure you get the most out of your homemade lobster butter:

  1. Use an airtight container: This will prevent any air from getting in and causing the butter to spoil faster.

  2. Keep it in the refrigerator: The cool temperature will help preserve the butter and extend its shelf life.

  3. Label and date it: It’s important to keep track of when you made the lobster butter, so you know when it’s time to use it or discard it.

Versatile Culinary Applications

Now that we’ve discussed the shelf life and storage of lobster butter, let’s delve into its versatile culinary applications.

Advertisement

Lobster butter is a gourmet ingredient that can elevate any dish with its rich and savory flavor. Its uses in the culinary world are endless, making it a must-have in every chef’s arsenal.

From simple pasta dishes to indulgent seafood bisques, lobster butter adds a luxurious touch to any recipe. Spread it on warm bread for a decadent appetizer, or melt it over grilled steak for a surf-and-turf sensation.

You can even use it as a base for sauces or dressings, adding a burst of flavor to your creations. Whether you’re a professional chef or a home cook, incorporating lobster butter into your recipes will surely impress your guests and leave them craving for more.

Frequently Asked Questions

How Long Can Homemade Lobster Butter Be Stored in the Refrigerator?

Homemade lobster butter can be stored in the refrigerator for up to one week. It’s important to follow proper storage guidelines to ensure its freshness and taste.

Can I Use Frozen Lobster Meat to Make Lobster Butter?

Sure, you can use frozen lobster meat to make lobster butter. It’s a convenient alternative if fresh lobster isn’t available. The process involves cooking the frozen meat, extracting the flavorful juices, and combining them with butter.

Advertisement

Can I Substitute Regular Butter With Margarine or a Plant-Based Alternative?

Yes, you can substitute regular butter with margarine or a plant-based alternative. Margarine provides a similar texture and taste, while plant-based alternatives offer the benefits of being dairy-free and lower in saturated fat.

Can I Use Cooked Lobster Shells to Make the Base for Lobster Butter?

Sure, using cooked lobster shells to make lobster butter is a creative way to utilize leftovers. It adds a delicious seafood flavor to dishes like lobster bisque. Plus, it’s a sustainable practice that reduces food waste.

Are There Any Alternative Methods to Infuse the Butter With Lobster Flavor, Besides Using the Shells?

There are alternative methods to infuse butter with lobster flavor besides using the shells. Some options include using lobster stock, adding chopped cooked lobster meat, or incorporating lobster seasoning into the butter.

Conclusion

After going through the process of selecting the perfect lobster, extracting the succulent meat, and infusing it with rich buttery goodness, I can confidently say that making lobster butter is a culinary adventure worth embarking on.

The combination of the delicate lobster meat and the creamy, flavorful butter creates a symphony of flavors that will transport your taste buds to new heights.

Advertisement

So why settle for ordinary butter when you can elevate your dishes with a homemade lobster butter that is sure to impress?

Dive into this delicious journey and never look back!

Continue Reading
Advertisement

Recipes & Culinary Uses

How to Make Creamy Butter Garlic Pasta

Published

on

By

An image of a steaming plate of al dente pasta twirled with a rich, golden butter garlic sauce

I am going to reveal to you the secret to making the most delicious butter garlic pasta you have ever tried.

Get ready to indulge in a symphony of flavors as tender pasta gets enveloped in a rich, velvety butter garlic sauce.

This recipe is simple yet sophisticated, perfect for impressing guests or treating yourself to a truly decadent meal.

So grab your apron and let’s dive into the magic of homemade butter garlic pasta.

Trust me, you won’t be able to resist.

Advertisement

Key Takeaways

  • Choose long and thin pasta like spaghetti or linguine for the best texture.
  • Cook the pasta al dente to prevent mushiness and allow the sauce to cling to the strands.
  • Prepare a well-seasoned and fragrant garlic butter sauce with sautéed minced garlic and optional herbs and spices.
  • Combine the cooked pasta with the simmered sauce, ensuring every strand is coated, and garnish with Parmesan cheese and parsley.

Choosing the Right Pasta

I’ll pick out the perfect type of pasta for my butter garlic pasta. When it comes to choosing the right pasta, there are so many options to consider. Different types of pasta shapes can greatly impact the overall texture and taste of the dish.

For a butter garlic pasta, I’d opt for a long and thin pasta shape like spaghetti or linguine. These types of pasta allow the butter garlic sauce to cling onto the strands, ensuring each bite is full of flavor.

Additionally, the importance of cooking the pasta until it’s al dente can’t be understated. Al dente pasta has a slight bite to it, providing a satisfying texture and preventing it from becoming mushy when combined with the butter garlic sauce.

Preparing the Garlic Butter Sauce

To start, I’ll heat up the olive oil in a skillet and sauté the minced garlic until it becomes fragrant. This step is crucial as it will infuse the sauce with a rich, savory flavor.

Advertisement

Once the garlic is golden and aromatic, I’ll enhance the garlic butter sauce by adding a handful of fresh herbs, such as chopped parsley or basil. These herbs not only add a burst of freshness but also contribute to the overall visual appeal of the dish.

Next, I’ll pour in a splash of white wine to the garlic butter sauce. The wine adds a subtle tanginess and complexity that elevates the flavors. This step is optional, but it truly takes the sauce to another level.

With the garlic butter sauce now perfectly seasoned and fragrant, it’s time to move on to boiling the pasta.

Boiling the Pasta

Advertisement

Once the water reaches a rolling boil, I add a generous amount of salt before adding the pasta. Achieving the perfect al dente texture is essential for a delicious butter garlic pasta. I carefully follow the instructions on the pasta package, cooking it for the recommended time minus a minute or two. This ensures that the pasta is cooked, but still firm to the bite.

To add a twist to the traditional garlic butter pasta, I sometimes incorporate a variety of herbs and spices into the boiling water. A pinch of red pepper flakes adds a subtle kick, while a handful of fresh basil leaves brings a refreshing aroma. These additions elevate the flavors and take the dish to a whole new level.

Cooking the Garlic Butter Sauce

While simmering the sauce, I stir in a knob of butter until it melts and blends seamlessly with the other ingredients. This step is crucial for creating a rich and flavorful garlic butter sauce that will elevate your pasta dish to new heights.

Here are three cooking techniques and flavor variations that you can experiment with to enhance the taste of your butter garlic pasta:

  • Sautéing the garlic: Instead of simply adding minced garlic to the sauce, try sautéing it in the butter until fragrant and golden brown. This will bring out the natural sweetness and depth of flavor in the garlic.

  • Adding herbs and spices: To take your sauce to the next level, consider incorporating herbs like parsley or basil, and spices like red pepper flakes or black pepper. These additions will add complexity and a touch of heat to your butter garlic pasta.

  • Using flavored butter: If you want to get creative with your flavor profile, try using flavored butter. You can find a wide variety of options at the grocery store or make your own by mixing in herbs, spices, or even cheese. This will infuse your sauce with a unique and delicious taste.

Combining the Pasta and Sauce

Advertisement

After the sauce has simmered to perfection, I pour it over the cooked pasta and toss until every strand is coated in the creamy goodness.

The combination of the rich butter and aromatic garlic creates a delectable flavor that’s hard to resist.

To enhance the dish even further, I like to garnish it with a sprinkle of freshly grated Parmesan cheese and a handful of chopped parsley. This adds a touch of freshness and brings out the flavors of the sauce.

As for serving suggestions, this butter garlic pasta pairs well with a simple green salad or some crusty garlic bread on the side.

Advertisement

For variations and substitutions, you can experiment with different types of pasta, such as spaghetti or fettuccine, and add in ingredients like sautéed mushrooms or grilled chicken for added protein.

The possibilities are endless, but one thing is for sure: this butter garlic pasta is a crowd-pleaser that will leave everyone wanting more.

Frequently Asked Questions

How Can I Make This Recipe Vegan-Friendly?

To make this recipe vegan-friendly, you can use vegan substitutes for butter, such as plant-based margarine or coconut oil. Additionally, opt for dairy-free options like almond milk or cashew cream instead of regular milk or cream.

Can I Use Gluten-Free Pasta for This Recipe?

Sure, you can use gluten-free pasta for this recipe. Just remember to follow the cooking instructions for gluten-free pasta and consider alternatives like rice or quinoa pasta for a delicious, gluten-free version.

Can I Substitute Olive Oil for Butter in the Garlic Butter Sauce?

Substituting olive oil or vegan butter in the garlic butter sauce can alter the taste and texture of the dish. Olive oil adds a rich, fruity flavor, while vegan butter provides a creamy and buttery texture.

Advertisement

How Can I Make This Dish Spicier?

To make this dish spicier, there are several ways to add heat. You can incorporate hot chili flakes, spicy red pepper sauce, or even diced jalapeños. Another alternative to garlic could be using ginger for a flavorful twist.

Can I Add Vegetables or Protein to This Pasta Dish?

Adding vegetables and protein to this pasta dish is a great idea. It not only enhances the nutritional value but also adds texture and flavor. I recommend sautéing some bell peppers and adding cooked chicken for a delicious and balanced meal.

Conclusion

In conclusion, making butter garlic pasta is a simple yet delicious dish that can be enjoyed by everyone.

The rich and creamy garlic butter sauce perfectly coats the al dente pasta, creating a mouthwatering combination of flavors.

This recipe allows you to indulge in a culinary experience that’s both satisfying and comforting, like a warm embrace on a chilly evening.

Advertisement

So why not give it a try and treat yourself to a delightful meal?

Continue Reading

Recipes & Culinary Uses

Easy Steps to Make Butter from Raw Milk Using a Mixer

Published

on

By

An image showcasing the step-by-step process of transforming creamy raw milk into luscious butter using a mixer

As I immerse myself in the realm of culinary exploration, I came across a hidden treasure: crafting butter from raw milk using a mixer. With just a few basic ingredients and my reliable mixer, I unveiled the key to producing smooth, homemade butter that would impress any chef.

In this article, I will guide you through the precise steps, from gathering the ingredients to storing the final product. Get ready to churn and savor the rich rewards of your own creation.

Let’s butter up!

Key Takeaways

  • Choose a mixer with a powerful motor and sturdy construction
  • Strain and pasteurize the raw milk before churning
  • Use a high-speed setting on the mixer for faster butter formation
  • Store homemade butter in airtight containers to maintain flavor and freshness

Gathering the Ingredients and Equipment

I’m gathering the ingredients and equipment needed to make butter from raw milk in my mixer.

Advertisement

To ensure a successful butter-making process, it’s crucial to choose the right mixer. Look for a mixer with a powerful motor and a sturdy construction that can handle the thick consistency of the cream. A high-speed setting is also desirable to expedite the churning process.

When it comes to sourcing raw milk, it’s important to prioritize safety and quality. Look for local farms or dairies that follow strict hygiene practices and ensure the cows are healthy and well-cared for. Freshness is key, so opt for milk that has been recently produced and stored properly.

Preparing the Raw Milk for Churning

To start preparing the raw milk for churning, I’ll first need to strain out any impurities. This ensures that the milk is clean and safe for consumption.

Before churning, it’s important to pasteurize the raw milk to eliminate any harmful bacteria that may be present. Pasteurization involves heating the milk to a specific temperature and holding it there for a set period of time. This process helps to destroy any potential pathogens without significantly altering the taste or nutritional composition of the milk.

Once the raw milk is pasteurized, there are different methods of churning it into butter. One method involves using a mixer, which agitates the milk until the fat globules separate from the liquid, forming butter.

Advertisement

Churning the Raw Milk in the Mixer

Using a high-speed setting, I’ll let the mixer agitate the milk until the fat globules separate and butter forms. The speed of the mixer plays a crucial role in the churning process. A higher speed will help the fat globules to separate more quickly, resulting in butter formation. The churning time will vary depending on the mixer speed and the amount of milk being churned. It is important to monitor the process closely to avoid over-churning, which can lead to a grainy texture. To give you an idea of the correlation between mixer speed and churning time, here is a table that summarizes the approximate time required for butter formation at different speeds:

Mixer Speed Churning Time (minutes)
Low 20-30
Medium 15-20
High 10-15
Very High 5-10
Turbo 2-5

Separating the Butter From the Buttermilk

After the churning process, I strain the mixture through a fine-mesh sieve to separate the butter from the buttermilk. The creamy liquid slowly drips down, leaving behind the beautiful golden butter. It’s a delicate process, requiring patience and precision.

As I watch the buttermilk flow through the sieve, I can’t help but appreciate the benefits of using raw milk for making butter. The rich and complex flavors of raw milk add depth and character to the final product. It’s like tasting a piece of the farm, with its grassy undertones and hints of sweetness.

Advertisement

To further enhance the butter’s taste, there are various methods for flavoring homemade butter. From the simplicity of sprinkling salt to the creativity of adding herbs and spices, the possibilities are endless.

Storing and Using Your Homemade Butter

When storing my homemade butter, I prefer to use airtight containers to keep it fresh and prevent any unwanted odors from seeping in. It’s important to protect the butter’s flavor and texture, as well as extend its shelf life. Additionally, I like to experiment with different flavors to add a unique twist to my butter. Some creative ways to flavor homemade butter include incorporating herbs like rosemary or thyme, adding spices like cinnamon or garlic powder, or mixing in sweet ingredients like honey or maple syrup. This allows me to customize my butter based on my preferences and the dishes I plan to use it in. Speaking of which, homemade butter has a multitude of uses in cooking and baking. It can be spread on toast, melted over vegetables, used as a base for sauces, or incorporated into pastry dough for flakier results. The possibilities are endless!

Flavor Ingredients Recommended Uses
Herb-infused Rosemary, thyme Mashed potatoes, roasted vegetables
Spiced Cinnamon, garlic powder Toast, pancakes
Sweet Honey, maple syrup Baked goods, waffles

Frequently Asked Questions

How Long Does It Take for the Raw Milk to Turn Into Butter in the Mixer?

To speed up the process of turning raw milk into butter in a mixer, you can increase the speed and duration of mixing. It is not possible to make butter in a mixer without using raw milk.

Advertisement

Can I Use Pasteurized Milk Instead of Raw Milk for Making Butter in a Mixer?

Using raw milk instead of pasteurized milk for making butter in a mixer has several benefits. It enhances the flavor and nutritional value of the butter. To achieve the best consistency, ensure the milk is fresh and at room temperature before churning.

What Is the Ideal Temperature for the Raw Milk Before Churning It in the Mixer?

The ideal temperature for raw milk before churning it in the mixer is around 50-55°F. This ensures proper fat separation and reduces churning time. It’s crucial to maintain the correct temperature for the best results.

Can I Add Flavorings or Herbs to the Butter While Churning It in the Mixer?

Yes, you can add flavorings or herbs to the butter while churning it in the mixer. This is a great way to incorporate flavor into homemade butter and experiment with different tastes.

Can I Use a Hand Mixer Instead of a Stand Mixer to Churn the Raw Milk Into Butter?

Using a hand mixer for churning raw milk into butter has its pros and cons. It can be more convenient and easier to handle, but may take longer and require more effort compared to a stand mixer. Other methods without a mixer include shaking in a jar or using a food processor.

Conclusion

In conclusion, making butter from raw milk in a mixer is a simple and rewarding process. By following the steps outlined above and using the right ingredients and equipment, you can transform fresh raw milk into delicious homemade butter.

Advertisement

Remember, practice makes perfect, so don’t be discouraged if your first attempt isn’t perfect. With a little patience and perseverance, you’ll be churning out creamy butter in no time, and soon you’ll be able to spread it on toast and enjoy the fruits of your labor.

Continue Reading

Recipes & Culinary Uses

Make Rich Butter from Raw Milk

Published

on

By

An image capturing the process of making butter from raw milk

Hey! Have you ever thought about how to turn raw milk into homemade butter? Look no further, I’ve got the solution for you.

In this article, I’ll take you through the step-by-step process of turning that creamy goodness into delicious homemade butter.

We’ll explore the benefits of using raw milk, learn how to separate the cream, and even discover different flavors you can infuse into your butter.

So, grab your apron and let’s get churning!

Key Takeaways

  • Raw milk contains essential vitamins, minerals, and enzymes that are destroyed during pasteurization.
  • Separating the cream from raw milk can be done through gravity separation, centrifugal separation, or cold separation.
  • Churning the cream into butter can be done through hand churning, using a stand mixer with a whisk attachment, or using a food processor with a blade attachment.
  • Washing and storing the freshly made butter involves cleaning the butter container and preserving its freshness by wrapping it tightly in wax paper or using an airtight container.

Understanding the Benefits of Raw Milk

Advertisement

Raw milk has numerous health benefits that are not found in pasteurized milk. Understanding the nutritional value of raw milk is important for those seeking a natural and wholesome source of nutrients.

Contrary to popular belief, raw milk is not a dangerous product when handled and consumed properly. In fact, it contains essential vitamins, minerals, and enzymes that are destroyed during the pasteurization process.

Raw milk is rich in beneficial bacteria and probiotics, which can support a healthy gut microbiome and enhance digestion. Additionally, raw milk is a good source of bioavailable nutrients such as calcium, protein, and healthy fats.

Debunking myths about raw milk is crucial to prevent misinformation and promote informed choices regarding our food.

Preparing the Raw Milk for Butter Making

To prepare the milk for butter making, it’s important to first skim off the cream. This step is crucial as it allows us to separate the high-fat cream from the milk, which is necessary for obtaining a good quality butter.

Advertisement

Here are three separating techniques to help you achieve the best results:

  1. Gravity separation: After allowing the milk to stand undisturbed for a few hours, the cream naturally rises to the top, making it easy to skim off with a spoon or ladle.

  2. Centrifugal separation: Using a cream separator machine, the milk is spun at high speeds, causing the heavier cream to separate from the lighter milk. This method is efficient and yields a higher cream quality.

  3. Cold separation: By refrigerating the milk overnight, the cream becomes denser and easier to separate. Skimming off the cold cream results in a richer and creamier butter.

Separating the Cream From the Raw Milk

If you want to achieve the best results when separating the cream from the milk, try using gravity separation, centrifugal separation, or cold separation techniques.

Gravity separation involves allowing the milk to sit undisturbed in a container for a period of time, allowing the cream to rise to the top.

Advertisement

Centrifugal separation utilizes a machine that spins the milk at high speeds, forcing the cream to separate from the milk.

Cold separation involves chilling the milk to a low temperature, causing the cream to solidify and separate from the milk.

These techniques are beneficial because consuming raw dairy has numerous health benefits, such as improved digestion, increased nutrient absorption, and enhanced immune function.

Additionally, if you don’t have access to a churn, these separation methods provide alternatives for obtaining cream for making butter.

Churning the Cream Into Butter

Once the cream has separated from the milk, you can start churning it into delicious butter. Churning is the process of agitating the cream until it transforms into butter.

Advertisement

Here are three techniques to help you achieve the perfect consistency:

  1. Hand Churning: This traditional method involves using a small churn or jar and physically shaking or rocking it back and forth until the cream turns into butter.

  2. Stand Mixer: If you have a stand mixer with a whisk attachment, you can use it to churn the cream. Start at a low speed and gradually increase until the butter forms.

  3. Food Processor: Another option is to use a food processor with a blade attachment. Pulse the cream until it separates into butter and buttermilk.

Troubleshooting common butter making problems:

  • If the cream isn’t thickening, ensure it is at the right temperature (around 50-55°F) and give it more time to churn.
  • If the butter is too soft, refrigerate it for a while before churning again.
  • If the butter is too hard, let it soften at room temperature or add a small amount of buttermilk to adjust the consistency.

After churning the cream into butter, it’s time to move on to the next step of washing and storing the freshly made butter.

Washing and Storing the Freshly Made Butter

When it comes to washing and storing freshly made butter, there are a few key points to consider.

Advertisement

First, cleaning the butter container is essential to maintain the quality of the butter. I recommend using warm soapy water and a soft sponge to remove any residue before drying it thoroughly.

Second, preserving the butter’s freshness is crucial to prolong its shelf life. To do this, I suggest wrapping the butter tightly in wax paper or placing it in an airtight container to protect it from air and odors.

Lastly, it’s important to store butter at the proper temperature. The recommended storage temperature for butter is between 32-40°F (0-4°C), as this helps to maintain its texture and prevent spoilage.

Cleaning the Butter Container

Before cleaning the butter container, make sure to remove any leftover butter residue. Cleaning the butter container is essential to maintain its freshness and prevent any cross-contamination. Here are three effective cleaning techniques to ensure a clean and sanitized container:

  1. Soak in hot, soapy water: Fill the container with hot water and add a few drops of dish soap. Let it sit for a few minutes to loosen any residue, then scrub with a sponge or brush.

  2. Use vinegar solution: Mix equal parts white vinegar and water in the container. Let it sit for about 15 minutes to dissolve any stubborn residue. Scrub with a sponge or brush, then rinse thoroughly.

  3. Bleach solution: Mix 1 tablespoon of bleach with 1 gallon of water. Let the container soak in the solution for 10 minutes, then scrub and rinse well.

Preserving Butter’s Freshness

After cleaning the butter container, the next step is to ensure that the butter stays fresh and maintains its texture for as long as possible. This is important because nobody wants to end up with rancid butter. To preserve the butter’s freshness, there are a few key things you can do. Firstly, storing the butter in an airtight container or wrapping it tightly in wax paper will help prevent it from being exposed to air and developing off flavors. Secondly, keeping the butter refrigerated at a consistent temperature, ideally around 40°F (4°C), will slow down the process of it going rancid. Lastly, if you want to store butter for an extended period of time, freezing it is a great option as it can extend its shelf life for several months. By following these steps, you can enjoy fresh and flavorful butter for all your culinary needs.

Advertisement
Preserving Butter’s Freshness
Store butter in an airtight container or wrap tightly in wax paper.
Refrigerate butter at a consistent temperature of around 40°F (4°C).
Freeze butter for extended storage, which can extend its shelf life for several months.
Follow these steps to enjoy fresh and flavorful butter for all your culinary needs.

Recommended Storage Temperature

Storing butter in the refrigerator at a consistent temperature of around 40°F (4°C) helps to maintain its freshness and prevent it from going rancid. Here are three recommended storage methods and the ideal temperature range for butter:

  1. Wrap it properly: Use parchment paper or airtight containers to wrap the butter. This will protect it from absorbing odors and prevent it from drying out.

  2. Keep it away from light: Exposure to light can cause butter to spoil faster. Store it in a cool, dark place, like the refrigerator’s butter compartment or a covered butter dish.

  3. Avoid temperature fluctuations: Butter can easily absorb flavors and odors from other foods in the fridge. To maintain its quality, store it away from strong-smelling foods and make sure the temperature remains constant.

Following these recommended storage methods and keeping the butter at the ideal temperature range will help to preserve its freshness and taste for longer periods.

Using Leftover Buttermilk in Recipes

You can easily use leftover buttermilk in recipes to add a tangy flavor. Buttermilk is a versatile ingredient that can enhance the taste and texture of various baked goods. It’s a great substitute for regular milk in recipes because it adds a unique tanginess and richness. Here are some creative uses for leftover buttermilk in baking:

Row Buttermilk Recipe Result
1 Pancakes Fluffy and Light and
tender texture fluffy pancakes
2 Biscuits Tender and Flaky and
flaky texture buttery biscuits
3 Cakes Moist and Moist and
tender texture tender cakes
4 Fried chicken Crispy and Juicy and
flavorful coating flavorful chicken

Exploring Variations and Flavors in Homemade Butter

When it comes to homemade butter, there are endless possibilities for adding unique flavors and enhancing its taste.

One way to do this is through unique butter infusions, where you can mix in various ingredients like garlic, herbs, or even fruit zest to create a personalized flavor profile.

Advertisement

Another option is to enhance the taste of your homemade butter by incorporating herbs such as rosemary, thyme, or basil, which can add a delightful aroma and taste.

Lastly, experimenting with flavored salts like smoked sea salt or truffle salt can take your butter to a whole new level, adding a burst of flavor that will elevate any dish.

Unique Butter Infusions

To add unique flavors to your butter, try infusing it with herbs or spices. Butter infusion techniques offer a creative way to elevate the taste of your homemade butter. Here are three ideas to get you started:

  1. Garlic and Herb Butter: Melt your butter, then add minced garlic and chopped fresh herbs like rosemary, thyme, or parsley. Let the flavors infuse for a few hours before refrigerating.

  2. Citrus Zest Butter: Grate the zest of an orange, lemon, or lime into your softened butter. Mix well and let it sit in the fridge for a while to let the citrus flavors infuse.

  3. Spiced Butter: Add a pinch of your favorite spices, such as cinnamon, nutmeg, or cardamom, to your softened butter. Mix thoroughly and let it sit in the fridge to develop the flavors.

Enhancing Taste With Herbs

Adding herbs to your butter is a simple and effective way to enhance the taste of your culinary creations. Not only does it add a burst of flavor, but it also adds a touch of freshness and complexity to your dishes. Experimenting with different herbal blends can elevate your butter to a whole new level. Whether you prefer a savory blend of rosemary and thyme or a more exotic combination of cilantro and lime, the possibilities are endless. To help you get started, here is a table showcasing some popular herb and spice combinations that you can try in your butter:

Herb/Spice Flavor Profile Best Pairings
Rosemary Earthy, piney Potatoes, lamb
Basil Sweet, peppery Tomatoes, mozzarella
Dill Fresh, tangy Fish, cucumbers
Cinnamon Warm, sweet Apples, baked goods

Experimenting With Flavored Salts

After experimenting with herbs to enhance the taste of my homemade butter, I decided to take my flavor exploration to the next level by experimenting with flavored salts. Flavored salts can add a unique and exciting twist to butter, elevating its taste and making it even more delicious.

Advertisement

Here are three ways I incorporated different salts into my flavored butter recipes:

  1. Smoked Salt Butter: I mixed smoked salt into softened butter, creating a smoky and savory spread that pairs perfectly with grilled meats and vegetables.

  2. Truffle Salt Butter: By combining truffle salt with butter, I created a luxurious and indulgent spread that adds a hint of earthy and aromatic flavor to any dish.

  3. Citrus Salt Butter: I zested some fresh citrus fruits and mixed the zest with sea salt before incorporating it into butter. The result was a bright and tangy butter that adds a burst of freshness to baked goods and seafood.

Frequently Asked Questions

Can I Make Butter From Pasteurized Milk?

Yes, you can make butter from pasteurized milk. It’s a simple process of churning the cream until it separates into butter and buttermilk. Homemade butter can be healthier than store-bought due to its freshness and lack of additives.

How Long Does It Take to Separate the Cream From the Raw Milk?

Separating cream from raw milk depends on various factors, such as temperature and milk fat content. Once separated, the cream can be churned into butter. The churning process can take anywhere from 10 to 30 minutes.

Can I Use an Electric Mixer Instead of a Churn to Make Butter?

Yes, you can use an electric mixer to make butter. However, it’s important to note that the process may differ slightly between churning raw milk and pasteurized milk.

How Long Can I Store Freshly Made Butter?

Freshly made butter can be stored in the refrigerator for up to two weeks. However, its shelf life can be extended by freezing it. Proper storage is essential to maintain its freshness and quality.

Advertisement

What Other Uses Are There for Leftover Buttermilk Besides Using It in Recipes?

Leftover buttermilk can be used in pancakes, biscuits, or even as a marinade for fried chicken. As for alternative methods for making butter, you can also use heavy cream and a mixer.

Conclusion

In conclusion, making butter from raw milk is a delightful and rewarding process. The benefits of raw milk are numerous, as it contains valuable enzymes and nutrients that are lost during pasteurization.

By separating the cream from the raw milk and churning it vigorously, you can easily transform it into creamy and delicious homemade butter.

Don’t forget to wash and store the butter properly to ensure its freshness. And don’t discard the leftover buttermilk! It can be used in various recipes to add flavor and moisture.

So, grab some raw milk and start your butter-making adventure today!

Advertisement
Continue Reading

Trending