I really enjoy treating myself to a delicious lobster dinner. Trust me, adding a spoonful of creamy garlic butter really elevates the dish.
In this article, I’ll show you my foolproof method for making the most mouthwatering garlic butter. It will have your taste buds dancing with delight. Get ready to elevate your seafood experience with this heavenly concoction.
This garlic butter is sure to impress even the most discerning of palates.
Key Takeaways
- Choosing the right garlic variety enhances the flavor of garlic butter.
- Crushing garlic releases more natural oils, resulting in a stronger flavor.
- Infusing butter with garlic creates a smooth and rich consistency.
- Seasoning garlic-infused butter with salt and freshly ground black pepper enhances the taste.

Vitamix Ascent X3 Blender with Three Blending Programs, Self-Cleaning Program, Professional-Grade Blender for Smoothies, Soups and More, Stainless-Steel Blades, 48 Oz Container, Shadow Black
Included: Ascent X3 blender motor base, 48-ounce container, S2 low-profile tamper, tamper holder, and digital recipe book; this...
As an affiliate, we earn on qualifying purchases.
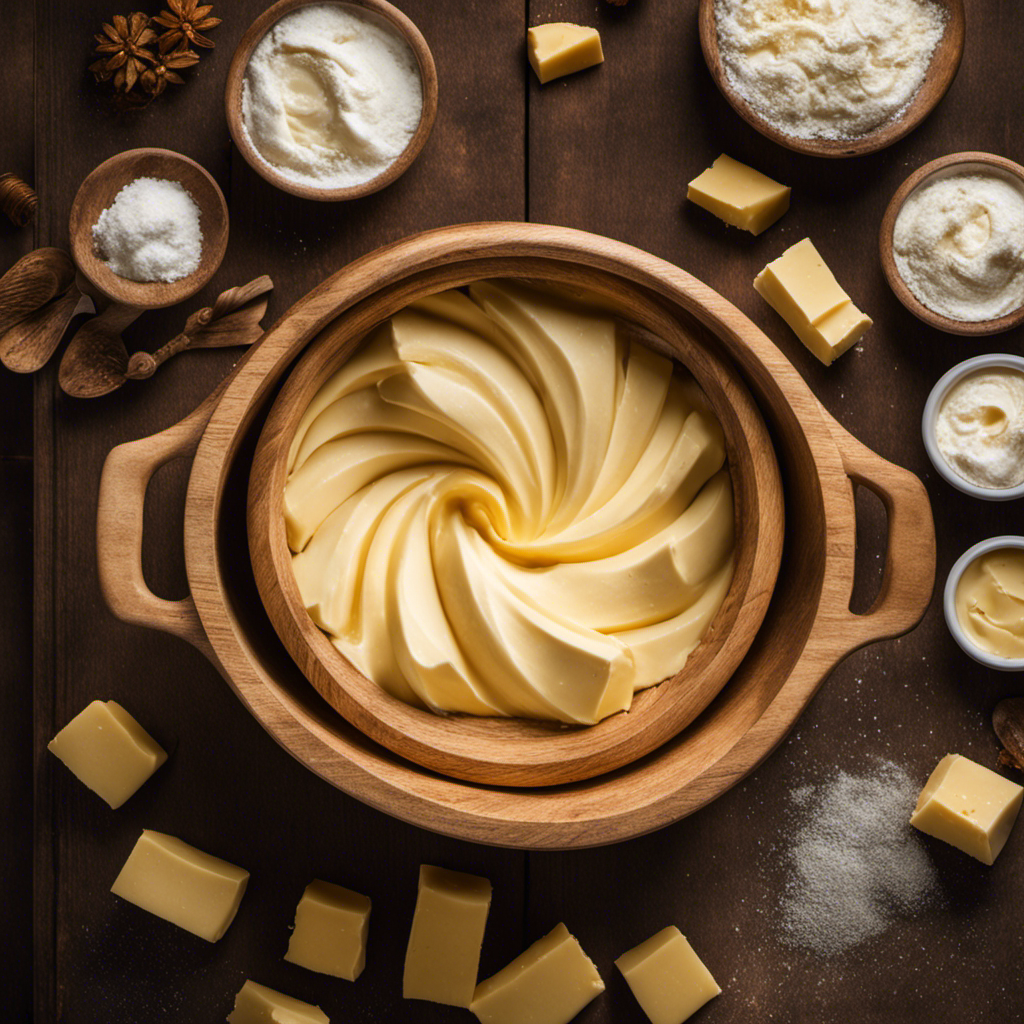
Selecting the Right Ingredients
To make the best garlic butter for your lobster, you’ll want to start by selecting the right ingredients. When it comes to garlic, there are various varieties to choose from, each with its own unique flavor profile.
The most common ones include hardneck garlic, softneck garlic, and elephant garlic. Hardneck garlic has a bold and robust flavor, perfect for those who enjoy a strong garlic taste. Softneck garlic, on the other hand, has a milder and sweeter flavor, making it a great choice for those who prefer a more subtle garlic taste. Elephant garlic, despite its name, is not actually a true garlic, but it still offers a mild and slightly sweet flavor.
Choosing the right garlic variety will allow you to enhance the flavor of your garlic butter, ensuring a delicious accompaniment to your lobster.

Cosori 9-in-1 TurboBlaze Air Fryer 6 Qt, Smart Control, 90°–450°F, Shake Reminders, Precise Heating for Even Results, Air Fry, Roast, Bake, Broil, Dry, Frozen, Proof, Reheat, Keep Warm, 120V, Cream
𝘼𝙞𝙧 𝙁𝙧𝙮𝙚𝙧 𝙐𝙥𝙜𝙧𝙖𝙙𝙚: Innovative TurboBlaze Technology delivers a powerful 3600 rpm fan speed and temperatures up to 450℉,...
As an affiliate, we earn on qualifying purchases.
Preparing the Garlic
When it comes to preparing garlic for cooking, there are two popular methods to choose from: crushing and mincing. Both techniques have their own advantages and can greatly impact the flavor and texture of the dish.
Additionally, roasting garlic is another technique that can add a deep and mellow flavor to your recipes.
In this discussion, I will delve into the differences between crushing and mincing garlic, as well as the benefits of roasting garlic to enhance the overall taste of your dishes.
Crushing Vs. Mincing Garlic
Crushing garlic produces a stronger flavor compared to mincing it. When you crush garlic, you release more of its natural oils, resulting in a more intense and robust flavor.
Here are three techniques for crushing garlic and enhancing its flavor intensity:
-
Mortar and Pestle: This traditional method involves using a mortar and pestle to crush the garlic cloves into a paste. The friction and grinding action create a smooth consistency and maximize the release of flavor.
-
Garlic Press: A garlic press is a convenient tool that quickly crushes garlic cloves. It exerts pressure to extract the oils and juices, intensifying the garlic flavor.
-
Knife and Salt: Crush garlic by mincing it finely with a knife and sprinkling salt on top. Use the side of the knife to crush the minced garlic, creating a garlic paste with an enhanced flavor.
Roasting Garlic for Flavor
For an irresistible burst of flavor, roast the garlic cloves until they become golden and caramelized. Roasting garlic is one of the best techniques for enhancing the flavor of lobster.
To begin, preheat the oven to 400°F. Take a whole head of garlic and slice off the top to expose the cloves. Drizzle some olive oil over the exposed cloves, making sure they are well coated. Wrap the garlic head tightly in aluminum foil and place it in the oven for about 40 minutes, or until the cloves become soft and golden.
Once roasted, the garlic will have a sweet and nutty flavor that pairs perfectly with the rich and delicate taste of lobster. Simply squeeze the roasted cloves out of their skins, mash them into a paste, and mix with softened butter to create a delicious garlic butter sauce for your lobster.

Puffworks Baby Organic Peanut Butter Puffs, Perfect for Early Peanut Introduction, Plant Protein, USDA Organic, Gluten-Free, Vegan, Non-GMO, Kosher, 1.0 Ounce (Pack of 6)
6-1.0 Ounce Bags of Puffworks baby Organic Peanut Butter Puffs
As an affiliate, we earn on qualifying purchases.
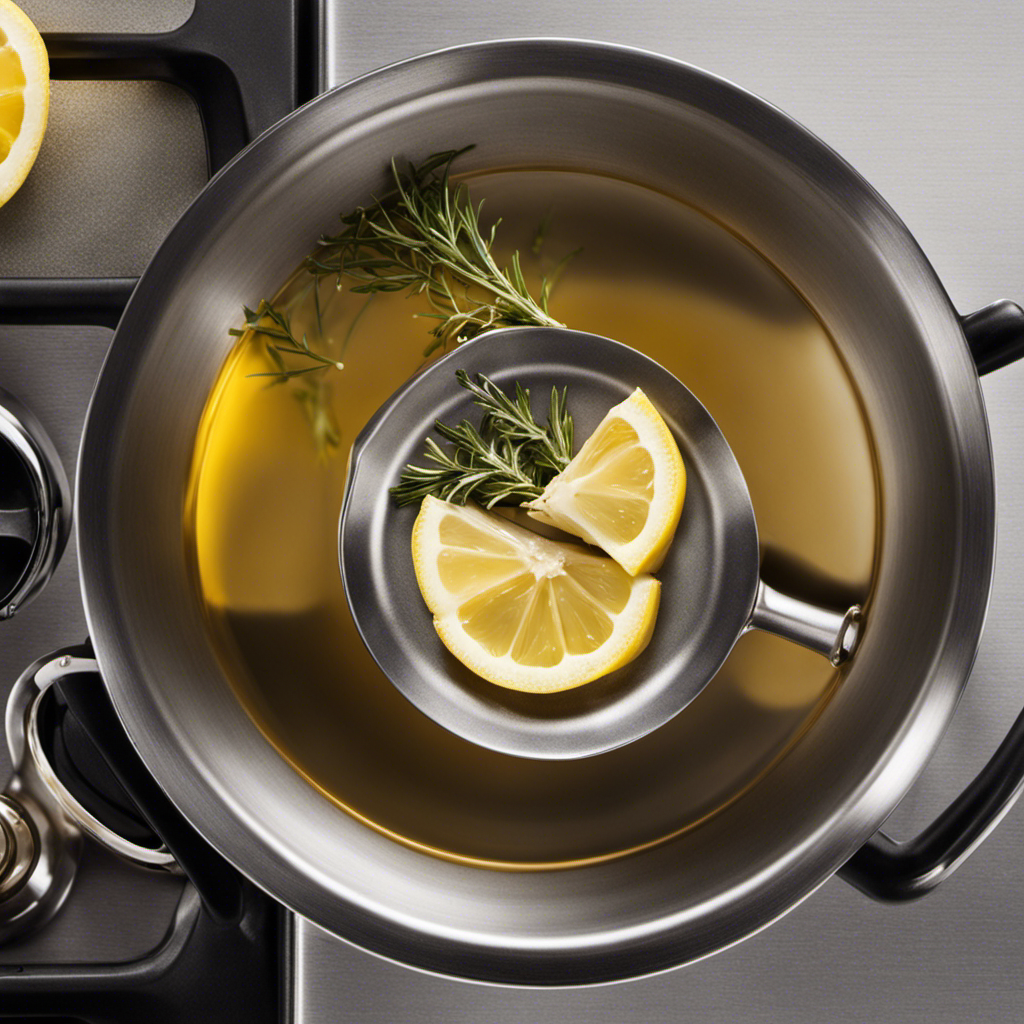
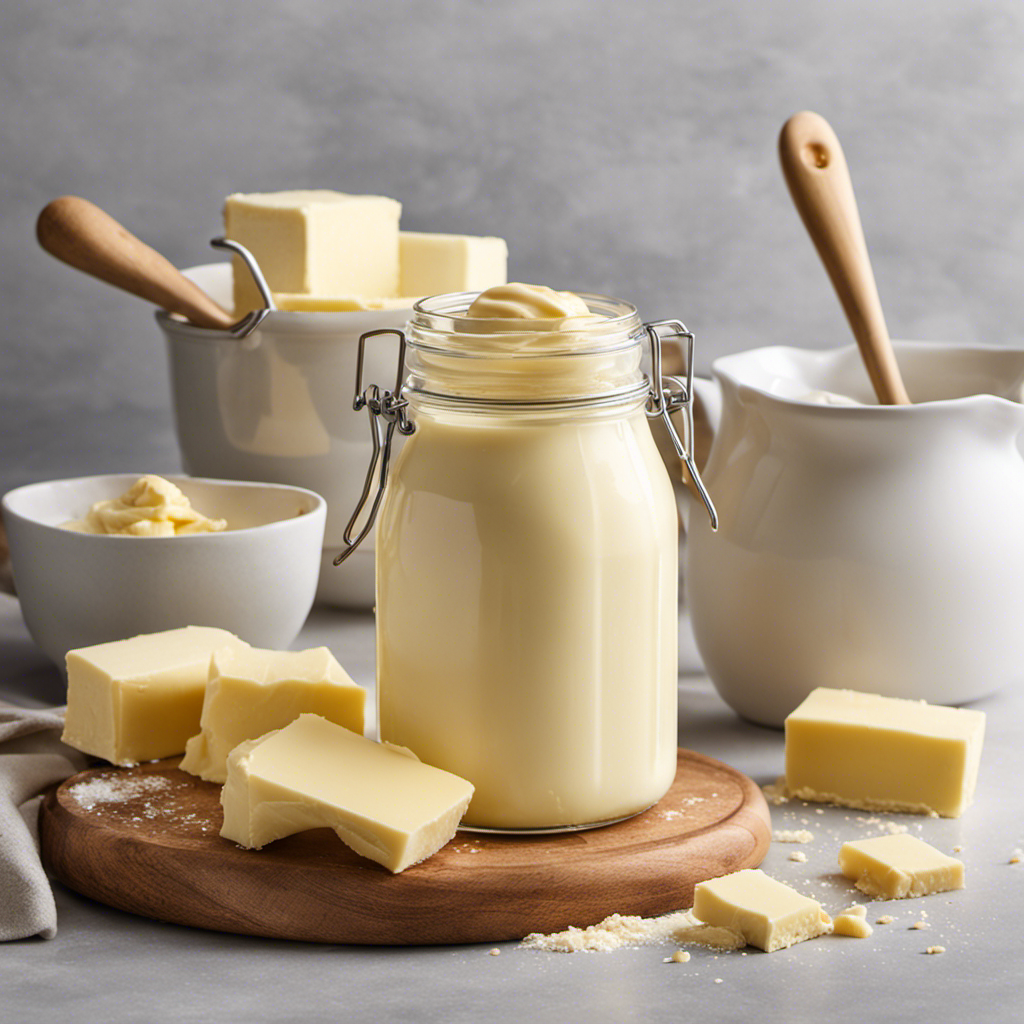
Melting the Butter
When it comes to melting butter for lobster, it’s important to consider the ideal melting temperature and butter consistency. Achieving the right temperature ensures that the butter melts evenly and doesn’t burn.
Additionally, the consistency of the butter plays a role in how it coats the lobster meat, providing a smooth and creamy texture.
Ideal Melting Temperature
The ideal melting temperature for the garlic butter is around 120 degrees Fahrenheit. This temperature ensures that the butter melts smoothly and evenly, without becoming too hot and losing its flavor.
When melting garlic butter, it is important to use gentle heat to avoid burning or scorching the butter.
Here are some alternative melting methods to consider:
-
Double Boiler: This method involves placing a heatproof bowl containing the garlic butter over a pot of simmering water. The indirect heat from the steam gently melts the butter without the risk of burning.
-
Microwave: If you’re short on time, you can melt the garlic butter in the microwave. Use a microwave-safe bowl and heat in short intervals, stirring in between, until the butter is fully melted.
-
Stovetop: For a quicker method, you can melt the garlic butter directly on low heat on the stovetop. Keep a close eye on it and stir frequently to prevent burning.
These alternative methods ensure that the garlic butter melts perfectly for your lobster or any other culinary creation.
Butter Consistency Considerations
To achieve the desired consistency, it’s important to melt the garlic butter slowly and stir frequently. When it comes to butter temperature, it’s crucial to start with room temperature butter. This allows for easier melting and blending with the garlic. If the butter is too cold, it will take longer to melt and may result in uneven consistency. On the other hand, if the butter is too warm, it might lead to separation and greasiness.
As for garlic infusion techniques, one popular method is to melt the butter in a saucepan over low heat and add minced garlic. Allow the garlic to cook gently in the butter, stirring constantly, for about 2-3 minutes. This ensures that the garlic flavor is infused into the butter without burning it.

Nourishing Nippers Early Allergen Introduction - for Babies 4+ Months,14 Allergens in one pack, Including Peanut, Egg & Milk | Mix with Baby Food & Purees. 6 Month Supply
Nutritious Baby Food: Provides early exposure to common allergens like peanuts, eggs, and wheat to help reduce the...
As an affiliate, we earn on qualifying purchases.
Infusing the Butter With Garlic Flavor
Mix melted butter and minced garlic together for a flavorful infusion. This step is crucial in creating a delicious garlic butter that will elevate the taste of your lobster. As the butter melts, it absorbs the essence of the garlic, resulting in a heavenly combination of flavors.
Here are three reasons why infusing butter with garlic is not only tasty but also beneficial for your health:
-
Garlic infused oil: Infusing the butter with garlic allows the oil from the garlic to blend seamlessly with the butter. This creates a smooth and rich consistency that coats the lobster perfectly.
-
Health benefits of garlic: Garlic is renowned for its numerous health benefits. It contains compounds that can boost your immune system, lower cholesterol levels, and even reduce the risk of heart disease. By infusing butter with garlic, you can enjoy these health benefits while indulging in a delectable lobster meal.
-
Enhanced flavor: Garlic adds a distinct and aromatic flavor to any dish. By infusing butter with garlic, you enhance the natural taste of the lobster, making it even more enjoyable.
Infusing butter with garlic is a simple yet effective way to take your lobster dish to the next level, both in terms of taste and health benefits.
Seasoning the Garlic Butter
Season your garlic-infused butter with a pinch of salt and a sprinkle of freshly ground black pepper for added depth and flavor. This simple step enhances the taste of the garlic butter and complements the sweetness of the lobster.
If you want to explore different variations of garlic butter, you can experiment with adding herbs like parsley or thyme, or even a hint of lemon zest for a citrusy twist. The possibilities are endless, allowing you to customize the garlic butter to your personal preference.
Additionally, garlic butter is not just limited to lobster. It pairs wonderfully with other seafood like shrimp, crab, or scallops. The rich and creamy flavors of the butter combined with the delicate seafood create a truly indulgent and satisfying dish.
Serving and Enjoying the Garlic Butter
Once your garlic-infused butter is ready, simply spread it onto warm, toasted bread for a delicious and indulgent treat. The rich, creamy butter combined with the aromatic garlic creates a mouthwatering combination that is sure to satisfy your taste buds.
But don’t limit yourself to just bread! Here are some serving suggestions and pairing ideas to elevate your garlic butter experience:
- Pair it with grilled lobster tails for a decadent surf and turf meal.
- Use it as a dipping sauce for steamed lobster claws or shrimp.
- Drizzle it over a lobster pasta dish for added flavor and richness.
The possibilities are endless when it comes to enjoying this flavorful garlic butter. So, get creative and explore different ways to incorporate it into your favorite lobster dishes. Whether you’re hosting a dinner party or simply treating yourself to a delicious meal, the garlic butter will take your lobster experience to the next level.
Frequently Asked Questions
Can I Use Margarine Instead of Butter in This Recipe?
Sure, you can use margarine instead of butter in this recipe. However, keep in mind that the taste and texture might be slightly different. Additionally, garlic butter can also be used as a delicious spread for bread or as a flavor enhancer in various dishes.
How Long Does It Take to Infuse the Butter With Garlic Flavor?
Infusing butter with garlic flavor can take anywhere from 30 minutes to overnight, depending on your preference. If you’re short on time, try using garlic-infused olive oil instead. It adds a delicious punch of flavor to your lobster dish!
Can I Use Minced Garlic Instead of Fresh Garlic Cloves?
I prefer using fresh garlic cloves instead of minced garlic in recipes. The flavor is stronger and more authentic. However, if you’re in a pinch, minced garlic can still work well. It’s just a matter of personal preference.
Can I Store the Garlic Butter in the Refrigerator?
Yes, I can store the garlic butter in the refrigerator. It’s a great way to keep it fresh and ready to use whenever I want. Plus, I can also try using an alternative to butter in my recipe.
Can I Use the Garlic Butter for Other Dishes Apart From Lobster?
Yes, you can definitely use garlic butter for other dishes! It makes a delicious sauce for pasta, adding a rich and flavorful touch. You can also use it as a spread for bread, creating a tasty garlic bread. Enjoy!
Conclusion
In conclusion, crafting the perfect garlic butter for your lobster is a culinary adventure that will elevate your dining experience to new heights.
Like a symphony conductor blending harmonious notes, selecting the finest ingredients, preparing the garlic with precision, and infusing the butter with its aromatic essence all come together to create a masterpiece.
With a sprinkle of seasoning, this velvety elixir transforms into a flavor explosion that dances on your taste buds.
So, savor each bite, as this golden elixir takes your lobster feast to a realm of culinary excellence.