Connect with us

Recipes & Culinary Uses

Make Your Own Gourmet Flavored Butter

Published

on

An image showcasing a rustic wooden cutting board topped with a dollop of creamy, homemade flavored butter surrounded by vibrant, freshly picked herbs and spices, enticing readers to learn How to Make Flavored Butter

I’m here to show you how to make flavored butter that will take your culinary creations to the next level.

Making your own flavored butter is like adding a burst of sunshine to your dishes – it’s simple, fun, and oh-so-delicious.

In this article, I’ll guide you through the process, from choosing the right butter to selecting flavorings and preparing your ingredients.

Get ready to elevate your cooking game with these easy-to-follow steps. Let’s dive in!

Key Takeaways

  • Choosing high-quality, unsalted butter is important for making flavored butter.
  • Experimenting with different combinations of herbs, spices, and sweet additions allows for customization.
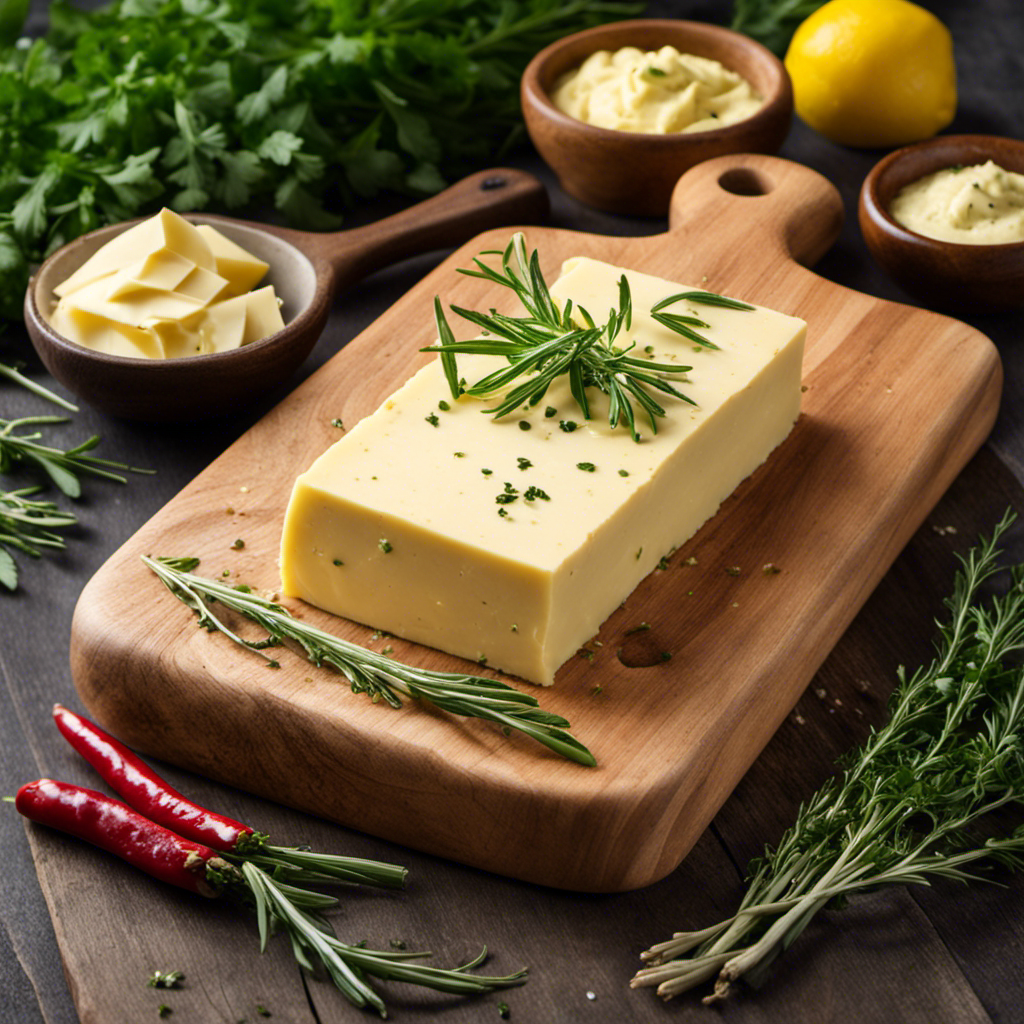
  • Popular flavor combinations include garlic and herb, lemon and chili, and honey and cinnamon.
  • Softening the butter and incorporating flavorings into it are key steps in making flavored butter.

Choosing the Right Butter

Advertisement

You should choose the right butter for making flavored butter by opting for a high-quality, unsalted variety. When it comes to butter types, it’s important to select one that is of good quality. Look for a brand that uses fresh cream and has a rich, creamy texture. Avoid salted butter as it can overpower the flavors you want to add. Unsalted butter allows you to have full control over the taste of your flavored butter.

Now, let’s talk about the flavoring techniques. Once you have chosen your butter, you can get creative with your flavorings. Some popular options include herbs like basil or rosemary, spices like garlic or cinnamon, and even sweet additions like honey or chocolate. Experiment with different combinations to find your perfect blend of flavors.

Selecting Flavorings for Your Butter

When it comes to adding flavor to butter, there are popular combinations that never disappoint.

From the classic pairing of garlic and herb to the tangy and spicy blend of lemon and chili, these flavor combinations are sure to elevate your dishes.

However, don’t be afraid to step outside the box and experiment with unique flavors like lavender and honey or smoked paprika and maple syrup.

Advertisement

The possibilities are endless, and you might just discover a new favorite flavor combination along the way.

Popular Flavor Combinations

To create popular flavor combinations for your flavored butter, try combining ingredients like garlic and herb, honey and cinnamon, or lemon and dill. These combinations not only add a burst of flavor to your butter, but they also offer a variety of benefits.

Garlic and herb flavored butter is perfect for spreading on bread or using as a savory topping for grilled meats. The combination of honey and cinnamon adds a touch of sweetness to your butter, making it ideal for spreading on pancakes or toast. Lemon and dill flavored butter is refreshing and pairs well with seafood dishes.

Experimenting with different flavors allows you to customize your butter to suit your taste preferences. In the next section, we will explore unique flavor combinations to take your flavored butter to the next level.

Experimenting With Unique Flavors

Experimenting with unique flavors can elevate your flavored butter to new heights, allowing you to create delicious combinations that will surprise and delight your taste buds.

Advertisement

When it comes to flavored butter, the possibilities are endless. Here are three ways to explore savory options and experiment with herbs:

  1. Think outside the box: Don’t limit yourself to traditional herbs like basil or thyme. Try experimenting with more unusual herbs like tarragon or lavender for a unique twist.

  2. Mix and match: Combine different herbs to create your own signature blend. For example, try mixing rosemary and sage for a fragrant and earthy flavor.

  3. Get inspired by cuisines: Take inspiration from different cuisines around the world. Add spices like cumin and coriander for a Middle Eastern flair or chili peppers for a spicy kick.

By experimenting with herbs and exploring savory options, you can create flavored butter that adds a burst of flavor to any dish.

Now, let’s move on to preparing your ingredients.

Preparing Your Ingredients

Advertisement

When it comes to cooking, the key to a successful dish often lies in the ingredients used. That’s why it’s important to carefully select and prepare your ingredients before you start cooking.

In this discussion, we will explore some helpful tips for selecting the best ingredients and ensuring they are properly prepared to enhance the flavors and textures of your dishes.

Ingredient Selection Tips

You can easily enhance the flavor of your butter by selecting high-quality ingredients. When it comes to ingredient pairing, there are a few key tips to keep in mind.

  1. Choose complementary flavors: Pair ingredients that naturally go well together, such as herbs and citrus zest, or sweet and savory combinations like honey and garlic. The right pairing can create a harmonious flavor profile in your butter.

  2. Experiment with different ingredients: Don’t be afraid to get creative! Try adding spices, dried fruits, or even cheese to your butter for a unique twist. The possibilities are endless, so have fun exploring different flavor combinations.

  3. Use flavor infusion techniques: To infuse your butter with maximum flavor, try techniques like steeping herbs in melted butter or blending ingredients together to create a smooth and well-incorporated mixture. These methods ensure that the flavors are evenly distributed throughout the butter.

Proper Ingredient Preparation

To properly prepare your ingredients for making flavored butter, follow these steps:

  1. Start by washing and drying any fresh herbs or citrus zest that you plan to use. This is important to remove any dirt or residue and ensure clean flavors.

  2. Once your ingredients are clean, measure them out. Finely chop the herbs and measure the desired amount. For citrus zest, use a microplane or zester to grate the peel, being careful to avoid the bitter white pith.

  3. There are two ways to infuse the flavors into the butter. You can either add the chopped herbs or citrus zest directly to the softened butter or create a compound butter by gently melting the butter and incorporating the flavors before allowing it to solidify again.

Now that our ingredients are prepared, let’s move on to the next step: softening the butter.

Advertisement

Softening the Butter

Before adding any flavors, make sure your butter is softened to easily incorporate the ingredients. Softening butter is a crucial step in making flavored butter, as it allows for a smooth and creamy consistency. There are several techniques you can use to soften butter quickly and effectively.

  1. Room Temperature Method: Simply take the butter out of the refrigerator and let it sit at room temperature for about 30 minutes. This allows the butter to soften naturally without using any heat.

  2. Microwave Method: Cut the butter into smaller pieces and place them in a microwave-safe bowl. Heat the butter in short bursts of 10 seconds, checking and stirring in between each burst until the desired softness is achieved.

  3. Grating Method: If you need softened butter in a hurry, grate the cold butter using a cheese grater. The increased surface area helps the butter soften faster.

When it comes to alternative butter options, you can also use margarine or plant-based spreads as a substitute. Just make sure to adjust the flavors accordingly to create a delicious and unique flavored butter.

Mixing in the Flavorings

Once the butter has softened, it’s time to mix in the flavorings for a delectable twist. Mixing in the flavorings is where the magic happens, as it allows you to create unique and delicious flavored butters. There are various mixing techniques and flavor infusion methods that can be used to achieve different tastes and textures.

One popular method is to simply mix the softened butter with herbs and spices. This can be done by finely chopping the herbs and mixing them into the butter along with your desired spices. Another technique is to create a compound butter, which involves mixing the softened butter with other ingredients such as garlic, lemon zest, or even cheese.

To give you an idea of the endless possibilities, here is a table showcasing some flavor combinations for flavored butter:

Advertisement
Flavor Combination Ingredients
Garlic Herb Garlic, parsley, thyme, rosemary
Lemon Pepper Lemon zest, black pepper
Sun-dried Tomato Sun-dried tomatoes, basil
Honey Cinnamon Honey, cinnamon

These are just a few examples, but feel free to experiment and create your own unique flavor combinations. The key is to mix the flavorings thoroughly into the softened butter to ensure that the flavors are evenly distributed. So, get creative and enjoy the process of mixing in the flavorings to create a butter that will elevate any dish.

Incorporating Additional Ingredients

When it comes to cooking, I love to push the boundaries and try out unique flavor combinations. It’s exciting to experiment with different ingredients and see how they can transform a dish into something extraordinary.

In this discussion, we’ll explore the world of unique flavor combinations and delve into the art of experimenting with ingredients to create delicious and memorable meals.

Unique Flavor Combinations

To create unique flavor combinations, you can experiment with different herbs and spices in your flavored butter. It’s amazing how a simple addition of herbs or spices can transform regular butter into a mouthwatering treat.

Here are three ideas to get you started on creating your own flavors:

Advertisement
  1. Citrus Zest: Add a burst of freshness by incorporating citrus zest into your butter. Whether it’s lemon, orange, or lime, the zesty flavor will brighten up any dish.

  2. Savory Herbs: Experiment with savory herbs like rosemary, thyme, or sage to give your butter a robust and earthy taste. These herbs work well with grilled meats or roasted vegetables.

  3. Spicy Kick: If you enjoy a little heat, try adding chili flakes or cayenne pepper to your butter. This will give your dishes a fiery kick and add excitement to your meals.

Experimenting With Ingredients

You can get creative and try out different ingredients to discover new and exciting flavor combinations. When it comes to experimenting with herbs and trying different spices, the possibilities are endless.

Adding fresh herbs like rosemary or thyme can bring a fragrant and earthy taste to your flavored butter. Alternatively, you can try using spices such as paprika, cumin, or turmeric to add a hint of warmth and complexity.

Don’t be afraid to mix and match different herbs and spices to find your perfect combination. For a citrusy twist, you can even add a squeeze of lemon or lime juice.

The key is to have fun and let your taste buds guide you as you explore the world of flavor possibilities.

Shaping and Storing Your Flavored Butter

After shaping your flavored butter into a log, it can be stored in the refrigerator for up to a week. This allows the flavors to meld together and intensify, making it perfect for spreading on toast or using in recipes.

Advertisement

Here are three shaping techniques for flavored butter that will not only make it look beautiful, but also make it easier to use:

  1. Roll and Wrap: Roll the flavored butter into a log shape using plastic wrap. Twist the ends of the plastic wrap tightly to secure the log shape. This method is great for slicing the butter into rounds.

  2. Mold and Shape: Use a small cookie cutter or silicone mold to shape the butter into fun and decorative shapes. This is a great way to add a touch of elegance to your butter when serving it at special occasions.

  3. Pipe and Swirl: Fill a piping bag fitted with a star tip with the flavored butter. Pipe the butter onto a parchment-lined baking sheet in swirls or rosettes. This method is perfect for adding a decorative touch to your butter when serving it at parties or events.

By using these shaping techniques, you can elevate the presentation of your flavored butter while still ensuring it stays fresh and delicious for up to a week in the refrigerator.

Using Flavored Butter in Cooking

Now that you know how to shape and store your flavored butter, let’s explore all the delicious ways you can use it in cooking.

One of the simplest ways to enjoy flavored butter is by using it as a spread. Whether it’s on warm bread, toast, or even pancakes, the creamy and flavorful butter adds a burst of taste to every bite.

But why stop there? You can also incorporate flavored butter into desserts for a unique twist. Imagine a rich chocolate cake with a hint of orange-flavored buttercream frosting, or a warm apple pie topped with cinnamon honey butter. The possibilities are endless!

Advertisement

Pairing Flavored Butter With Different Foods

When using different types of bread, consider pairing them with complementary flavors of butter for a delightful taste experience. Flavored butter can elevate any dish, and desserts are no exception. Here are three creative ways to use flavored butter in recipes:

  1. Cinnamon Honey Butter: Spread this aromatic butter on warm cinnamon rolls or toast for a sweet and indulgent treat. The combination of cinnamon and honey adds a comforting warmth to any dessert.

  2. Lemon Blueberry Butter: Whip up a batch of this tangy butter to add a burst of freshness to your favorite baked goods. It pairs perfectly with muffins, scones, or even pancakes. The zesty lemon and juicy blueberries create a delightful flavor combination.

  3. Chocolate Hazelnut Butter: This decadent butter is a dream come true for chocolate lovers. Slather it on croissants or use it to make a rich and creamy frosting for cakes and cupcakes. The combination of chocolate and hazelnut is simply irresistible.

Get creative with flavored butter and take your desserts to the next level.

Serving Suggestions for Flavored Butter

Enhance your dining experience by exploring unique serving suggestions for your favorite flavored butters.

Flavored butter is a versatile condiment that can be used in a variety of creative ways to elevate your dishes.

One delicious serving suggestion is to spread a generous amount of garlic and herb butter on a warm slice of crusty bread. The savory flavors of the butter will melt into the bread, creating a mouthwatering appetizer.

Advertisement

Another creative use for flavored butter is to melt it over grilled vegetables. The creamy texture and rich flavors of the butter will add a delightful twist to your favorite veggies.

Lastly, try using flavored butter as a topping for grilled steak or fish. The butter will melt and create a luscious sauce that complements the meat perfectly.

Get creative with your serving suggestions and discover new ways to enjoy the deliciousness of flavored butter.

Troubleshooting and Tips for Making Flavored Butter

To troubleshoot and improve your process, try using room temperature ingredients when making your favorite flavored butter. This can help prevent issues such as clumping or separation.

Here are some additional tips to help you troubleshoot and create the most delicious flavored butter:

Advertisement
  1. Experiment with creative flavor combinations: Don’t be afraid to think outside the box and try unique combinations like honey lavender or chili lime. The possibilities are endless!

  2. Adjust the salt levels: If your flavored butter tastes bland, try adding a pinch of salt to enhance the flavors. Remember, a little goes a long way, so start with small amounts and taste as you go.

  3. Incorporate fresh herbs: Adding fresh herbs like basil, thyme, or rosemary can elevate the taste of your flavored butter. Chop them finely and mix them in for a burst of freshness.

Frequently Asked Questions

How Long Can Flavored Butter Be Stored in the Refrigerator?

Flavored butter can be stored in the refrigerator for up to two weeks. To ensure long term storage, it is best to use airtight containers or wrap it tightly in plastic wrap.

Can I Use Margarine Instead of Butter for Making Flavored Butter?

Can I use margarine instead of butter for flavored butter? Margarine vs. butter: which is better? Using margarine affects the flavor, as it has a different taste and texture. Butter is creamier and adds richness to the butter.

Can I Freeze Flavored Butter?

Yes, you can freeze flavored butter. It’s a great way to preserve the delicious taste and extend its shelf life. Just make sure to wrap it tightly in plastic wrap or store it in an airtight container to prevent freezer burn.

Can I Use Dried Herbs Instead of Fresh Herbs for Flavoring My Butter?

Using dried herbs for flavored butter vs. using fresh herbs: dried herbs provide a longer shelf life and concentrated flavor, while fresh herbs offer a more vibrant taste. Store flavored butter in an airtight container in the refrigerator for up to two weeks.

Can I Use Flavored Butter for Baking?

I love using flavored butter in my baking! It adds a delicious twist to my recipes. There are many substitutes for flavored butter, like extracts or spices. The benefits are endless – enhanced flavor, moist texture, and a unique touch to your baked goods.

Advertisement

Conclusion

In conclusion, making flavored butter is a simple and creative way to enhance the taste of your dishes. By choosing the right butter and selecting flavorful ingredients, you can create a variety of delicious options.

Did you know that flavored butter can be stored in the refrigerator for up to two weeks? This means you can always have a tasty and versatile ingredient on hand to elevate your cooking.

So why not give it a try and discover the endless possibilities that flavored butter has to offer?

Continue Reading
Advertisement

Recipes & Culinary Uses

How to Make Creamy Butter Garlic Pasta

Published

on

By

An image of a steaming plate of al dente pasta twirled with a rich, golden butter garlic sauce

I am going to reveal to you the secret to making the most delicious butter garlic pasta you have ever tried.

Get ready to indulge in a symphony of flavors as tender pasta gets enveloped in a rich, velvety butter garlic sauce.

This recipe is simple yet sophisticated, perfect for impressing guests or treating yourself to a truly decadent meal.

So grab your apron and let’s dive into the magic of homemade butter garlic pasta.

Trust me, you won’t be able to resist.

Advertisement

Key Takeaways

  • Choose long and thin pasta like spaghetti or linguine for the best texture.
  • Cook the pasta al dente to prevent mushiness and allow the sauce to cling to the strands.
  • Prepare a well-seasoned and fragrant garlic butter sauce with sautéed minced garlic and optional herbs and spices.
  • Combine the cooked pasta with the simmered sauce, ensuring every strand is coated, and garnish with Parmesan cheese and parsley.

Choosing the Right Pasta

I’ll pick out the perfect type of pasta for my butter garlic pasta. When it comes to choosing the right pasta, there are so many options to consider. Different types of pasta shapes can greatly impact the overall texture and taste of the dish.

For a butter garlic pasta, I’d opt for a long and thin pasta shape like spaghetti or linguine. These types of pasta allow the butter garlic sauce to cling onto the strands, ensuring each bite is full of flavor.

Additionally, the importance of cooking the pasta until it’s al dente can’t be understated. Al dente pasta has a slight bite to it, providing a satisfying texture and preventing it from becoming mushy when combined with the butter garlic sauce.

Preparing the Garlic Butter Sauce

To start, I’ll heat up the olive oil in a skillet and sauté the minced garlic until it becomes fragrant. This step is crucial as it will infuse the sauce with a rich, savory flavor.

Advertisement

Once the garlic is golden and aromatic, I’ll enhance the garlic butter sauce by adding a handful of fresh herbs, such as chopped parsley or basil. These herbs not only add a burst of freshness but also contribute to the overall visual appeal of the dish.

Next, I’ll pour in a splash of white wine to the garlic butter sauce. The wine adds a subtle tanginess and complexity that elevates the flavors. This step is optional, but it truly takes the sauce to another level.

With the garlic butter sauce now perfectly seasoned and fragrant, it’s time to move on to boiling the pasta.

Boiling the Pasta

Advertisement

Once the water reaches a rolling boil, I add a generous amount of salt before adding the pasta. Achieving the perfect al dente texture is essential for a delicious butter garlic pasta. I carefully follow the instructions on the pasta package, cooking it for the recommended time minus a minute or two. This ensures that the pasta is cooked, but still firm to the bite.

To add a twist to the traditional garlic butter pasta, I sometimes incorporate a variety of herbs and spices into the boiling water. A pinch of red pepper flakes adds a subtle kick, while a handful of fresh basil leaves brings a refreshing aroma. These additions elevate the flavors and take the dish to a whole new level.

Cooking the Garlic Butter Sauce

While simmering the sauce, I stir in a knob of butter until it melts and blends seamlessly with the other ingredients. This step is crucial for creating a rich and flavorful garlic butter sauce that will elevate your pasta dish to new heights.

Here are three cooking techniques and flavor variations that you can experiment with to enhance the taste of your butter garlic pasta:

  • Sautéing the garlic: Instead of simply adding minced garlic to the sauce, try sautéing it in the butter until fragrant and golden brown. This will bring out the natural sweetness and depth of flavor in the garlic.

  • Adding herbs and spices: To take your sauce to the next level, consider incorporating herbs like parsley or basil, and spices like red pepper flakes or black pepper. These additions will add complexity and a touch of heat to your butter garlic pasta.

  • Using flavored butter: If you want to get creative with your flavor profile, try using flavored butter. You can find a wide variety of options at the grocery store or make your own by mixing in herbs, spices, or even cheese. This will infuse your sauce with a unique and delicious taste.

Combining the Pasta and Sauce

Advertisement

After the sauce has simmered to perfection, I pour it over the cooked pasta and toss until every strand is coated in the creamy goodness.

The combination of the rich butter and aromatic garlic creates a delectable flavor that’s hard to resist.

To enhance the dish even further, I like to garnish it with a sprinkle of freshly grated Parmesan cheese and a handful of chopped parsley. This adds a touch of freshness and brings out the flavors of the sauce.

As for serving suggestions, this butter garlic pasta pairs well with a simple green salad or some crusty garlic bread on the side.

Advertisement

For variations and substitutions, you can experiment with different types of pasta, such as spaghetti or fettuccine, and add in ingredients like sautéed mushrooms or grilled chicken for added protein.

The possibilities are endless, but one thing is for sure: this butter garlic pasta is a crowd-pleaser that will leave everyone wanting more.

Frequently Asked Questions

How Can I Make This Recipe Vegan-Friendly?

To make this recipe vegan-friendly, you can use vegan substitutes for butter, such as plant-based margarine or coconut oil. Additionally, opt for dairy-free options like almond milk or cashew cream instead of regular milk or cream.

Can I Use Gluten-Free Pasta for This Recipe?

Sure, you can use gluten-free pasta for this recipe. Just remember to follow the cooking instructions for gluten-free pasta and consider alternatives like rice or quinoa pasta for a delicious, gluten-free version.

Can I Substitute Olive Oil for Butter in the Garlic Butter Sauce?

Substituting olive oil or vegan butter in the garlic butter sauce can alter the taste and texture of the dish. Olive oil adds a rich, fruity flavor, while vegan butter provides a creamy and buttery texture.

Advertisement

How Can I Make This Dish Spicier?

To make this dish spicier, there are several ways to add heat. You can incorporate hot chili flakes, spicy red pepper sauce, or even diced jalapeños. Another alternative to garlic could be using ginger for a flavorful twist.

Can I Add Vegetables or Protein to This Pasta Dish?

Adding vegetables and protein to this pasta dish is a great idea. It not only enhances the nutritional value but also adds texture and flavor. I recommend sautéing some bell peppers and adding cooked chicken for a delicious and balanced meal.

Conclusion

In conclusion, making butter garlic pasta is a simple yet delicious dish that can be enjoyed by everyone.

The rich and creamy garlic butter sauce perfectly coats the al dente pasta, creating a mouthwatering combination of flavors.

This recipe allows you to indulge in a culinary experience that’s both satisfying and comforting, like a warm embrace on a chilly evening.

Advertisement

So why not give it a try and treat yourself to a delightful meal?

Continue Reading

Recipes & Culinary Uses

Easy Steps to Make Butter from Raw Milk Using a Mixer

Published

on

By

An image showcasing the step-by-step process of transforming creamy raw milk into luscious butter using a mixer

As I immerse myself in the realm of culinary exploration, I came across a hidden treasure: crafting butter from raw milk using a mixer. With just a few basic ingredients and my reliable mixer, I unveiled the key to producing smooth, homemade butter that would impress any chef.

In this article, I will guide you through the precise steps, from gathering the ingredients to storing the final product. Get ready to churn and savor the rich rewards of your own creation.

Let’s butter up!

Key Takeaways

  • Choose a mixer with a powerful motor and sturdy construction
  • Strain and pasteurize the raw milk before churning
  • Use a high-speed setting on the mixer for faster butter formation
  • Store homemade butter in airtight containers to maintain flavor and freshness

Gathering the Ingredients and Equipment

I’m gathering the ingredients and equipment needed to make butter from raw milk in my mixer.

Advertisement

To ensure a successful butter-making process, it’s crucial to choose the right mixer. Look for a mixer with a powerful motor and a sturdy construction that can handle the thick consistency of the cream. A high-speed setting is also desirable to expedite the churning process.

When it comes to sourcing raw milk, it’s important to prioritize safety and quality. Look for local farms or dairies that follow strict hygiene practices and ensure the cows are healthy and well-cared for. Freshness is key, so opt for milk that has been recently produced and stored properly.

Preparing the Raw Milk for Churning

To start preparing the raw milk for churning, I’ll first need to strain out any impurities. This ensures that the milk is clean and safe for consumption.

Before churning, it’s important to pasteurize the raw milk to eliminate any harmful bacteria that may be present. Pasteurization involves heating the milk to a specific temperature and holding it there for a set period of time. This process helps to destroy any potential pathogens without significantly altering the taste or nutritional composition of the milk.

Once the raw milk is pasteurized, there are different methods of churning it into butter. One method involves using a mixer, which agitates the milk until the fat globules separate from the liquid, forming butter.

Advertisement

Churning the Raw Milk in the Mixer

Using a high-speed setting, I’ll let the mixer agitate the milk until the fat globules separate and butter forms. The speed of the mixer plays a crucial role in the churning process. A higher speed will help the fat globules to separate more quickly, resulting in butter formation. The churning time will vary depending on the mixer speed and the amount of milk being churned. It is important to monitor the process closely to avoid over-churning, which can lead to a grainy texture. To give you an idea of the correlation between mixer speed and churning time, here is a table that summarizes the approximate time required for butter formation at different speeds:

Mixer Speed Churning Time (minutes)
Low 20-30
Medium 15-20
High 10-15
Very High 5-10
Turbo 2-5

Separating the Butter From the Buttermilk

After the churning process, I strain the mixture through a fine-mesh sieve to separate the butter from the buttermilk. The creamy liquid slowly drips down, leaving behind the beautiful golden butter. It’s a delicate process, requiring patience and precision.

As I watch the buttermilk flow through the sieve, I can’t help but appreciate the benefits of using raw milk for making butter. The rich and complex flavors of raw milk add depth and character to the final product. It’s like tasting a piece of the farm, with its grassy undertones and hints of sweetness.

Advertisement

To further enhance the butter’s taste, there are various methods for flavoring homemade butter. From the simplicity of sprinkling salt to the creativity of adding herbs and spices, the possibilities are endless.

Storing and Using Your Homemade Butter

When storing my homemade butter, I prefer to use airtight containers to keep it fresh and prevent any unwanted odors from seeping in. It’s important to protect the butter’s flavor and texture, as well as extend its shelf life. Additionally, I like to experiment with different flavors to add a unique twist to my butter. Some creative ways to flavor homemade butter include incorporating herbs like rosemary or thyme, adding spices like cinnamon or garlic powder, or mixing in sweet ingredients like honey or maple syrup. This allows me to customize my butter based on my preferences and the dishes I plan to use it in. Speaking of which, homemade butter has a multitude of uses in cooking and baking. It can be spread on toast, melted over vegetables, used as a base for sauces, or incorporated into pastry dough for flakier results. The possibilities are endless!

Flavor Ingredients Recommended Uses
Herb-infused Rosemary, thyme Mashed potatoes, roasted vegetables
Spiced Cinnamon, garlic powder Toast, pancakes
Sweet Honey, maple syrup Baked goods, waffles

Frequently Asked Questions

How Long Does It Take for the Raw Milk to Turn Into Butter in the Mixer?

To speed up the process of turning raw milk into butter in a mixer, you can increase the speed and duration of mixing. It is not possible to make butter in a mixer without using raw milk.

Advertisement

Can I Use Pasteurized Milk Instead of Raw Milk for Making Butter in a Mixer?

Using raw milk instead of pasteurized milk for making butter in a mixer has several benefits. It enhances the flavor and nutritional value of the butter. To achieve the best consistency, ensure the milk is fresh and at room temperature before churning.

What Is the Ideal Temperature for the Raw Milk Before Churning It in the Mixer?

The ideal temperature for raw milk before churning it in the mixer is around 50-55°F. This ensures proper fat separation and reduces churning time. It’s crucial to maintain the correct temperature for the best results.

Can I Add Flavorings or Herbs to the Butter While Churning It in the Mixer?

Yes, you can add flavorings or herbs to the butter while churning it in the mixer. This is a great way to incorporate flavor into homemade butter and experiment with different tastes.

Can I Use a Hand Mixer Instead of a Stand Mixer to Churn the Raw Milk Into Butter?

Using a hand mixer for churning raw milk into butter has its pros and cons. It can be more convenient and easier to handle, but may take longer and require more effort compared to a stand mixer. Other methods without a mixer include shaking in a jar or using a food processor.

Conclusion

In conclusion, making butter from raw milk in a mixer is a simple and rewarding process. By following the steps outlined above and using the right ingredients and equipment, you can transform fresh raw milk into delicious homemade butter.

Advertisement

Remember, practice makes perfect, so don’t be discouraged if your first attempt isn’t perfect. With a little patience and perseverance, you’ll be churning out creamy butter in no time, and soon you’ll be able to spread it on toast and enjoy the fruits of your labor.

Continue Reading

Recipes & Culinary Uses

Make Rich Butter from Raw Milk

Published

on

By

An image capturing the process of making butter from raw milk

Hey! Have you ever thought about how to turn raw milk into homemade butter? Look no further, I’ve got the solution for you.

In this article, I’ll take you through the step-by-step process of turning that creamy goodness into delicious homemade butter.

We’ll explore the benefits of using raw milk, learn how to separate the cream, and even discover different flavors you can infuse into your butter.

So, grab your apron and let’s get churning!

Key Takeaways

  • Raw milk contains essential vitamins, minerals, and enzymes that are destroyed during pasteurization.
  • Separating the cream from raw milk can be done through gravity separation, centrifugal separation, or cold separation.
  • Churning the cream into butter can be done through hand churning, using a stand mixer with a whisk attachment, or using a food processor with a blade attachment.
  • Washing and storing the freshly made butter involves cleaning the butter container and preserving its freshness by wrapping it tightly in wax paper or using an airtight container.

Understanding the Benefits of Raw Milk

Advertisement

Raw milk has numerous health benefits that are not found in pasteurized milk. Understanding the nutritional value of raw milk is important for those seeking a natural and wholesome source of nutrients.

Contrary to popular belief, raw milk is not a dangerous product when handled and consumed properly. In fact, it contains essential vitamins, minerals, and enzymes that are destroyed during the pasteurization process.

Raw milk is rich in beneficial bacteria and probiotics, which can support a healthy gut microbiome and enhance digestion. Additionally, raw milk is a good source of bioavailable nutrients such as calcium, protein, and healthy fats.

Debunking myths about raw milk is crucial to prevent misinformation and promote informed choices regarding our food.

Preparing the Raw Milk for Butter Making

To prepare the milk for butter making, it’s important to first skim off the cream. This step is crucial as it allows us to separate the high-fat cream from the milk, which is necessary for obtaining a good quality butter.

Advertisement

Here are three separating techniques to help you achieve the best results:

  1. Gravity separation: After allowing the milk to stand undisturbed for a few hours, the cream naturally rises to the top, making it easy to skim off with a spoon or ladle.

  2. Centrifugal separation: Using a cream separator machine, the milk is spun at high speeds, causing the heavier cream to separate from the lighter milk. This method is efficient and yields a higher cream quality.

  3. Cold separation: By refrigerating the milk overnight, the cream becomes denser and easier to separate. Skimming off the cold cream results in a richer and creamier butter.

Separating the Cream From the Raw Milk

If you want to achieve the best results when separating the cream from the milk, try using gravity separation, centrifugal separation, or cold separation techniques.

Gravity separation involves allowing the milk to sit undisturbed in a container for a period of time, allowing the cream to rise to the top.

Advertisement

Centrifugal separation utilizes a machine that spins the milk at high speeds, forcing the cream to separate from the milk.

Cold separation involves chilling the milk to a low temperature, causing the cream to solidify and separate from the milk.

These techniques are beneficial because consuming raw dairy has numerous health benefits, such as improved digestion, increased nutrient absorption, and enhanced immune function.

Additionally, if you don’t have access to a churn, these separation methods provide alternatives for obtaining cream for making butter.

Churning the Cream Into Butter

Once the cream has separated from the milk, you can start churning it into delicious butter. Churning is the process of agitating the cream until it transforms into butter.

Advertisement

Here are three techniques to help you achieve the perfect consistency:

  1. Hand Churning: This traditional method involves using a small churn or jar and physically shaking or rocking it back and forth until the cream turns into butter.

  2. Stand Mixer: If you have a stand mixer with a whisk attachment, you can use it to churn the cream. Start at a low speed and gradually increase until the butter forms.

  3. Food Processor: Another option is to use a food processor with a blade attachment. Pulse the cream until it separates into butter and buttermilk.

Troubleshooting common butter making problems:

  • If the cream isn’t thickening, ensure it is at the right temperature (around 50-55°F) and give it more time to churn.
  • If the butter is too soft, refrigerate it for a while before churning again.
  • If the butter is too hard, let it soften at room temperature or add a small amount of buttermilk to adjust the consistency.

After churning the cream into butter, it’s time to move on to the next step of washing and storing the freshly made butter.

Washing and Storing the Freshly Made Butter

When it comes to washing and storing freshly made butter, there are a few key points to consider.

Advertisement

First, cleaning the butter container is essential to maintain the quality of the butter. I recommend using warm soapy water and a soft sponge to remove any residue before drying it thoroughly.

Second, preserving the butter’s freshness is crucial to prolong its shelf life. To do this, I suggest wrapping the butter tightly in wax paper or placing it in an airtight container to protect it from air and odors.

Lastly, it’s important to store butter at the proper temperature. The recommended storage temperature for butter is between 32-40°F (0-4°C), as this helps to maintain its texture and prevent spoilage.

Cleaning the Butter Container

Before cleaning the butter container, make sure to remove any leftover butter residue. Cleaning the butter container is essential to maintain its freshness and prevent any cross-contamination. Here are three effective cleaning techniques to ensure a clean and sanitized container:

  1. Soak in hot, soapy water: Fill the container with hot water and add a few drops of dish soap. Let it sit for a few minutes to loosen any residue, then scrub with a sponge or brush.

  2. Use vinegar solution: Mix equal parts white vinegar and water in the container. Let it sit for about 15 minutes to dissolve any stubborn residue. Scrub with a sponge or brush, then rinse thoroughly.

  3. Bleach solution: Mix 1 tablespoon of bleach with 1 gallon of water. Let the container soak in the solution for 10 minutes, then scrub and rinse well.

Preserving Butter’s Freshness

After cleaning the butter container, the next step is to ensure that the butter stays fresh and maintains its texture for as long as possible. This is important because nobody wants to end up with rancid butter. To preserve the butter’s freshness, there are a few key things you can do. Firstly, storing the butter in an airtight container or wrapping it tightly in wax paper will help prevent it from being exposed to air and developing off flavors. Secondly, keeping the butter refrigerated at a consistent temperature, ideally around 40°F (4°C), will slow down the process of it going rancid. Lastly, if you want to store butter for an extended period of time, freezing it is a great option as it can extend its shelf life for several months. By following these steps, you can enjoy fresh and flavorful butter for all your culinary needs.

Advertisement
Preserving Butter’s Freshness
Store butter in an airtight container or wrap tightly in wax paper.
Refrigerate butter at a consistent temperature of around 40°F (4°C).
Freeze butter for extended storage, which can extend its shelf life for several months.
Follow these steps to enjoy fresh and flavorful butter for all your culinary needs.

Recommended Storage Temperature

Storing butter in the refrigerator at a consistent temperature of around 40°F (4°C) helps to maintain its freshness and prevent it from going rancid. Here are three recommended storage methods and the ideal temperature range for butter:

  1. Wrap it properly: Use parchment paper or airtight containers to wrap the butter. This will protect it from absorbing odors and prevent it from drying out.

  2. Keep it away from light: Exposure to light can cause butter to spoil faster. Store it in a cool, dark place, like the refrigerator’s butter compartment or a covered butter dish.

  3. Avoid temperature fluctuations: Butter can easily absorb flavors and odors from other foods in the fridge. To maintain its quality, store it away from strong-smelling foods and make sure the temperature remains constant.

Following these recommended storage methods and keeping the butter at the ideal temperature range will help to preserve its freshness and taste for longer periods.

Using Leftover Buttermilk in Recipes

You can easily use leftover buttermilk in recipes to add a tangy flavor. Buttermilk is a versatile ingredient that can enhance the taste and texture of various baked goods. It’s a great substitute for regular milk in recipes because it adds a unique tanginess and richness. Here are some creative uses for leftover buttermilk in baking:

Row Buttermilk Recipe Result
1 Pancakes Fluffy and Light and
tender texture fluffy pancakes
2 Biscuits Tender and Flaky and
flaky texture buttery biscuits
3 Cakes Moist and Moist and
tender texture tender cakes
4 Fried chicken Crispy and Juicy and
flavorful coating flavorful chicken

Exploring Variations and Flavors in Homemade Butter

When it comes to homemade butter, there are endless possibilities for adding unique flavors and enhancing its taste.

One way to do this is through unique butter infusions, where you can mix in various ingredients like garlic, herbs, or even fruit zest to create a personalized flavor profile.

Advertisement

Another option is to enhance the taste of your homemade butter by incorporating herbs such as rosemary, thyme, or basil, which can add a delightful aroma and taste.

Lastly, experimenting with flavored salts like smoked sea salt or truffle salt can take your butter to a whole new level, adding a burst of flavor that will elevate any dish.

Unique Butter Infusions

To add unique flavors to your butter, try infusing it with herbs or spices. Butter infusion techniques offer a creative way to elevate the taste of your homemade butter. Here are three ideas to get you started:

  1. Garlic and Herb Butter: Melt your butter, then add minced garlic and chopped fresh herbs like rosemary, thyme, or parsley. Let the flavors infuse for a few hours before refrigerating.

  2. Citrus Zest Butter: Grate the zest of an orange, lemon, or lime into your softened butter. Mix well and let it sit in the fridge for a while to let the citrus flavors infuse.

  3. Spiced Butter: Add a pinch of your favorite spices, such as cinnamon, nutmeg, or cardamom, to your softened butter. Mix thoroughly and let it sit in the fridge to develop the flavors.

Enhancing Taste With Herbs

Adding herbs to your butter is a simple and effective way to enhance the taste of your culinary creations. Not only does it add a burst of flavor, but it also adds a touch of freshness and complexity to your dishes. Experimenting with different herbal blends can elevate your butter to a whole new level. Whether you prefer a savory blend of rosemary and thyme or a more exotic combination of cilantro and lime, the possibilities are endless. To help you get started, here is a table showcasing some popular herb and spice combinations that you can try in your butter:

Herb/Spice Flavor Profile Best Pairings
Rosemary Earthy, piney Potatoes, lamb
Basil Sweet, peppery Tomatoes, mozzarella
Dill Fresh, tangy Fish, cucumbers
Cinnamon Warm, sweet Apples, baked goods

Experimenting With Flavored Salts

After experimenting with herbs to enhance the taste of my homemade butter, I decided to take my flavor exploration to the next level by experimenting with flavored salts. Flavored salts can add a unique and exciting twist to butter, elevating its taste and making it even more delicious.

Advertisement

Here are three ways I incorporated different salts into my flavored butter recipes:

  1. Smoked Salt Butter: I mixed smoked salt into softened butter, creating a smoky and savory spread that pairs perfectly with grilled meats and vegetables.

  2. Truffle Salt Butter: By combining truffle salt with butter, I created a luxurious and indulgent spread that adds a hint of earthy and aromatic flavor to any dish.

  3. Citrus Salt Butter: I zested some fresh citrus fruits and mixed the zest with sea salt before incorporating it into butter. The result was a bright and tangy butter that adds a burst of freshness to baked goods and seafood.

Frequently Asked Questions

Can I Make Butter From Pasteurized Milk?

Yes, you can make butter from pasteurized milk. It’s a simple process of churning the cream until it separates into butter and buttermilk. Homemade butter can be healthier than store-bought due to its freshness and lack of additives.

How Long Does It Take to Separate the Cream From the Raw Milk?

Separating cream from raw milk depends on various factors, such as temperature and milk fat content. Once separated, the cream can be churned into butter. The churning process can take anywhere from 10 to 30 minutes.

Can I Use an Electric Mixer Instead of a Churn to Make Butter?

Yes, you can use an electric mixer to make butter. However, it’s important to note that the process may differ slightly between churning raw milk and pasteurized milk.

How Long Can I Store Freshly Made Butter?

Freshly made butter can be stored in the refrigerator for up to two weeks. However, its shelf life can be extended by freezing it. Proper storage is essential to maintain its freshness and quality.

Advertisement

What Other Uses Are There for Leftover Buttermilk Besides Using It in Recipes?

Leftover buttermilk can be used in pancakes, biscuits, or even as a marinade for fried chicken. As for alternative methods for making butter, you can also use heavy cream and a mixer.

Conclusion

In conclusion, making butter from raw milk is a delightful and rewarding process. The benefits of raw milk are numerous, as it contains valuable enzymes and nutrients that are lost during pasteurization.

By separating the cream from the raw milk and churning it vigorously, you can easily transform it into creamy and delicious homemade butter.

Don’t forget to wash and store the butter properly to ensure its freshness. And don’t discard the leftover buttermilk! It can be used in various recipes to add flavor and moisture.

So, grab some raw milk and start your butter-making adventure today!

Advertisement
Continue Reading

Trending