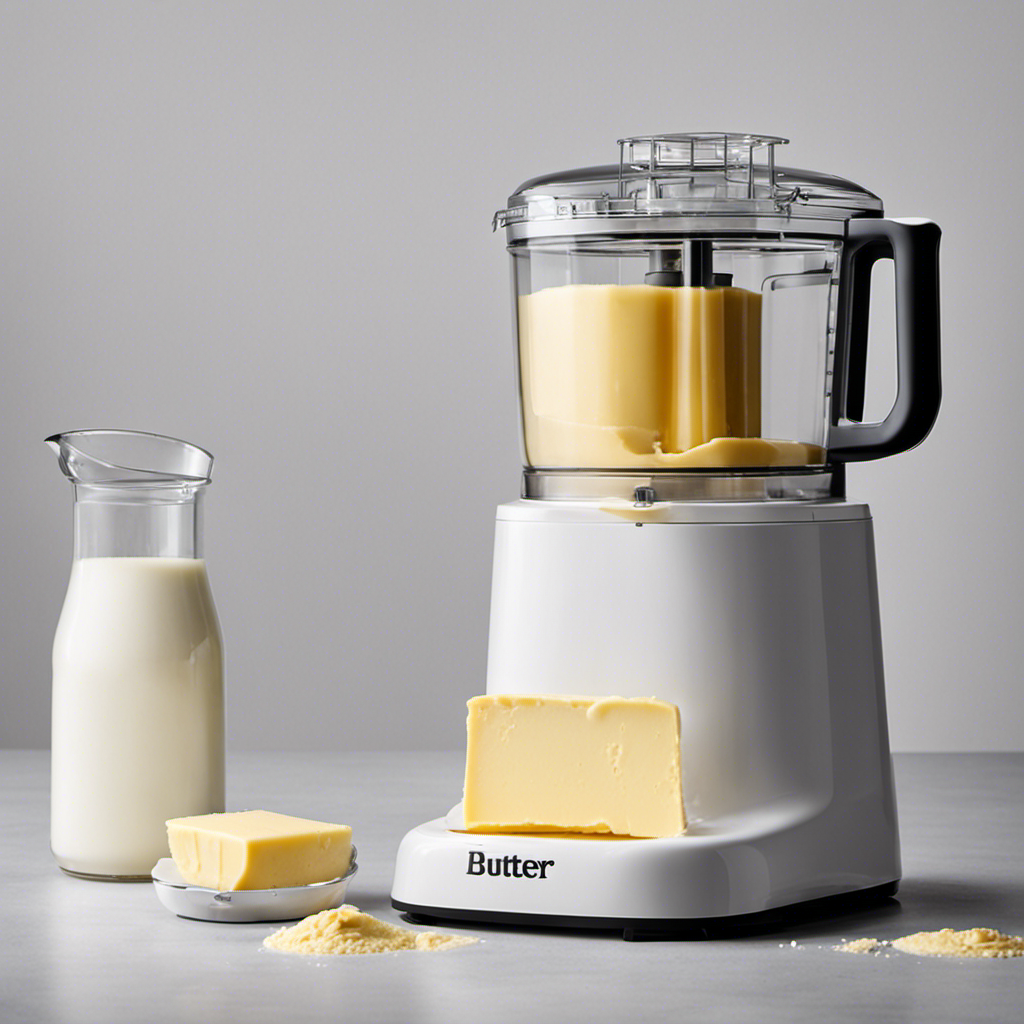
I absolutely love the feeling of churning my own butter. There’s something incredibly satisfying about transforming a humble carton of cream into a rich and creamy spread, all with the help of my trusty food processor.
In this article, I will guide you through the step-by-step process of making butter in a food processor. From selecting the right ingredients to storing and using your homemade butter, get ready to embark on a butter-making adventure that will leave you feeling accomplished and delighted.
Let’s dive in!
Key Takeaways
- Choose high-quality cream with at least 35% fat content for a richer and creamier butter.
- Clean the food processor thoroughly after each use to maintain hygiene and prevent cross-contamination.
- Securely attach the blade assembly before using the food processor to avoid accidents and injuries.
- Pour chilled cream into the processor and start churning on low speed to separate the fat from the liquid and achieve proper butter formation.
Selecting the Right Ingredients
To make butter in a food processor, you’ll need to start by selecting the right ingredients. Choosing high quality cream is crucial for achieving the best results. Look for cream that is fresh and free from any additives or preservatives. It’s important to understand the fat content of the cream as well. Higher fat content will result in a richer and creamier butter. For best results, opt for cream with a fat content of at least 35%. This will ensure that your butter has the right consistency and flavor.
Once you have chosen the cream, it’s time to move on to preparing the food processor, which is the next step in the butter-making process.
Preparing the Food Processor
When it comes to using a food processor, proper cleaning is essential for maintaining hygiene and preventing cross-contamination. After each use, I make sure to thoroughly clean the food processor by disassembling the parts and washing them with warm soapy water.
Paying special attention to the blade assembly, I carefully remove any food residue and ensure it is completely dry before storage. Additionally, it is important to prioritize safety by always unplugging the food processor before cleaning and handling the sharp blades with caution to avoid any accidents.
Cleaning the Food Processor
After blending the butter in the food processor, it’s important to clean the machine thoroughly. Proper food processor maintenance and cleaning is essential to ensure its longevity and optimal performance.
Here are some cleaning tips to keep your food processor in top shape:
- Disassemble the food processor: Remove the blade, bowl, and any other detachable parts for a thorough clean.
- Hand wash or dishwasher safe: Check the manufacturer’s instructions to determine if the parts are dishwasher safe. If not, wash them by hand with warm, soapy water.
- Pay attention to the blade: The blade is the most important part to clean. Use a brush or sponge to remove any residue, being careful not to cut yourself.
Blade Assembly and Safety
For optimal safety, always ensure that the blade assembly in your food processor is securely attached before using it. The blade assembly is a crucial component that allows the food processor to chop, blend, and puree ingredients effectively. Neglecting to correctly attach the blade assembly can result in accidents and injuries. To ensure proper attachment, align the blade assembly with the center of the food processor bowl and rotate it clockwise until it locks into place. Always double-check that the blade assembly is securely attached before starting the food processor. Additionally, follow these safety precautions when using your food processor: keep your hands and utensils away from the blade, avoid overloading the bowl, and never operate the food processor without the lid securely in place. By following these safety measures, you can enjoy the convenience of your food processor without compromising your well-being.
| Safety Precautions |
|---|
| 1. Securely attach the blade assembly |
| 2. Keep hands and utensils away from the blade |
| 3. Do not operate the food processor without the lid |
Adding the Cream
First, you’ll want to pour the cream into the food processor. This is the crucial step in starting the churning process to make butter.
Here are some troubleshooting tips to ensure success:
-
Use cold, heavy cream: The cream should be chilled before being added to the food processor. This helps in achieving a higher fat content, which is necessary for the butter to form properly.
-
Don’t overfill the processor: It is important to leave enough space for the cream to move around and be agitated. Overfilling may hinder the churning process and result in uneven butter.
-
Start with low speed: Begin the churning process on the lowest speed setting to gradually incorporate air into the cream. This helps in separating the fat from the liquid.
Processing the Cream
When it comes to processing the cream to make butter, two key points to consider are the optimal processing time and the cream to butter ratio.
The optimal processing time refers to the duration required to achieve the desired consistency and texture of the butter. This can vary depending on the type of cream and the equipment used.
Additionally, the cream to butter ratio is crucial as it determines the yield and quality of the final product. Finding the right balance ensures a smooth and creamy butter that is perfect for spreading or baking.
Optimal Processing Time
The optimal processing time for making butter in a food processor is approximately 10 minutes. During this time, the cream goes through maximal churn, resulting in the desired butter consistency.
To achieve the best results, it is important to follow these guidelines:
- Start with chilled cream: Using cold cream ensures that the butter forms quickly and efficiently.
- Monitor the processing time: Overprocessing can lead to the butter separating and becoming too oily.
- Check for visual cues: Watch for the cream to thicken and form clumps, indicating that the butter has formed.
By following these steps and paying attention to the optimal processing time, you can achieve smooth and creamy butter consistency.
Now, let’s move on to the next section, where we will discuss the cream to butter ratio.
Cream to Butter Ratio
To achieve the perfect cream to butter ratio, you’ll need to carefully measure the amount of cream you use. The cream consistency plays a crucial role in determining the final butter flavor.
It is important to use fresh, high-quality cream that is at room temperature. Start by pouring the measured cream into the food processor. The cream should be thick and slightly chilled for optimal results.
As the food processor runs, the cream will undergo a transformation. It will first turn into whipped cream, then into butter. Pay close attention to the process and stop the food processor once you see the butter forming and separating from the buttermilk.
This will ensure that you have achieved the desired cream to butter ratio and that the butter has a rich, creamy flavor.
Separating the Buttermilk
Once you’ve churned the cream in the food processor, you’ll need to strain it to separate the buttermilk. Straining the cream is an essential step in the butter-making process as it allows you to remove the liquid buttermilk from the solid butter.
Here are three important things to know about separating the buttermilk:
-
Use a fine-mesh strainer or cheesecloth: To effectively strain the cream, you’ll need a strainer with a fine-mesh or a cheesecloth. This will help catch any small bits of butter that may have formed during churning.
-
Strain over a bowl: Place the strainer or cheesecloth over a bowl to collect the strained buttermilk. This will ensure that you don’t lose any of the valuable liquid.
-
Save the buttermilk for other uses: Don’t discard the buttermilk! It can be used in various recipes like pancakes, biscuits, or even salad dressings. Its tangy flavor adds a delicious twist to dishes.
Washing and Working the Butter
After separating the buttermilk from the butter, the next step is washing and working the butter to remove any remaining buttermilk and enhance its texture. To do this, I recommend placing the butter in a bowl of cold water and kneading it gently with your hands or a wooden spoon. This helps to extract the remaining buttermilk, which can cause the butter to spoil faster. Repeat this process until the water runs clear.
Once the butter is thoroughly washed, you can shape it into a block or roll it into a log using parchment paper. If you encounter any issues during this process, such as the butter being too soft or difficult to work with, try refrigerating it for a few minutes to firm it up.
These working techniques and troubleshooting tips will ensure you end up with perfectly washed and shaped butter.
Storing and Using the Homemade Butter
When storing homemade butter, it is important to keep it in an airtight container or wrapped tightly in wax paper to prevent it from absorbing any unwanted odors. This will help maintain the freshness and flavor of the butter.
Additionally, here are some tips on using and enhancing your homemade butter:
-
Using flavored butter for cooking: Once you have made your homemade butter, you can experiment with different flavors by incorporating herbs, spices, or even citrus zest. Simply mix in your desired flavorings and refrigerate until firm. This flavored butter can then be used to enhance the taste of your dishes, whether it’s spreading it on toast or melting it over grilled meats or vegetables.
-
Incorporating herbs and spices into homemade butter: To add depth of flavor to your butter, you can finely chop fresh herbs like rosemary, thyme, or basil and mix them into the softened butter. You can also experiment with spices like garlic powder, paprika, or cayenne pepper for a more savory kick. The possibilities are endless, so don’t be afraid to get creative!
-
Storing and using your flavored butter: After adding herbs or spices to your butter, shape it into a log or roll it into individual portions using wax paper or plastic wrap. Store it in the refrigerator for up to two weeks or freeze it for longer storage. When cooking, simply slice off a portion of the flavored butter and use it as needed to add flavor to your dishes.
Frequently Asked Questions
Can I Use Any Type of Cream to Make Butter in a Food Processor?
Yes, you can use heavy cream or light cream to make butter in a food processor. Both types of cream contain enough fat to separate into butter when agitated in a food processor.
How Long Does It Typically Take to Process the Cream Into Butter?
It typically takes around 10-15 minutes to process cream into butter in a food processor. However, the time may vary depending on the type and temperature of the cream used.
Can I Use a Blender Instead of a Food Processor to Make Butter?
Using a blender instead of a food processor for making butter has its pros and cons. While the blender can work, it may take longer and the texture may not be as smooth.
Is It Necessary to Wash the Butter After Separating the Buttermilk?
Yes, it is necessary to wash the butter after separating the buttermilk. Washing removes excess buttermilk, which can cause the butter to spoil faster. Different methods to remove water include kneading, pressing, and soaking in cold water.
Can I Flavor the Homemade Butter With Herbs or Spices?
Yes, you can flavor homemade butter with herbs or spices. Some popular flavor combinations include garlic and herb, lemon and dill, and chili and lime. Flavored butter can be used to enhance the taste of dishes or spread on bread.
Conclusion
In conclusion, making butter in a food processor is a simple and rewarding process. By following the steps outlined in this article, you can create your own homemade butter with ease.
The theory that making butter at home is difficult or time-consuming is simply not true. With the right ingredients and a food processor, you can have fresh, creamy butter in no time.
So why not give it a try and enjoy the satisfaction of creating something delicious from scratch?
