Connect with us

Recipes & Culinary Uses

Best Places to Buy Cocoa Butter for Cooking

Published

on

An image showcasing a cozy kitchen with a rustic wooden countertop adorned with a glass jar filled with creamy cocoa butter, surrounded by natural ingredients like cocoa beans, vanilla pods, and a whisk, evoking the essence of homemade cooking

I love trying out new ingredients in my recipes, and one that I’ve recently come across is cocoa butter. It not only gives a luxurious and smooth consistency to dishes, but also brings a delicious chocolatey taste.

But where can you buy cocoa butter for cooking? In this article, I’ll guide you through the best online retailers, local stores, and specialty shops that offer a wide range of cocoa butter options.

Get ready to elevate your culinary creations with this delicious ingredient!

Key Takeaways

  • Online retailers like Now Foods, Life-Flo, iHerb, Nubian Heritage, and Dr. Woods offer a convenient option for purchasing cocoa butter for cooking.
  • Local stores such as specialty food stores, gourmet markets, and health food stores are great places to find cocoa butter for cooking.
  • Specialty shops that offer a wide variety of gourmet cocoa butter options provide superior quality and expertise.
  • Buying cocoa butter online provides the convenience of delivery options and a wide range of choices, while local stores offer the opportunity to inspect the product and receive guidance from knowledgeable staff.
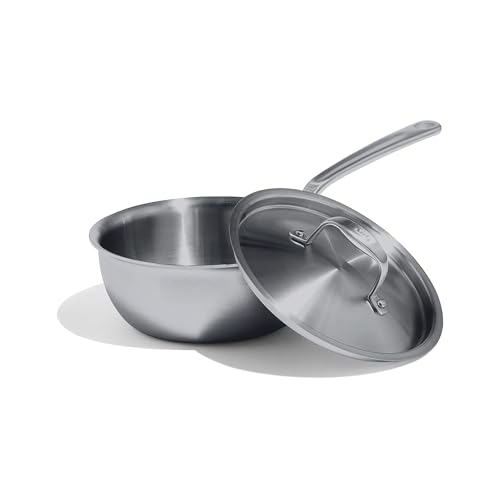
The Benefits of Using Cocoa Butter in Cooking

Using cocoa butter in your cooking can provide numerous benefits, such as enhancing the flavor and adding a creamy texture to your dishes.

Advertisement

When it comes to cocoa butter, there are different brands available in the market, each with its own unique flavor profile. Some brands may have a more intense chocolate flavor, while others may have a milder taste. It’s important to experiment with different brands to find the one that best suits your palate and the specific dish you’re preparing.

Cocoa butter also has a high melting point, which means it can withstand high temperatures without burning or losing its flavor. This makes it ideal for baking and sautéing, as it adds a rich, indulgent taste to your recipes.
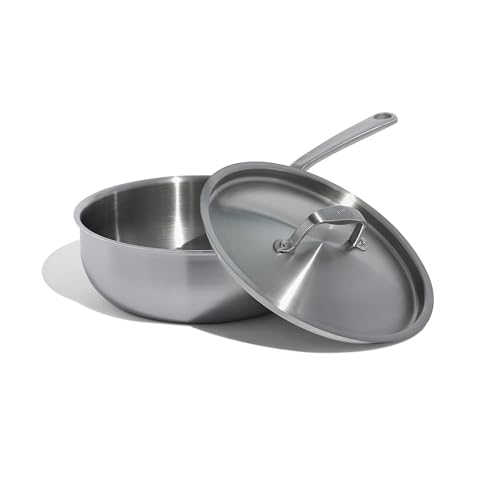
Exploring Different Types of Cocoa Butter

When it comes to cocoa butter, there are a plethora of uses, health benefits, and culinary applications to explore.

As someone who has extensively researched the topic, I can confidently say that cocoa butter is not only a popular ingredient in skincare products, but it is also known for its moisturizing and healing properties.

Additionally, many culinary enthusiasts and chefs utilize cocoa butter in various recipes, from desserts to savory dishes, due to its unique flavor and ability to enhance the overall taste and texture of the food.

Advertisement

Cocoa Butter Uses

One popular use for cocoa butter is in homemade chocolate recipes. Cocoa butter, derived from cocoa beans, is known for its smooth and creamy texture, making it an essential ingredient in creating delectable chocolate treats. Not only does it add richness to the flavor, but it also helps in achieving that velvety melt-in-your-mouth consistency.

In addition to its culinary uses, cocoa butter is also highly valued in skincare products. Its moisturizing properties make it a popular choice for lotions, creams, and body butters. When applied topically, cocoa butter helps to lock in moisture, leaving the skin feeling soft and supple. It is also believed to have antioxidant properties that can help protect the skin from free radicals and promote a youthful appearance.

Here is a table showcasing some popular cocoa butter recipes and skincare products:

Recipes Skincare Products
Homemade Dark Chocolate Cocoa Butter Body Lotion
Chocolate Truffles Cocoa Butter Lip Balm
Chocolate Fudge Brownies Cocoa Butter Massage Oil
Chocolate Ganache Cocoa Butter Body Scrub
Chocolate Bark Cocoa Butter Hand Cream

Whether it’s indulging in delicious chocolate treats or pampering your skin, cocoa butter is a versatile ingredient that brings both joy and nourishment.

Health Benefits

To reap the health benefits of cocoa butter, you can incorporate it into your skincare routine or try incorporating it into homemade body products. Cocoa butter is derived from the cacao bean and is known for its moisturizing and nourishing properties. It is rich in antioxidants, which help fight free radicals and protect the skin from damage. Cocoa butter also contains fatty acids that can help improve skin elasticity and hydration.

Advertisement

Additionally, it has been found to have anti-inflammatory properties, which can help soothe and calm irritated skin. There are different types of cocoa butter available, including raw and refined. Raw cocoa butter is minimally processed and retains more of its natural nutrients, while refined cocoa butter undergoes further processing to remove impurities.

Incorporating cocoa butter into your skincare routine or homemade body products can provide numerous health benefits for your skin.

Culinary Applications

You can enhance your culinary creations by incorporating cocoa butter, which adds a rich and velvety texture to your dishes. Cocoa butter is a versatile ingredient that can be used in various culinary techniques and flavor pairings.

Here are some ideas to inspire you:

  • Use cocoa butter to make smooth and creamy chocolate ganache for desserts like truffles or cakes.
  • Incorporate cocoa butter into your homemade ice cream for a luscious and indulgent treat.
  • Experiment with savory dishes by using cocoa butter in marinades or sauces to add a subtle chocolatey note.

Cocoa butter can be purchased at specialty food stores or online retailers that cater to culinary ingredients. Make sure to look for high-quality cocoa butter to achieve the best results in your cooking.

How to Choose the Best Cocoa Butter for Cooking

When it comes to choosing the best cocoa butter for cooking, two key factors to consider are quality versus price. It’s important to find a balance between a high-quality product and a reasonable price point.

Advertisement

Additionally, understanding the various uses and applications of cocoa butter can help in making an informed decision.

Quality Vs. Price

If you’re looking for cocoa butter for cooking, finding the right balance between quality and price can be a challenge. As someone who loves to cook and experiment with different ingredients, I understand the importance of sourcing high-quality cocoa butter without breaking the bank.

Here are a few tips to help you navigate the world of cocoa butter alternatives and find the best option for your needs:

  • Consider organic cocoa butter: Opting for organic cocoa butter ensures that you are getting a product that is free from pesticides and other harmful chemicals.

  • Look for fair trade certifications: Sourcing cocoa butter from fair trade suppliers helps support sustainable farming practices and ensures fair wages for farmers.

  • Read customer reviews: Before making a purchase, take the time to read customer reviews to get an idea of the quality and performance of the product.

Uses and Applications

Using cocoa butter in desserts adds a rich and creamy texture to your favorite treats. But did you know that cocoa butter has other amazing uses beyond the kitchen?

Cocoa butter is not only delicious but also beneficial for skincare. It is a natural moisturizer that can help nourish and hydrate the skin. When applied topically, cocoa butter forms a protective barrier that locks in moisture, leaving your skin feeling soft and smooth. Its rich texture makes it an ideal ingredient for moisturizers, lotions, and body butters.

Advertisement

The antioxidants present in cocoa butter also help fight free radicals and promote a youthful appearance. So, whether you’re baking a batch of brownies or looking to pamper your skin, cocoa butter is a versatile ingredient that can bring both pleasure and nourishment to your life.

Top Online Retailers for Cocoa Butter

You can easily find top online retailers for cocoa butter. These retailers offer a wide range of options, ensuring that you can find the perfect cocoa butter for your needs. Here are some of the best places to buy cocoa butter online:

  • Amazon: With its vast selection and competitive prices, Amazon is a go-to destination for cocoa butter. They offer top cocoa butter brands like Palmer’s and Navitas Naturals.

  • Vitacost: Known for its focus on natural and organic products, Vitacost offers high-quality cocoa butter from brands like Now Foods and Life-Flo.

  • iHerb: iHerb is a popular online retailer that carries a variety of cocoa butter brands, including Nubian Heritage and Dr. Woods.

When it comes to skincare, cocoa butter has numerous benefits for the skin. It is deeply moisturizing, helps improve elasticity, and can even help reduce the appearance of scars and stretch marks. So, whether you’re looking to cook with cocoa butter or use it for skincare, these top online retailers have you covered.

Local Stores That Carry Cocoa Butter for Cooking

When it comes to finding cocoa butter for cooking, local stores are a convenient option to explore. While online retailers offer a wide range of choices, sometimes it’s easier to find what you need right in your own neighborhood.

Local suppliers often carry cocoa butter, which is essential for many recipes and baking projects. Not only can you save on shipping costs, but you also have the advantage of speaking directly with knowledgeable staff who can provide guidance and recommendations.

Advertisement

Additionally, visiting local stores allows you to inspect the product before purchasing, ensuring its quality and freshness. To find cocoa butter locally, simply search for specialty food stores, gourmet markets, or health food stores in your area.

This way, you can enjoy the convenience and personal touch that local suppliers offer, without the hassle of finding cocoa butter online.

Specialty Shops for Gourmet Cocoa Butter

Specialty shops offer a wide selection of gourmet cocoa butter for all your baking needs. These shops are known for their high-quality products and expertise in the field of baking. Here are three reasons why specialty shops are the best place to buy gourmet cocoa butter:

  • Variety: Specialty shops have a wide range of gourmet cocoa butter options to choose from. Whether you’re looking for a specific brand or flavor, you’re sure to find it at these shops.

  • Quality: Gourmet cocoa butter is known for its superior quality. Specialty shops source their products from reputable suppliers, ensuring that you get the best cocoa butter for your baking.

  • Expertise: The staff at specialty shops are knowledgeable about cocoa butter and can provide you with valuable advice and recommendations. They can guide you in choosing the right cocoa butter for your specific baking needs.

Bulk Suppliers of Cocoa Butter for Cooking

For those looking to stock up on cocoa butter, bulk suppliers offer a convenient solution. Bulk suppliers specialize in providing large quantities of cocoa butter, making it easier for you to stock up and ensure you have enough for all your culinary creations.

When it comes to culinary uses, cocoa butter is a versatile ingredient that can enhance the flavor and texture of various dishes. From chocolate desserts to savory dishes, cocoa butter adds a rich and smooth mouthfeel to your recipes.

Advertisement

Whether you’re a professional chef or a home cook, having a reliable source of cocoa butter in bulk can save you time and money. So, if you’re in need of cocoa butter for your cooking endeavors, look no further than bulk suppliers for a hassle-free shopping experience.

Cocoa Butter Options for Different Dietary Needs

When it comes to cocoa butter, there are options available for different dietary needs. For those looking for cocoa butter substitutes or vegan alternatives, there are a few options to consider.

  • Shea butter: Derived from the nuts of the shea tree, this butter has a similar creamy texture and can be used as a substitute for cocoa butter in recipes.

  • Coconut oil: This versatile oil can be used as a vegan substitute for cocoa butter in certain recipes. It adds a subtle coconut flavor and has a smooth texture.

  • Avocado butter: Made from the flesh of avocados, this butter is a great vegan alternative to cocoa butter. It has a rich, creamy texture and is packed with nutrients.

These cocoa butter substitutes and vegan options provide a great alternative for those with dietary restrictions or preferences. They can be easily found in health food stores or online retailers specializing in vegan products.

Tips for Using Cocoa Butter in Your Favorite Recipes

To enhance the flavor and texture of your favorite recipes, try incorporating cocoa butter as a versatile ingredient that can elevate your dishes to the next level.

Not only does cocoa butter add a rich and creamy taste to your dishes, but it also offers several benefits for your skin. Cocoa butter is widely known for its moisturizing properties and can help hydrate and nourish your skin. Additionally, it contains antioxidants that can protect your skin from environmental damage and promote a youthful appearance.

Advertisement

If you’re looking to make homemade cocoa butter recipes, you can try incorporating it into baked goods like brownies or cookies for a decadent and indulgent treat. You can also melt it and drizzle it over fruits or use it as a base for homemade chocolates.

The possibilities are endless when it comes to using cocoa butter in your favorite recipes.

Frequently Asked Questions

Can I Use Cocoa Butter as a Substitute for Regular Butter or Oil in Baking?

Yes, cocoa butter can be used as a substitute for regular butter or oil in baking. It adds a rich, chocolate flavor and has the added benefit of being dairy-free and high in antioxidants.

Is Cocoa Butter Suitable for People With Dairy Allergies or Lactose Intolerance?

Cocoa butter is a suitable alternative for people with dairy allergies or lactose intolerance. It contains no dairy products or lactose, making it a safe option. You can find cocoa butter in specialty food stores or online.

Can Cocoa Butter Be Used for Savory Dishes or Is It Primarily Used in Sweet Recipes?

Cocoa butter can be used in savory dishes, adding a rich and velvety texture. While it is primarily known for its use in sweet recipes, it can be a unique and delicious substitute for regular butter in cooking.

Advertisement

How Long Does Cocoa Butter Last and How Should It Be Stored?

Cocoa butter lasts for about 2-5 years if stored properly. To tell if it’s gone bad, check for a rancid smell or change in texture. Store it in a cool, dry place away from heat and sunlight for best results.

Are There Any Potential Health Risks or Concerns Associated With Consuming Cocoa Butter in Cooking?

There are no known health risks associated with consuming cocoa butter in cooking. In fact, it has potential benefits such as being rich in antioxidants. However, it’s important to use it in moderation, as recommended dosage is key.

Conclusion

Well, who would have thought that cocoa butter could be such a versatile ingredient in the kitchen?

From its rich flavor to its smooth texture, cocoa butter adds a touch of luxury to any dish.

And the best part? You can easily find it online or at your local stores.

Advertisement

So go ahead, indulge in the irony of using cocoa butter to create delicious meals that will leave your taste buds wanting more.

Trust me, it’s a culinary secret worth exploring!

Continue Reading
Advertisement

Recipes & Culinary Uses

How to Make Creamy Butter Garlic Pasta

Published

on

By

An image of a steaming plate of al dente pasta twirled with a rich, golden butter garlic sauce

I am going to reveal to you the secret to making the most delicious butter garlic pasta you have ever tried.

Get ready to indulge in a symphony of flavors as tender pasta gets enveloped in a rich, velvety butter garlic sauce.

This recipe is simple yet sophisticated, perfect for impressing guests or treating yourself to a truly decadent meal.

So grab your apron and let’s dive into the magic of homemade butter garlic pasta.

Trust me, you won’t be able to resist.

Advertisement

Key Takeaways

  • Choose long and thin pasta like spaghetti or linguine for the best texture.
  • Cook the pasta al dente to prevent mushiness and allow the sauce to cling to the strands.
  • Prepare a well-seasoned and fragrant garlic butter sauce with sautéed minced garlic and optional herbs and spices.
  • Combine the cooked pasta with the simmered sauce, ensuring every strand is coated, and garnish with Parmesan cheese and parsley.

Choosing the Right Pasta

I’ll pick out the perfect type of pasta for my butter garlic pasta. When it comes to choosing the right pasta, there are so many options to consider. Different types of pasta shapes can greatly impact the overall texture and taste of the dish.

For a butter garlic pasta, I’d opt for a long and thin pasta shape like spaghetti or linguine. These types of pasta allow the butter garlic sauce to cling onto the strands, ensuring each bite is full of flavor.

Additionally, the importance of cooking the pasta until it’s al dente can’t be understated. Al dente pasta has a slight bite to it, providing a satisfying texture and preventing it from becoming mushy when combined with the butter garlic sauce.

Preparing the Garlic Butter Sauce

To start, I’ll heat up the olive oil in a skillet and sauté the minced garlic until it becomes fragrant. This step is crucial as it will infuse the sauce with a rich, savory flavor.

Advertisement

Once the garlic is golden and aromatic, I’ll enhance the garlic butter sauce by adding a handful of fresh herbs, such as chopped parsley or basil. These herbs not only add a burst of freshness but also contribute to the overall visual appeal of the dish.

Next, I’ll pour in a splash of white wine to the garlic butter sauce. The wine adds a subtle tanginess and complexity that elevates the flavors. This step is optional, but it truly takes the sauce to another level.

With the garlic butter sauce now perfectly seasoned and fragrant, it’s time to move on to boiling the pasta.

Boiling the Pasta

Advertisement

Once the water reaches a rolling boil, I add a generous amount of salt before adding the pasta. Achieving the perfect al dente texture is essential for a delicious butter garlic pasta. I carefully follow the instructions on the pasta package, cooking it for the recommended time minus a minute or two. This ensures that the pasta is cooked, but still firm to the bite.

To add a twist to the traditional garlic butter pasta, I sometimes incorporate a variety of herbs and spices into the boiling water. A pinch of red pepper flakes adds a subtle kick, while a handful of fresh basil leaves brings a refreshing aroma. These additions elevate the flavors and take the dish to a whole new level.

Cooking the Garlic Butter Sauce

While simmering the sauce, I stir in a knob of butter until it melts and blends seamlessly with the other ingredients. This step is crucial for creating a rich and flavorful garlic butter sauce that will elevate your pasta dish to new heights.

Here are three cooking techniques and flavor variations that you can experiment with to enhance the taste of your butter garlic pasta:

  • Sautéing the garlic: Instead of simply adding minced garlic to the sauce, try sautéing it in the butter until fragrant and golden brown. This will bring out the natural sweetness and depth of flavor in the garlic.

  • Adding herbs and spices: To take your sauce to the next level, consider incorporating herbs like parsley or basil, and spices like red pepper flakes or black pepper. These additions will add complexity and a touch of heat to your butter garlic pasta.

  • Using flavored butter: If you want to get creative with your flavor profile, try using flavored butter. You can find a wide variety of options at the grocery store or make your own by mixing in herbs, spices, or even cheese. This will infuse your sauce with a unique and delicious taste.

Combining the Pasta and Sauce

Advertisement

After the sauce has simmered to perfection, I pour it over the cooked pasta and toss until every strand is coated in the creamy goodness.

The combination of the rich butter and aromatic garlic creates a delectable flavor that’s hard to resist.

To enhance the dish even further, I like to garnish it with a sprinkle of freshly grated Parmesan cheese and a handful of chopped parsley. This adds a touch of freshness and brings out the flavors of the sauce.

As for serving suggestions, this butter garlic pasta pairs well with a simple green salad or some crusty garlic bread on the side.

Advertisement

For variations and substitutions, you can experiment with different types of pasta, such as spaghetti or fettuccine, and add in ingredients like sautéed mushrooms or grilled chicken for added protein.

The possibilities are endless, but one thing is for sure: this butter garlic pasta is a crowd-pleaser that will leave everyone wanting more.

Frequently Asked Questions

How Can I Make This Recipe Vegan-Friendly?

To make this recipe vegan-friendly, you can use vegan substitutes for butter, such as plant-based margarine or coconut oil. Additionally, opt for dairy-free options like almond milk or cashew cream instead of regular milk or cream.

Can I Use Gluten-Free Pasta for This Recipe?

Sure, you can use gluten-free pasta for this recipe. Just remember to follow the cooking instructions for gluten-free pasta and consider alternatives like rice or quinoa pasta for a delicious, gluten-free version.

Can I Substitute Olive Oil for Butter in the Garlic Butter Sauce?

Substituting olive oil or vegan butter in the garlic butter sauce can alter the taste and texture of the dish. Olive oil adds a rich, fruity flavor, while vegan butter provides a creamy and buttery texture.

Advertisement

How Can I Make This Dish Spicier?

To make this dish spicier, there are several ways to add heat. You can incorporate hot chili flakes, spicy red pepper sauce, or even diced jalapeños. Another alternative to garlic could be using ginger for a flavorful twist.

Can I Add Vegetables or Protein to This Pasta Dish?

Adding vegetables and protein to this pasta dish is a great idea. It not only enhances the nutritional value but also adds texture and flavor. I recommend sautéing some bell peppers and adding cooked chicken for a delicious and balanced meal.

Conclusion

In conclusion, making butter garlic pasta is a simple yet delicious dish that can be enjoyed by everyone.

The rich and creamy garlic butter sauce perfectly coats the al dente pasta, creating a mouthwatering combination of flavors.

This recipe allows you to indulge in a culinary experience that’s both satisfying and comforting, like a warm embrace on a chilly evening.

Advertisement

So why not give it a try and treat yourself to a delightful meal?

Continue Reading

Recipes & Culinary Uses

Easy Steps to Make Butter from Raw Milk Using a Mixer

Published

on

By

An image showcasing the step-by-step process of transforming creamy raw milk into luscious butter using a mixer

As I immerse myself in the realm of culinary exploration, I came across a hidden treasure: crafting butter from raw milk using a mixer. With just a few basic ingredients and my reliable mixer, I unveiled the key to producing smooth, homemade butter that would impress any chef.

In this article, I will guide you through the precise steps, from gathering the ingredients to storing the final product. Get ready to churn and savor the rich rewards of your own creation.

Let’s butter up!

Key Takeaways

  • Choose a mixer with a powerful motor and sturdy construction
  • Strain and pasteurize the raw milk before churning
  • Use a high-speed setting on the mixer for faster butter formation
  • Store homemade butter in airtight containers to maintain flavor and freshness

Gathering the Ingredients and Equipment

I’m gathering the ingredients and equipment needed to make butter from raw milk in my mixer.

Advertisement

To ensure a successful butter-making process, it’s crucial to choose the right mixer. Look for a mixer with a powerful motor and a sturdy construction that can handle the thick consistency of the cream. A high-speed setting is also desirable to expedite the churning process.

When it comes to sourcing raw milk, it’s important to prioritize safety and quality. Look for local farms or dairies that follow strict hygiene practices and ensure the cows are healthy and well-cared for. Freshness is key, so opt for milk that has been recently produced and stored properly.

Preparing the Raw Milk for Churning

To start preparing the raw milk for churning, I’ll first need to strain out any impurities. This ensures that the milk is clean and safe for consumption.

Before churning, it’s important to pasteurize the raw milk to eliminate any harmful bacteria that may be present. Pasteurization involves heating the milk to a specific temperature and holding it there for a set period of time. This process helps to destroy any potential pathogens without significantly altering the taste or nutritional composition of the milk.

Once the raw milk is pasteurized, there are different methods of churning it into butter. One method involves using a mixer, which agitates the milk until the fat globules separate from the liquid, forming butter.

Advertisement

Churning the Raw Milk in the Mixer

Using a high-speed setting, I’ll let the mixer agitate the milk until the fat globules separate and butter forms. The speed of the mixer plays a crucial role in the churning process. A higher speed will help the fat globules to separate more quickly, resulting in butter formation. The churning time will vary depending on the mixer speed and the amount of milk being churned. It is important to monitor the process closely to avoid over-churning, which can lead to a grainy texture. To give you an idea of the correlation between mixer speed and churning time, here is a table that summarizes the approximate time required for butter formation at different speeds:

Mixer Speed Churning Time (minutes)
Low 20-30
Medium 15-20
High 10-15
Very High 5-10
Turbo 2-5

Separating the Butter From the Buttermilk

After the churning process, I strain the mixture through a fine-mesh sieve to separate the butter from the buttermilk. The creamy liquid slowly drips down, leaving behind the beautiful golden butter. It’s a delicate process, requiring patience and precision.

As I watch the buttermilk flow through the sieve, I can’t help but appreciate the benefits of using raw milk for making butter. The rich and complex flavors of raw milk add depth and character to the final product. It’s like tasting a piece of the farm, with its grassy undertones and hints of sweetness.

Advertisement

To further enhance the butter’s taste, there are various methods for flavoring homemade butter. From the simplicity of sprinkling salt to the creativity of adding herbs and spices, the possibilities are endless.

Storing and Using Your Homemade Butter

When storing my homemade butter, I prefer to use airtight containers to keep it fresh and prevent any unwanted odors from seeping in. It’s important to protect the butter’s flavor and texture, as well as extend its shelf life. Additionally, I like to experiment with different flavors to add a unique twist to my butter. Some creative ways to flavor homemade butter include incorporating herbs like rosemary or thyme, adding spices like cinnamon or garlic powder, or mixing in sweet ingredients like honey or maple syrup. This allows me to customize my butter based on my preferences and the dishes I plan to use it in. Speaking of which, homemade butter has a multitude of uses in cooking and baking. It can be spread on toast, melted over vegetables, used as a base for sauces, or incorporated into pastry dough for flakier results. The possibilities are endless!

Flavor Ingredients Recommended Uses
Herb-infused Rosemary, thyme Mashed potatoes, roasted vegetables
Spiced Cinnamon, garlic powder Toast, pancakes
Sweet Honey, maple syrup Baked goods, waffles

Frequently Asked Questions

How Long Does It Take for the Raw Milk to Turn Into Butter in the Mixer?

To speed up the process of turning raw milk into butter in a mixer, you can increase the speed and duration of mixing. It is not possible to make butter in a mixer without using raw milk.

Advertisement

Can I Use Pasteurized Milk Instead of Raw Milk for Making Butter in a Mixer?

Using raw milk instead of pasteurized milk for making butter in a mixer has several benefits. It enhances the flavor and nutritional value of the butter. To achieve the best consistency, ensure the milk is fresh and at room temperature before churning.

What Is the Ideal Temperature for the Raw Milk Before Churning It in the Mixer?

The ideal temperature for raw milk before churning it in the mixer is around 50-55°F. This ensures proper fat separation and reduces churning time. It’s crucial to maintain the correct temperature for the best results.

Can I Add Flavorings or Herbs to the Butter While Churning It in the Mixer?

Yes, you can add flavorings or herbs to the butter while churning it in the mixer. This is a great way to incorporate flavor into homemade butter and experiment with different tastes.

Can I Use a Hand Mixer Instead of a Stand Mixer to Churn the Raw Milk Into Butter?

Using a hand mixer for churning raw milk into butter has its pros and cons. It can be more convenient and easier to handle, but may take longer and require more effort compared to a stand mixer. Other methods without a mixer include shaking in a jar or using a food processor.

Conclusion

In conclusion, making butter from raw milk in a mixer is a simple and rewarding process. By following the steps outlined above and using the right ingredients and equipment, you can transform fresh raw milk into delicious homemade butter.

Advertisement

Remember, practice makes perfect, so don’t be discouraged if your first attempt isn’t perfect. With a little patience and perseverance, you’ll be churning out creamy butter in no time, and soon you’ll be able to spread it on toast and enjoy the fruits of your labor.

Continue Reading

Recipes & Culinary Uses

Make Rich Butter from Raw Milk

Published

on

By

An image capturing the process of making butter from raw milk

Hey! Have you ever thought about how to turn raw milk into homemade butter? Look no further, I’ve got the solution for you.

In this article, I’ll take you through the step-by-step process of turning that creamy goodness into delicious homemade butter.

We’ll explore the benefits of using raw milk, learn how to separate the cream, and even discover different flavors you can infuse into your butter.

So, grab your apron and let’s get churning!

Key Takeaways

  • Raw milk contains essential vitamins, minerals, and enzymes that are destroyed during pasteurization.
  • Separating the cream from raw milk can be done through gravity separation, centrifugal separation, or cold separation.
  • Churning the cream into butter can be done through hand churning, using a stand mixer with a whisk attachment, or using a food processor with a blade attachment.
  • Washing and storing the freshly made butter involves cleaning the butter container and preserving its freshness by wrapping it tightly in wax paper or using an airtight container.

Understanding the Benefits of Raw Milk

Advertisement

Raw milk has numerous health benefits that are not found in pasteurized milk. Understanding the nutritional value of raw milk is important for those seeking a natural and wholesome source of nutrients.

Contrary to popular belief, raw milk is not a dangerous product when handled and consumed properly. In fact, it contains essential vitamins, minerals, and enzymes that are destroyed during the pasteurization process.

Raw milk is rich in beneficial bacteria and probiotics, which can support a healthy gut microbiome and enhance digestion. Additionally, raw milk is a good source of bioavailable nutrients such as calcium, protein, and healthy fats.

Debunking myths about raw milk is crucial to prevent misinformation and promote informed choices regarding our food.

Preparing the Raw Milk for Butter Making

To prepare the milk for butter making, it’s important to first skim off the cream. This step is crucial as it allows us to separate the high-fat cream from the milk, which is necessary for obtaining a good quality butter.

Advertisement

Here are three separating techniques to help you achieve the best results:

  1. Gravity separation: After allowing the milk to stand undisturbed for a few hours, the cream naturally rises to the top, making it easy to skim off with a spoon or ladle.

  2. Centrifugal separation: Using a cream separator machine, the milk is spun at high speeds, causing the heavier cream to separate from the lighter milk. This method is efficient and yields a higher cream quality.

  3. Cold separation: By refrigerating the milk overnight, the cream becomes denser and easier to separate. Skimming off the cold cream results in a richer and creamier butter.

Separating the Cream From the Raw Milk

If you want to achieve the best results when separating the cream from the milk, try using gravity separation, centrifugal separation, or cold separation techniques.

Gravity separation involves allowing the milk to sit undisturbed in a container for a period of time, allowing the cream to rise to the top.

Advertisement

Centrifugal separation utilizes a machine that spins the milk at high speeds, forcing the cream to separate from the milk.

Cold separation involves chilling the milk to a low temperature, causing the cream to solidify and separate from the milk.

These techniques are beneficial because consuming raw dairy has numerous health benefits, such as improved digestion, increased nutrient absorption, and enhanced immune function.

Additionally, if you don’t have access to a churn, these separation methods provide alternatives for obtaining cream for making butter.

Churning the Cream Into Butter

Once the cream has separated from the milk, you can start churning it into delicious butter. Churning is the process of agitating the cream until it transforms into butter.

Advertisement

Here are three techniques to help you achieve the perfect consistency:

  1. Hand Churning: This traditional method involves using a small churn or jar and physically shaking or rocking it back and forth until the cream turns into butter.

  2. Stand Mixer: If you have a stand mixer with a whisk attachment, you can use it to churn the cream. Start at a low speed and gradually increase until the butter forms.

  3. Food Processor: Another option is to use a food processor with a blade attachment. Pulse the cream until it separates into butter and buttermilk.

Troubleshooting common butter making problems:

  • If the cream isn’t thickening, ensure it is at the right temperature (around 50-55°F) and give it more time to churn.
  • If the butter is too soft, refrigerate it for a while before churning again.
  • If the butter is too hard, let it soften at room temperature or add a small amount of buttermilk to adjust the consistency.

After churning the cream into butter, it’s time to move on to the next step of washing and storing the freshly made butter.

Washing and Storing the Freshly Made Butter

When it comes to washing and storing freshly made butter, there are a few key points to consider.

Advertisement

First, cleaning the butter container is essential to maintain the quality of the butter. I recommend using warm soapy water and a soft sponge to remove any residue before drying it thoroughly.

Second, preserving the butter’s freshness is crucial to prolong its shelf life. To do this, I suggest wrapping the butter tightly in wax paper or placing it in an airtight container to protect it from air and odors.

Lastly, it’s important to store butter at the proper temperature. The recommended storage temperature for butter is between 32-40°F (0-4°C), as this helps to maintain its texture and prevent spoilage.

Cleaning the Butter Container

Before cleaning the butter container, make sure to remove any leftover butter residue. Cleaning the butter container is essential to maintain its freshness and prevent any cross-contamination. Here are three effective cleaning techniques to ensure a clean and sanitized container:

  1. Soak in hot, soapy water: Fill the container with hot water and add a few drops of dish soap. Let it sit for a few minutes to loosen any residue, then scrub with a sponge or brush.

  2. Use vinegar solution: Mix equal parts white vinegar and water in the container. Let it sit for about 15 minutes to dissolve any stubborn residue. Scrub with a sponge or brush, then rinse thoroughly.

  3. Bleach solution: Mix 1 tablespoon of bleach with 1 gallon of water. Let the container soak in the solution for 10 minutes, then scrub and rinse well.

Preserving Butter’s Freshness

After cleaning the butter container, the next step is to ensure that the butter stays fresh and maintains its texture for as long as possible. This is important because nobody wants to end up with rancid butter. To preserve the butter’s freshness, there are a few key things you can do. Firstly, storing the butter in an airtight container or wrapping it tightly in wax paper will help prevent it from being exposed to air and developing off flavors. Secondly, keeping the butter refrigerated at a consistent temperature, ideally around 40°F (4°C), will slow down the process of it going rancid. Lastly, if you want to store butter for an extended period of time, freezing it is a great option as it can extend its shelf life for several months. By following these steps, you can enjoy fresh and flavorful butter for all your culinary needs.

Advertisement
Preserving Butter’s Freshness
Store butter in an airtight container or wrap tightly in wax paper.
Refrigerate butter at a consistent temperature of around 40°F (4°C).
Freeze butter for extended storage, which can extend its shelf life for several months.
Follow these steps to enjoy fresh and flavorful butter for all your culinary needs.

Recommended Storage Temperature

Storing butter in the refrigerator at a consistent temperature of around 40°F (4°C) helps to maintain its freshness and prevent it from going rancid. Here are three recommended storage methods and the ideal temperature range for butter:

  1. Wrap it properly: Use parchment paper or airtight containers to wrap the butter. This will protect it from absorbing odors and prevent it from drying out.

  2. Keep it away from light: Exposure to light can cause butter to spoil faster. Store it in a cool, dark place, like the refrigerator’s butter compartment or a covered butter dish.

  3. Avoid temperature fluctuations: Butter can easily absorb flavors and odors from other foods in the fridge. To maintain its quality, store it away from strong-smelling foods and make sure the temperature remains constant.

Following these recommended storage methods and keeping the butter at the ideal temperature range will help to preserve its freshness and taste for longer periods.

Using Leftover Buttermilk in Recipes

You can easily use leftover buttermilk in recipes to add a tangy flavor. Buttermilk is a versatile ingredient that can enhance the taste and texture of various baked goods. It’s a great substitute for regular milk in recipes because it adds a unique tanginess and richness. Here are some creative uses for leftover buttermilk in baking:

Row Buttermilk Recipe Result
1 Pancakes Fluffy and Light and
tender texture fluffy pancakes
2 Biscuits Tender and Flaky and
flaky texture buttery biscuits
3 Cakes Moist and Moist and
tender texture tender cakes
4 Fried chicken Crispy and Juicy and
flavorful coating flavorful chicken

Exploring Variations and Flavors in Homemade Butter

When it comes to homemade butter, there are endless possibilities for adding unique flavors and enhancing its taste.

One way to do this is through unique butter infusions, where you can mix in various ingredients like garlic, herbs, or even fruit zest to create a personalized flavor profile.

Advertisement

Another option is to enhance the taste of your homemade butter by incorporating herbs such as rosemary, thyme, or basil, which can add a delightful aroma and taste.

Lastly, experimenting with flavored salts like smoked sea salt or truffle salt can take your butter to a whole new level, adding a burst of flavor that will elevate any dish.

Unique Butter Infusions

To add unique flavors to your butter, try infusing it with herbs or spices. Butter infusion techniques offer a creative way to elevate the taste of your homemade butter. Here are three ideas to get you started:

  1. Garlic and Herb Butter: Melt your butter, then add minced garlic and chopped fresh herbs like rosemary, thyme, or parsley. Let the flavors infuse for a few hours before refrigerating.

  2. Citrus Zest Butter: Grate the zest of an orange, lemon, or lime into your softened butter. Mix well and let it sit in the fridge for a while to let the citrus flavors infuse.

  3. Spiced Butter: Add a pinch of your favorite spices, such as cinnamon, nutmeg, or cardamom, to your softened butter. Mix thoroughly and let it sit in the fridge to develop the flavors.

Enhancing Taste With Herbs

Adding herbs to your butter is a simple and effective way to enhance the taste of your culinary creations. Not only does it add a burst of flavor, but it also adds a touch of freshness and complexity to your dishes. Experimenting with different herbal blends can elevate your butter to a whole new level. Whether you prefer a savory blend of rosemary and thyme or a more exotic combination of cilantro and lime, the possibilities are endless. To help you get started, here is a table showcasing some popular herb and spice combinations that you can try in your butter:

Herb/Spice Flavor Profile Best Pairings
Rosemary Earthy, piney Potatoes, lamb
Basil Sweet, peppery Tomatoes, mozzarella
Dill Fresh, tangy Fish, cucumbers
Cinnamon Warm, sweet Apples, baked goods

Experimenting With Flavored Salts

After experimenting with herbs to enhance the taste of my homemade butter, I decided to take my flavor exploration to the next level by experimenting with flavored salts. Flavored salts can add a unique and exciting twist to butter, elevating its taste and making it even more delicious.

Advertisement

Here are three ways I incorporated different salts into my flavored butter recipes:

  1. Smoked Salt Butter: I mixed smoked salt into softened butter, creating a smoky and savory spread that pairs perfectly with grilled meats and vegetables.

  2. Truffle Salt Butter: By combining truffle salt with butter, I created a luxurious and indulgent spread that adds a hint of earthy and aromatic flavor to any dish.

  3. Citrus Salt Butter: I zested some fresh citrus fruits and mixed the zest with sea salt before incorporating it into butter. The result was a bright and tangy butter that adds a burst of freshness to baked goods and seafood.

Frequently Asked Questions

Can I Make Butter From Pasteurized Milk?

Yes, you can make butter from pasteurized milk. It’s a simple process of churning the cream until it separates into butter and buttermilk. Homemade butter can be healthier than store-bought due to its freshness and lack of additives.

How Long Does It Take to Separate the Cream From the Raw Milk?

Separating cream from raw milk depends on various factors, such as temperature and milk fat content. Once separated, the cream can be churned into butter. The churning process can take anywhere from 10 to 30 minutes.

Can I Use an Electric Mixer Instead of a Churn to Make Butter?

Yes, you can use an electric mixer to make butter. However, it’s important to note that the process may differ slightly between churning raw milk and pasteurized milk.

How Long Can I Store Freshly Made Butter?

Freshly made butter can be stored in the refrigerator for up to two weeks. However, its shelf life can be extended by freezing it. Proper storage is essential to maintain its freshness and quality.

Advertisement

What Other Uses Are There for Leftover Buttermilk Besides Using It in Recipes?

Leftover buttermilk can be used in pancakes, biscuits, or even as a marinade for fried chicken. As for alternative methods for making butter, you can also use heavy cream and a mixer.

Conclusion

In conclusion, making butter from raw milk is a delightful and rewarding process. The benefits of raw milk are numerous, as it contains valuable enzymes and nutrients that are lost during pasteurization.

By separating the cream from the raw milk and churning it vigorously, you can easily transform it into creamy and delicious homemade butter.

Don’t forget to wash and store the butter properly to ensure its freshness. And don’t discard the leftover buttermilk! It can be used in various recipes to add flavor and moisture.

So, grab some raw milk and start your butter-making adventure today!

Advertisement
Continue Reading

Trending