Connect with us

Butter Tips and Tricks

Converting 1lb of Butter to Cups: How Many Cups You Need

2025

Published

on

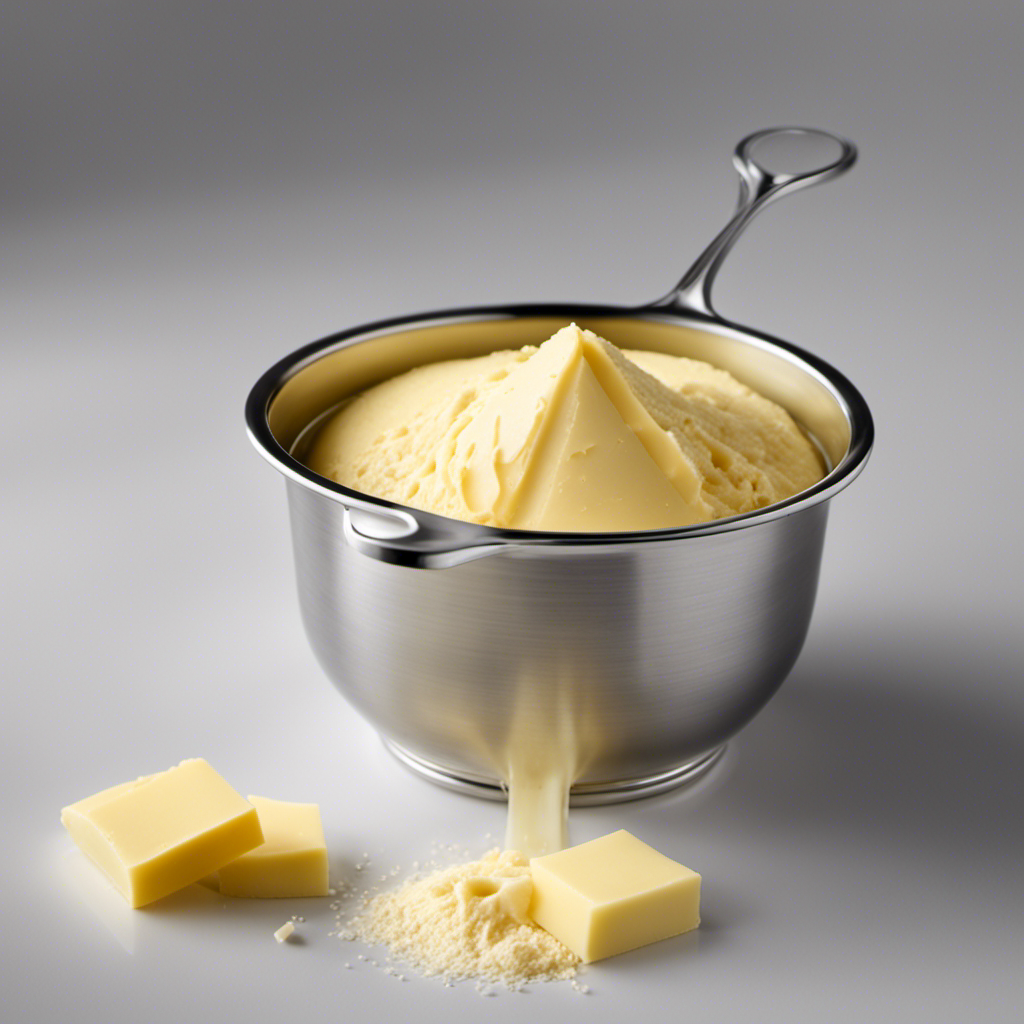
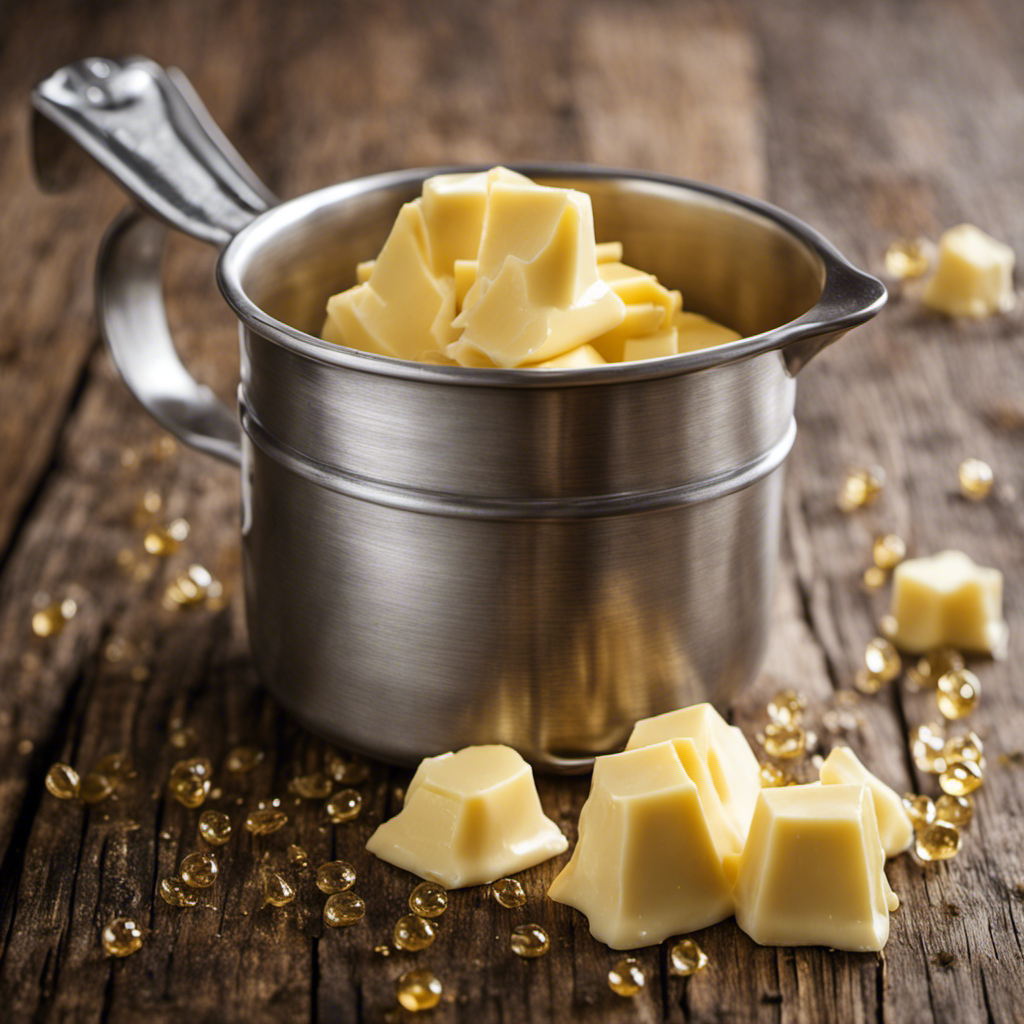
An image showcasing a vintage-style measuring cup filled to the brim with smooth, creamy butter, perfectly weighing 1lb

I’m facing a creamy conundrum that requires resolution: exactly how many cups amount to 1lb of butter?

Join me on this journey as we dive into the world of butter measurements. From understanding the basic conversion of pounds to cups, to unraveling the science behind butter measurements, we’ll leave no stone unturned.

Whether you’re converting butter from weight to volume or adjusting measurements for different recipes, I’ve got the tips you need to ensure accurate butter measurement.

Let’s get ready to butter up!

Key Takeaways

  • 1 lb of butter is equal to about 2 cups
  • Conversion from weight to volume is necessary for accurate measurements
  • Accurate measurement is crucial for precise recipe results
  • Understanding the science behind butter measurements ensures consistent results

Basic Conversion: Pound to Cup

Advertisement

1 lb of butter is equal to about 2 cups. Understanding conversion ratios is essential when it comes to baking.

Many recipes call for specific measurements, and it’s crucial to know how to convert them accurately. In baking, common measurements are often given in cups, tablespoons, or pounds. For example, if a recipe requires 1 lb of butter, you can easily convert it to cups by dividing the weight by the conversion ratio. In this case, 1 lb of butter is equivalent to approximately 2 cups.

This conversion ratio helps ensure that your baked goods turn out just right. By familiarizing yourself with common baking measurements and understanding conversion ratios, you’ll be able to confidently follow any recipe and achieve delicious results.

Understanding Butter Measurements

To understand how much butter you need, it’s important to know the conversion between pounds and cups. Here are some helpful tips for measuring butter for cooking and converting butter for spreads:

  1. 1 pound of butter is equal to 2 cups.
  2. If a recipe calls for 1/2 cup of butter, you will need 1/4 pound or 1 stick of butter.
  3. For spreads, 1/4 cup of butter is equivalent to 4 tablespoons or 1/2 stick of butter.
  4. If you need to convert a specific amount of butter from cups to pounds or vice versa, you can use online conversion tools or refer to a butter conversion chart.

Converting Butter From Weight to Volume

Advertisement

When it comes to baking, accurate measurements are crucial for achieving the desired results. One common ingredient that often requires conversion is butter. Understanding how to convert butter from weight to volume and measuring it accurately can make a significant difference in your recipes.

In this discussion, I will delve into the topic of butter weight conversion and provide tips for measuring butter accurately, helping you achieve consistent and delicious results in your baking endeavors.

Butter Weight Conversion

There’s a simple way to convert pounds of butter to cups. If you’re looking to convert butter from grams to cups, here’s how you can do it:

  1. Understand the conversion ratio: 1 cup of butter is equal to 226.8 grams.
  2. Determine the weight of the butter in grams.
  3. Divide the weight of the butter in grams by 226.8 to get the equivalent number of cups.
  4. Round the result to the nearest decimal place for a more accurate measurement.

Converting butter from weight to volume can be helpful when following recipes that list the ingredients in cups rather than pounds or grams. By knowing the conversion ratio and following these steps, you can easily measure butter accurately in cups.

Now, let’s move on to the next section about measuring butter accurately.

Measuring Butter Accurately

Measuring butter accurately is crucial for precise recipe results. As a home cook, I understand the importance of getting the measurements right to ensure the perfect texture and flavor in my dishes. When it comes to measuring butter for cooking, there are a few methods you can use to ensure accuracy. One way is to use a kitchen scale to weigh the butter in grams or ounces. Another method is to use measuring spoons to measure out tablespoons or teaspoons of butter. However, if a recipe calls for cups of butter, it’s important to know the conversion. Here is a handy table to help you convert butter in recipes:

Advertisement
Cups of Butter Grams Ounces
1 227 8
1/2 113 4
1/4 57 2
1/8 28 1

Using this table, you can easily measure the right amount of butter for your favorite recipes. Happy cooking!

The Science Behind Butter Measurements

Understanding the science behind butter measurements can help home bakers achieve accurate results in their recipes. Here’s what you need to know:

  1. Butter density: Butter is not uniformly dense throughout, which can lead to inconsistencies when measuring by volume. This is why weighing butter can provide more precise results.

  2. Measuring butter by weight: By using a kitchen scale, you can measure butter in grams or ounces. This ensures that you have the exact amount needed for your recipe, eliminating guesswork.

  3. Accuracy in baking: Baking is a science, and accurate measurements are crucial for successful outcomes. Using weight measurements for butter can help you achieve the desired texture, moisture, and flavor in your baked goods.

  4. Conversion to cups: Once you know the weight of your butter, you can easily convert it to cups using a conversion chart or calculator. This allows you to follow recipes that specify butter in cup measurements.

Understanding the science behind butter measurements not only improves accuracy but also ensures consistent and delicious results in your baking endeavors. Now, let’s delve into the next section about converting 1 pound of butter to cups.

Converting 1 Pound of Butter to Cups

Now that we understand the science behind butter measurements, let’s talk about converting 1 pound of butter to cups.

When it comes to butter, there are 2 cups in 1 pound. This means that if you have a recipe that calls for 1 pound of butter, you will need 2 cups.

Advertisement

It’s important to note that butter is typically sold in sticks, and each stick is equal to 1/2 cup or 8 tablespoons. So, if you need to convert butter to tablespoons, simply multiply the number of cups by 16.

Aside from using butter in baking recipes, there are also alternative uses for this versatile ingredient. Butter can be used to make sauces, add richness to mashed potatoes, or even give flavor to grilled vegetables. Its creamy texture and rich taste make it a favorite ingredient in many dishes.

Now that we know how to convert butter to cups and tablespoons, let’s explore how butter measurements are used in baking recipes.

Butter Measurements in Baking Recipes

When it comes to baking, accurate measurements are crucial for achieving the desired results. One common measurement concern is converting butter from pounds to cups.

In this discussion, I will delve into the process of butter cup conversion, the importance of accuracy in measurements, and how to effectively substitute butter in recipes.

Advertisement

Butter Cup Conversion

To convert pounds of butter to cups, you simply divide the pound measurement by two and use the resulting number as your cup measurement. It’s as simple as that!

Here are a few things to keep in mind when converting butter from pounds to cups:

  1. Start with the pound measurement of butter you have.
  2. Divide that measurement by two to get the cup measurement.
  3. Use the resulting number as your cup measurement in your recipe.
  4. Keep in mind that butter equivalents can vary depending on the recipe and the country you are in. It’s always a good idea to double-check the specific conversion for your recipe.

When converting butter to grams, the process is a bit different. One pound of butter is equal to approximately 454 grams. So, if you’re looking to convert pounds of butter to grams, simply multiply the pound measurement by 454 to get the gram measurement.

Accuracy of Measurements

Make sure you double-check the accuracy of your measurements to ensure your recipe turns out just right. Understanding different butter forms and the impact of temperature on butter measurements is essential for accurate results in baking and cooking.

Butter is commonly sold in stick form, with each stick typically measuring 1/2 cup or 8 tablespoons. However, different brands may have slightly different measurements, so it’s crucial to refer to the packaging or measure it yourself.

Softened butter, which is typically used in baking, is measured by packing it into a measuring cup or using a scale. Remember that the temperature of the butter can affect its volume, so it’s important to measure it at the desired temperature specified in the recipe.

Advertisement

Substituting Butter in Recipes

Substituting butter in recipes can alter the texture and flavor of the final dish. It’s important to keep this in mind if you’re looking for a different option or if you have dietary restrictions. Here are some tips to help you navigate the world of butter alternatives and measurement techniques:

  1. Choose the right substitute: There are various alternatives to butter, such as margarine, coconut oil, avocado, and applesauce. Each has its own unique flavor and texture, so choose wisely based on your recipe and personal preferences.

  2. Adjust the measurements: When substituting butter with alternatives, it’s crucial to consider the differences in moisture content and fat content. Use online conversion tools or refer to recipe books that provide specific measurements for each alternative.

  3. Experiment and taste: Don’t be afraid to experiment with different butter alternatives and measurements to find the perfect balance for your dish. Taste-test along the way to ensure you achieve the desired flavor and texture.

  4. Use proper measurement tools: To accurately measure butter alternatives, use measuring cups or spoons specifically designed for liquids or solids. This will help you achieve consistent results in your recipes.

Handy Conversion Chart: Butter in Cups

Did you know that a pound of butter is equivalent to about 2 cups?

Understanding butter density is important when converting butter to grams.

To convert butter from cups to grams, you need to know the density of butter. The density of butter is usually around 0.95 grams per milliliter.

Since there are approximately 237 milliliters in a cup, you can calculate that there are about 225 grams of butter in one cup.

Advertisement

Therefore, if you have a pound of butter, which is equivalent to 2 cups, you would have approximately 450 grams of butter.

This conversion is useful when following recipes that require measurements in grams or when you want to ensure accuracy in your baking or cooking.

Converting Butter From Ounces to Cups

When it comes to measuring butter, there is often confusion around the different units of measurement. People often wonder how many cups are in a pound of butter or how to convert ounces to cups accurately.

In this discussion, I will provide a clear explanation of butter measurement confusion and offer precise and reliable methods for converting butter from ounces to cups.

Butter Measurement Confusion

Are you unsure about how many cups are in a pound of butter? Well, you’re not alone! Many people find themselves confused when it comes to measuring butter. To help clear up the confusion, I want to share some butter measurement techniques and common butter measurement mistakes to avoid. Here’s what you need to know:

Advertisement
  1. Use a kitchen scale: The most accurate way to measure butter is by weighing it on a kitchen scale. This ensures you get the exact amount needed for your recipe.

  2. Convert from pounds to cups: If your recipe calls for cups of butter and you only have a pound, you can convert it. One pound of butter is equivalent to about 2 cups.

  3. Avoid using volume measurements: Butter can be tricky to measure using cups because its density can vary. It’s best to rely on weight measurements for accuracy.

  4. Don’t guess: When it comes to baking, precision is key. Guessing the amount of butter can lead to inconsistent results. Always measure carefully to ensure your recipe turns out as intended.

Precise Butter Conversion

To convert a pound of butter into cups, you can use a ratio of approximately 2 cups per pound. It’s important to understand butter density when converting from grams to cups. Butter is denser than water, so it takes up less space.

When converting, it’s best to use a conversion chart or calculator to ensure accuracy. To convert grams to cups, you need to know the density of the butter you’re working with. Different brands and types of butter may have slightly different densities, so it’s always a good idea to check the packaging for specific conversion information.

Measuring Butter in Different Forms

You can easily measure butter in different forms by knowing the conversion from pounds to cups. Here’s a helpful guide to measuring butter in recipes and converting butter from grams to cups:

  1. Stick of Butter: In the United States, a standard stick of butter weighs 1/2 cup or 8 tablespoons (113 grams).

  2. Pound of Butter: A pound of butter is equivalent to 2 cups or 32 tablespoons (454 grams).

  3. Grams to Cups: To convert butter from grams to cups, divide the weight in grams by 227 (the weight of 1 cup of butter in grams).

  4. Example: If you have 250 grams of butter, divide 250 by 227 to get approximately 1.1 cups.

Knowing these conversions will ensure that you can accurately measure butter for your recipes and achieve the desired results. Happy baking!

Adjusting Butter Measurements for Different Recipes

Now that we know how to measure butter in different forms, let’s talk about adjusting butter measurements for different recipes.

Advertisement

Baking can require different amounts of butter depending on the type of recipe. For example, if you’re making cookies, you might need to adjust the butter measurement to get the desired texture.

In general, if you want a softer and more tender baked good, you can increase the amount of butter. On the other hand, if you want a drier and crumblier texture, you can decrease the butter.

It’s important to note that adjusting butter measurements can affect the overall flavor and texture of your baked goods, so it’s a good idea to experiment and find the right balance.

If you’re looking for alternative options to butter in recipes, you can try using coconut oil, vegetable oil, or even applesauce as substitutes. These alternatives can help you achieve different flavors and textures in your baked goods.

Tips for Accurate Butter Measurement

When measuring butter, it’s important to use the correct measuring tools to ensure accuracy. Here are some tips to help you measure butter accurately:

Advertisement
  1. Use a kitchen scale: Weighing the butter on a scale is the most accurate way to measure it. This is especially important for recipes that require precise measurements.

  2. Use measuring cups: If you don’t have a scale, you can use measuring cups. Remember to pack the butter firmly into the cup and level off the top for an accurate measurement.

  3. Follow the markings on the butter wrapper: Most butter wrappers have markings to help you measure tablespoons or teaspoons. This can be a convenient way to measure smaller amounts of butter.

  4. Use a butter dish with measurements: Some butter dishes come with markings on the side, allowing you to easily measure the amount of butter you need.

Frequently Asked Questions

Can I Use a Different Type of Fat Instead of Butter in a Recipe?

Yes, you can substitute butter with different types of fats in a recipe. There are various alternatives like vegetable oil, coconut oil, or margarine. However, keep in mind that the texture and flavor may vary.

How Does the Temperature of the Butter Affect Its Measurement in Cups?

The temperature of butter can affect its measurement in cups. Butter has a melting point around 90°F, so if it’s too cold or too warm, it may not measure accurately. To quickly soften butter, you can use several methods like microwaving or grating.

How Do I Measure Butter if I Don’t Have a Scale?

When I don’t have a scale, I measure butter by using the conversion chart. It’s like finding my way without a map, but it works! Grams to cups, no problem!

Can I Substitute Margarine for Butter in a Recipe?

Yes, you can substitute margarine for butter in a recipe. However, there are pros and cons to consider. Margarine can alter the taste and texture, so it’s important to choose a high-quality brand for best results.

How Do I Convert Tablespoons of Butter to Cups?

Converting tablespoons of butter to cups can be tricky, but with a little math, it’s easy. Just remember that 1 cup equals 16 tablespoons. Don’t forget to adjust for different types of fats.

Advertisement

Conclusion

In conclusion, understanding butter measurements is essential for accurate and successful baking. Converting 1 pound of butter to cups can be a bit tricky, but with the knowledge and tips provided, you can easily navigate through different recipes.

Remember, precision is key when it comes to measuring butter, so use the appropriate tools and techniques.

So, next time you’re in the kitchen, don’t let butter measurements ‘slip through your fingers’ – measure carefully and enjoy delicious results!

Advertisement

Butter Tips and Tricks

Butter Temperature Guide for Baking

Find out how the right butter temperature can transform your baking results and discover tips that will elevate your skills to new heights.

Published

on

By

optimal butter temperature baking

Understanding butter temperatures is key for your baking success. Use cold butter when making flaky pastries, like pie crusts or croissants. For light and airy baked goods, softened butter works best; let it sit out for about 30 minutes. Melted butter is great for dense treats, such as brownies or chocolate chip cookies, as it adds moisture and flavor. Make sure your butter isn't too hot when melted to avoid cooking other ingredients. Getting these temperatures right can elevate your baking game greatly, leading to tastier and better-textured results. Discover more tips and tricks to enhance your baking skills.

Key Takeaways

  • Room temperature butter is ideal for creaming, incorporating air for light and fluffy textures in baked goods.
  • Cold butter is essential for flaky pastries, ensuring layers and tender textures in items like croissants and pie crusts.
  • Melted butter enhances moisture and flavor in cakes, yielding a gooey texture in cookies, but should be warm, not hot.
  • Use unsalted butter for precise control over salt levels in recipes, impacting taste balance significantly.
  • Always chill dough to enhance flavor and texture, preventing excessive spreading in cookies and ensuring better structure.

Importance of Butter Temperature

butter temperature affects baking

Butter temperature plays a crucial role in baking, affecting everything from texture to flavor. When you use room temperature butter, it easily incorporates air, leading to light and fluffy baked goods. This is especially important for cakes and cookies, where a creamy texture is key to the final product.

Additionally, the high fat content in butter contributes to a soft, tender crumb in baked goods, making it essential for achieving the desired results in various recipes. Culinary uses of butter further illustrate its versatility.

On the other hand, using melted butter can yield denser results. It can provide a rich, fudgy texture in brownies, but it won't give you that airy quality you might want in a sponge cake.

If you're making pastries or pie crust, cold butter is essential for achieving flakiness, as it creates pockets of steam during baking.

The precise temperature of your butter can also influence the spread of cookies. If your butter's too soft, your cookies might spread too much and become thin. Conversely, if your butter's too cold, you might end up with cookies that don't spread at all.

Advertisement

Cold Butter: When to Use

when to use cold butter

When you're making chilled dough or flaky pastries, cold butter is your best friend.

Using it helps create that tender, layered texture you love in croissants and pie crusts.

Chilled Dough Requirements

Chilled dough often requires cold butter to achieve that perfect, flaky texture in your baked goods. When you're preparing recipes like pie crusts, biscuits, or scones, using cold butter is essential. It helps create those delicious layers and prevents the dough from becoming too soft.

Here are some key points to remember when working with chilled dough:

  1. Temperature: Make sure your butter is straight from the fridge. If it's too soft, it won't create the desired texture.
  2. Cutting Technique: Use a pastry cutter or your fingers to incorporate the cold butter into the flour. This method keeps the butter cold and prevents it from melting prematurely.
  3. Dough Handling: Handle the dough as little as possible. The warmth from your hands can soften the butter, affecting the final product.
  4. Chilling Time: After mixing, chill the dough for at least 30 minutes before rolling it out. This resting period allows the butter to firm up again, enhancing the overall flakiness.

Flaky Pastry Benefits

Using cold butter is essential for achieving that desirable flaky texture in pastries. When you incorporate cold butter into your dough, it creates small pockets that expand during baking. This results in that light, airy texture you love in flaky pastries, like croissants and puff pastry.

The importance of maintaining the right temperature in baking is similar to guaranteeing proper toilet flushing mechanisms that enhance efficiency toilet flushing efficiency.

You want to keep the butter cold because the heat from your hands can melt it, which defeats the purpose. By using cold butter, you guarantee that it remains solid until it hits the oven. As the pastry bakes, the water in the butter turns to steam, creating those delightful layers that flake apart beautifully.

Advertisement

When making pastries, remember to cut the cold butter into small cubes and mix it into the flour quickly. This helps you maintain the butter's temperature while guaranteeing even distribution.

If you find yourself pressed for time, you can even chill your mixing bowl and utensils to further keep things cool.

Softened Butter: Key Uses

softened butter s essential applications

Softened butter plays an essential role in baking, acting as a key ingredient that can transform your recipes. When butter is softened to the right consistency, it's easier to incorporate into batters and doughs, ensuring a smooth texture and rich flavor.

Here are some of the key uses for softened butter:

  1. Creaming: You'll want to cream softened butter with sugar to create a light and airy mixture, which helps your baked goods rise beautifully.
  2. Incorporating Add-ins: Softened butter allows you to easily mix in ingredients like chocolate chips, nuts, or dried fruit without clumping.
  3. Making Frosting: It's vital for achieving a smooth, spreadable frosting. Softened butter blends seamlessly with powdered sugar and other flavorings.
  4. Enhancing Flavor: The rich taste of softened butter enhances the overall flavor profile of your cookies, cakes, and muffins, making them irresistibly delicious.

Using softened butter correctly can elevate your baking, so make sure to check its texture before starting your next culinary adventure!

Melted Butter: Best Applications

melted butter usage tips

When you're using melted butter in your baking, you're not just adding flavor; you're also changing the texture.

It helps create a rich, chewy cookie dough and enhances moisture in cakes, making them tender and delicious.

Understanding how to use melted butter effectively can elevate your baked goods to the next level.

Advertisement

Cookie Dough Consistency

Melted butter can greatly impact cookie dough consistency, leading to delightful results in certain recipes. When you use melted butter, it creates a richer, denser dough, which can yield cookies that are chewy and flavorful.

This technique works best for specific types of cookies, so knowing when to use melted butter is key.

Here are four cookie types where melted butter shines:

  1. Chocolate Chip Cookies: The melted butter helps to create a gooey, soft center while ensuring the edges remain slightly crispy.
  2. Brown Butter Cookies: Browning the butter before melting adds a nutty flavor that elevates your cookie game.
  3. Peanut Butter Cookies: The melted butter integrates seamlessly with peanut butter, creating a smooth and rich texture.
  4. Oatmeal Cookies: Using melted butter results in a chewy, satisfying bite, allowing the oats to shine through.

Cake Moisture Enhancement

Using melted butter in cake recipes can greatly enhance moisture and flavor, much like it does in cookie dough. When you incorporate melted butter, it blends easily with sugar and eggs, creating a smooth batter that results in a tender crumb. This is especially beneficial for recipes that require a denser texture, as it helps prevent dryness.

Here are some of the best applications for using melted butter in your cake recipes:

Application Description
Pound Cakes Adds richness and keeps the cake moist
Chocolate Cakes Enhances chocolate flavor and moisture
Bundt Cakes guarantees even moisture throughout
Layer Cakes Creates a soft, fine crumb
Quick Breads Improves texture while adding flavor

How to Achieve Perfect Butter

mastering butter perfection techniques

Achieving perfect butter is essential for elevating your baking results. The temperature and texture of butter can drastically affect the outcome of your recipes. To guarantee you're using butter at its best, follow these simple tips:

1. Room Temperature: For most baking needs, let your butter sit out for about 30 minutes to an hour. It should be soft enough to leave a slight indent when pressed but still hold its shape.

Advertisement

Using European butter can enhance the flavor due to its higher fat content and creamy texture.

2. Cold Butter for Pastries: If you're making pastries or pie crusts, use cold butter straight from the fridge. This helps create a flaky texture as the butter melts during baking.

3. Melted Butter: For recipes like brownies or some cookies, melted butter works wonders. Just make sure it's not too hot, as that can cook your eggs if they're added in afterward.

4. Clarified Butter: For a richer flavor, consider using clarified butter. It has a higher smoke point and adds a nutty taste, perfect for certain baked goods.

Common Baking Mistakes to Avoid

avoid common baking mistakes

Even with the right butter temperature, mistakes can still derail your baking efforts. One common error isn't measuring ingredients properly. Use a kitchen scale or measuring cups and spoons to guarantee accuracy.

Another mistake is skipping the creaming step when mixing butter and sugar. This process incorporates air, creating a light texture in your baked goods.

Advertisement

Overmixing your batter is another pitfall. Once you've combined the wet and dry ingredients, mix just until they come together. Overmixing can lead to dense, chewy results instead of the desired lightness.

Also, don't forget to check your oven temperature. An oven thermometer can help you verify that it's accurate; baking at the wrong temperature can ruin your recipe.

Frequently Asked Questions

Can I Use Margarine Instead of Butter?

Sure, you can use margarine instead of butter in many recipes. Just remember, margarine has a different flavor and fat content, which might slightly alter the texture and taste of your final dish. Experiment and enjoy!

How Does Butter Temperature Affect Cookie Texture?

Imagine baking a cake. If it's too hot, it collapses. Similarly, butter temperature affects cookie texture; cold butter yields chewy cookies, while softened creates a tender, melt-in-your-mouth delight. Choose wisely for your perfect batch!

What Happens if I Use Too Cold Butter?

If you use too cold butter, your cookies won't spread properly. They'll end up dense and cakey instead of chewy. It's essential to let butter soften for the best texture and flavor in your baked goods.

Advertisement

Can I Refrigerate Softened Butter for Later Use?

Yes, you can refrigerate softened butter for later use. Just make sure to wrap it tightly to prevent it from absorbing odors. When you're ready, let it sit at room temperature before using it again.

How Can I Quickly Soften Butter Without Melting It?

If you're in a pinch, try grating the cold butter with a box grater. It'll soften quickly as you work it into your recipe. Alternatively, cut it into small cubes for faster results.

Conclusion

In baking, using the right butter temperature is essential for achieving perfect results. Did you know that about 90% of bakers say the texture of their cookies improved when they used softened butter instead of cold? By mastering when to use cold, softened, or melted butter, you can elevate your baked goods from good to great. So, next time you're in the kitchen, remember these tips to avoid common mistakes and create delicious treats!

Continue Reading

Butter Tips and Tricks

How to Clarify Butter Step by Step

Find out how to easily clarify butter at home and unlock its rich flavors for your culinary creations—discover the secrets inside!

Published

on

By

clarifying butter made easy

To clarify butter, start by cutting 1 pound of unsalted butter into small pieces and melting it in a heavy-bottomed saucepan over low heat. Stir gently until it completely melts and the foam rises to the top. Skim off the foam and let the denser milk solids settle at the bottom. Carefully pour the golden butterfat into a heat-resistant container, avoiding the solids. Strain it through a fine mesh strainer or cheesecloth for a smooth finish. Store your clarified butter in airtight containers in a cool, dark place or the fridge. There's so much more you can do with this delicious ingredient!

Key Takeaways

  • Cut unsalted butter into small pieces and melt it slowly in a heavy-bottomed saucepan over low heat to prevent burning.
  • Skim the white foam off the surface once the butter is fully melted, leaving the milk solids at the bottom undisturbed.
  • Pour the clarified butter into a separate container, using a funnel to avoid spills and discarding the milk solids.
  • Strain the poured butter through a fine mesh strainer or cheesecloth to remove any remaining impurities for a smooth texture.
  • Store clarified butter in airtight containers in a cool, dark place or refrigerate for longer freshness; label with the date.

Gather Your Ingredients

prepare your cooking essentials

Gathering your ingredients is essential for a smooth clarifying process. Start with unsalted butter, as it allows you to control the flavor and salt content in your final product. Aim for around a pound, which usually yields about 1.5 cups of clarified butter.

You'll also want a sturdy, heat-resistant container to hold your clarified butter once it's done. A glass jar or a small bowl works perfectly. Make sure it's clean and dry before you use it.

Additionally, prepare a fine mesh strainer or cheesecloth. This will help you separate the milk solids from the liquid gold you're after. Having a spatula on hand can be helpful for scraping any remaining solids from the strainer.

Choose the Right Equipment

selecting appropriate gear

Choosing the right equipment is essential for successfully clarifying butter. First, you'll need a heavy-bottomed saucepan or pot. This type of cookware distributes heat evenly, preventing the butter from burning as it melts. A smaller pot is ideal if you're working with a limited amount of butter.

When preparing to clarify butter, consider how butter enhances flavor in various culinary applications, as this process will allow you to utilize it more effectively.

Next, grab a heatproof spatula or wooden spoon. You'll use this to stir the butter gently, ensuring it melts uniformly while separating the solids from the liquid. A fine-mesh strainer or cheesecloth is another vital tool. This is what you'll rely on to filter out the milk solids once the butter has melted and clarified.

Advertisement

Additionally, have a heat-safe container ready for the clarified butter. Glass jars or containers with tight-fitting lids work well, as they can be stored in the refrigerator after you finish. It's also helpful to have a ladle or small measuring cup on hand to pour the clarified butter without making a mess.

Lastly, keep a thermometer nearby if you want to monitor the temperature, though it's not strictly necessary. With the right equipment, you're all set to start the butter clarification process.

Melt the Butter

melt the butter slowly

With your equipment in place, it's time to melt the butter. Start by cutting the butter into small, even pieces. This helps it melt evenly and prevents scorching.

Place the butter in your saucepan or double boiler, whichever you prefer. If you're using a saucepan, keep the heat low to avoid burning.

Turn the stove on to a low setting. As the butter begins to melt, stir it gently with a wooden spoon or silicone spatula. This not only guarantees even melting but also helps you keep an eye on the temperature. You want the butter to melt gradually without bubbling or browning; this is essential for clarifying it properly.

If you notice any foam forming on the surface, don't worry just yet. Your goal is to melt and separate the butterfat from the water and milk solids.

Advertisement

Continue to stir until all the butter is completely melted. Once it's fully melted, remove it from the heat, allowing it to cool slightly before moving on to the next step.

You're one step closer to enjoying beautifully clarified butter!

Separate the Layers

layer separation technique

Once the butter has melted and cooled slightly, you can begin separating the layers. You'll notice three distinct layers: the top foam, the clarified butter in the middle, and the milk solids at the bottom. Your goal is to keep the clarified butter while discarding the other two layers.

Here's how to do it effectively:

  • Skim the Foam: Use a spoon to carefully skim off the white foam from the top. This foam consists of water and some proteins that you don't want in your clarified butter.
  • Leave the Milk Solids: As you scoop out the foam, be cautious not to disturb the layer of milk solids at the bottom. These solids are denser and will settle there as the butter cools.
  • Transfer the Clarified Butter: Once you've removed the foam, gently pour the middle layer into another container, leaving the milk solids behind.
  • Use a Funnel: If you're worried about spilling, use a funnel to help guide the butter into your storage jar without mixing in the solids.

Strain the Clarified Butter

strain clarified butter carefully

After transferring the clarified butter into another container, you'll want to strain it to remove any remaining impurities and guarantee a smooth texture. This step is vital to achieve the high quality of clarified butter, which has a long shelf life and is suitable for those with lactose intolerance.

Start by grabbing a fine mesh strainer or cheesecloth. Place the strainer over a clean bowl or jar, making sure it's stable and won't tip over during the pouring process.

Next, slowly pour the clarified butter into the strainer. This step is important, as it allows any milk solids or impurities to be caught while the liquid butter passes through. If you're using cheesecloth, you might want to fold it several times to create a finer filter.

Advertisement

If you notice any solids clinging to the strainer, gently scrape them away to make sure you're getting all the good stuff out. For best results, consider the proper storage techniques to maintain the freshness of your clarified butter.

Take your time with this process; rushing can lead to bits of solids slipping through. Once you've poured all the liquid butter, you can give the strainer a gentle shake to encourage any last drops to fall.

Discard the solids left in the strainer. Now, you're left with beautifully clarified butter, ready to enhance your cooking and baking!

Store Your Clarified Butter

proper clarified butter storage

Once you've strained your clarified butter, it's important to store it properly to maintain its quality.

Consider using one of the many specialized butter tools available for ideal storage. You can choose from a variety of storage containers, but make sure they're airtight to prevent oxidation.

Keep your clarified butter in a cool, dark place for the best results.

Advertisement

Storage Containers Options

When it comes to storing your clarified butter, choosing the right container is crucial for maintaining its quality and freshness.

You'll want a container that's airtight, durable, and suitable for refrigeration or room temperature, depending on how you plan to use it. Here are some great options to take into account:

  • Glass jars: These are ideal for both short- and long-term storage. They're non-reactive and easy to clean, plus you can see how much butter you have left.
  • Plastic containers: Lightweight and often designed with airtight seals, plastic containers are portable and convenient, but make sure they're BPA-free.
  • Silicone molds: If you're looking to store smaller portions, silicone molds allow you to freeze clarified butter in individual servings, making it easy to use just what you need.
  • Tupperware: A classic choice, Tupperware offers various sizes and shapes, making it flexible for your storage needs. Just verify it's tightly sealed to keep out air and moisture.

No matter what container you choose, verify it's clean and dry before filling it with your delicious clarified butter!

Ideal Storage Conditions

Storing your clarified butter in the right conditions can greatly extend its shelf life and maintain its flavor.

First, keep it in an airtight container. This prevents moisture and air from entering, which can cause rancidity. Glass jars or food-safe plastic containers work well.

Next, choose a cool, dark place for storage. A pantry or cupboard away from direct sunlight is ideal. If you prefer, you can also store clarified butter in the refrigerator. While refrigeration can prolong its freshness, it may solidify, making it harder to scoop out. Just let it sit at room temperature for a few minutes before using.

Advertisement

If you opt for longer storage, consider freezing your clarified butter. Portion it into small containers or ice cube trays, then transfer the frozen cubes to a freezer-safe bag. This way, you can easily grab a small amount as needed.

Remember to label your containers with the date so you can track freshness. Properly stored, clarified butter can last up to three months in the fridge and even longer in the freezer.

Use in Recipes

cooking ingredient suggestions

Incorporating clarified butter into your recipes can elevate your dishes to a whole new level. This golden ingredient boasts a high smoke point, making it perfect for sautéing, frying, or baking.

You'll find that it enhances flavors while providing a rich, nutty aroma that regular butter can't match.

Here are some delicious ways to use clarified butter in your cooking:

  • Sautéing vegetables: Use clarified butter to sauté your favorite vegetables for a savory side dish.
  • Roasting meats: Brush clarified butter over meats before roasting for a crispy, golden exterior.
  • Making sauces: Combine it with herbs and spices for a quick sauce that adds depth to your meals.
  • Baking pastries: Replace regular butter in pastry recipes for a flaky texture and enhanced flavor.

Frequently Asked Questions

Can I Use Salted Butter for Clarification?

You can use salted butter for clarification, but it might alter the flavor of your final dish. Unsalted butter is generally preferred, as it allows for better control over the seasoning in your recipes.

How Long Does Clarified Butter Last in the Fridge?

Clarified butter can last in the fridge for up to six months if stored properly. You'll enjoy its rich flavor, appreciate its versatility, and savor its longer shelf life compared to regular butter.

Advertisement

Can I Clarify Butter in the Microwave?

Yes, you can clarify butter in the microwave! Just melt it gently, allowing the milk solids to settle. Carefully skim off the top layer, and you'll have clarified butter ready for your recipes. Enjoy!

What Is the Smoke Point of Clarified Butter?

You'd think clarified butter would smoke like a kitchen fire, but it actually has a higher smoke point around 450°F. You can cook at higher temperatures without worrying about burnt flavor ruining your dish.

Is Clarified Butter Healthier Than Regular Butter?

Clarified butter's often considered healthier since it contains less lactose and casein, making it easier to digest for some. Plus, its higher smoke point allows for better cooking without burning, enhancing your culinary experience.

Conclusion

Now that you've crafted your own golden elixir, you're ready to elevate your culinary creations! Like a chef's secret weapon, clarified butter adds a rich, nutty depth to any dish, transforming the ordinary into the extraordinary. Whether you drizzle it over vegetables or use it for sautéing, your meals will shimmer with flavor. So go ahead, indulge in the simple pleasure of your homemade clarified butter, and let your taste buds dance with delight!

Advertisement
Continue Reading

Butter Tips and Tricks

Creating the Perfect Butter Sauce Base

Learn how to create a rich butter sauce base that elevates any dish, and discover unique tips to perfect your culinary creations.

Published

on

By

perfect butter sauce recipe

Creating the perfect butter sauce base starts with using high-quality, unsalted butter to guarantee rich flavor. Melt it slowly over low heat, then add fresh aromatics like garlic or shallots for depth. Incorporate an acidic agent such as lemon juice or white wine to balance the sauce's richness. Whisk vigorously to achieve a smooth texture and prevent separation. Taste as you go, adjusting seasonings to enhance flavors without overpowering. With these techniques, your butter sauce will elevate any dish. There's plenty more to explore about unique variations and tips to perfect your culinary creations.

Key Takeaways

  • Use high-quality, unsalted butter with at least 82% fat content for a rich and creamy sauce base.
  • Incorporate fresh herbs, garlic, or shallots to enhance the flavor profile and aroma of the butter sauce.
  • Gradually add acidic agents like lemon juice or white wine to balance the richness and brighten the overall taste.
  • Monitor cooking temperature closely to prevent burning and maintain a smooth, velvety texture throughout the process.
  • Taste frequently and adjust seasoning to achieve a harmonious flavor profile that complements your main dish.

Understanding Butter Sauce Types

exploring butter sauce varieties

When it comes to butter sauces, understanding the different types can elevate your culinary skills. Each type of butter sauce has its unique flavor profile and application, making it essential for you to know how to use them effectively.

Butter is versatile and enhances the flavor of sauces, making it a key ingredient in many culinary creations, especially when paired with savory dishes like fish or roasted meats butter enhances flavor.

First up is the classic beurre blanc, a creamy, tangy sauce made from butter, white wine, and shallots. It's perfect for drizzling over fish or vegetables.

Then there's beurre noisette, or brown butter, which gets its nutty flavor from cooking the butter until it turns a golden brown. This sauce adds depth to pasta and enhances roasted meats.

Another popular option is beurre maître d'hôtel, a compound butter mixed with herbs, lemon juice, and seasoning. You can easily slice it and let it melt over grilled steaks or sautéed vegetables.

Advertisement

Essential Ingredients for Butter Sauce

key components of butter sauce

To create a delicious butter sauce, you need to focus on a few key ingredients.

Start with quality butter, as it forms the foundation of your sauce and provides essential fatty acids and fat-soluble vitamins butter's nutritional benefits.

Then, think about adding aromatic enhancements and acidic balancing agents to elevate the flavor profile.

Quality of Butter

Choosing the right quality of butter can make or break your butter sauce. When you're selecting butter, go for high-fat content options, ideally around 82% fat. This higher fat percentage guarantees a creamier texture and richer flavor, which elevates your sauce considerably.

Additionally, butter is a source of vitamins A, D, E, and K, making it a nutritious choice for your culinary creations. Look for unsalted butter, as this gives you better control over the seasoning of your sauce. Salted butter can lead to an overly salty sauce that masks the delicate flavors you're aiming for.

Additionally, choose butter that's made from fresh cream and has minimal additives. This guarantees a clean taste and a smooth consistency. If you can, opt for European-style butter. It's churned longer, which gives it a unique richness and depth that can enhance your sauce.

Advertisement

Brands that prioritize quality often have a more vibrant flavor profile, making your sauce stand out. Don't overlook the importance of freshness, as optimal storage temperature for butter plays an essential role in maintaining its quality.

Butter that's nearing its expiration date can have off-flavors that will compromise your dish. Always check the packaging for the best quality, and when in doubt, invest a little more for superior butter. The right choice will pay off in the final flavor of your butter sauce.

Aromatic Enhancements

A butter sauce's flavor profile can be dramatically enhanced by the right aromatic ingredients. You want to contemplate herbs, spices, and other flavor boosters that can elevate your sauce from simple to spectacular. Think about fresh herbs like thyme, parsley, or basil; they add vibrant notes that complement the richness of butter.

Don't underestimate garlic. When sautéed gently, it infuses your sauce with an irresistible aroma and depth. Shallots are another great choice—they offer a subtle sweetness and complexity that can transform your dish.

For a touch of warmth, contemplate adding a pinch of nutmeg or even red pepper flakes. These spices can introduce a gentle heat that balances the sauce beautifully.

Advertisement

You can also experiment with aromatics like lemon zest or finely grated ginger, which bring brightness and freshness. Infusing your butter with these ingredients while it melts allows their flavors to meld seamlessly.

Ultimately, don't be afraid to get creative. The right aromatic enhancements can turn a basic butter sauce into a memorable component of your meal.

Remember to taste as you go, adjusting the balance to suit your preferences. Happy cooking!

Acidic Balancing Agents

While enhancing your butter sauce with aromatics adds depth, balancing that richness with acidity is key to achieving a harmonious flavor profile. Acidic balancing agents, like lemon juice, vinegar, or white wine, cut through the richness of butter, preventing it from overwhelming your dish.

When you add a splash of citrus juice, you're not just brightening the sauce; you're elevating every ingredient's flavor. Lemon juice, for instance, offers a fresh, zesty kick that pairs beautifully with seafood or vegetables.

Advertisement

On the other hand, a dash of red wine vinegar introduces a slightly sweet tang that complements richer meats and hearty pastas.

Don't be afraid to experiment. Start with a small amount, taste as you go, and adjust until you find that perfect balance. You might also consider using citrus zest alongside juice for an added depth of flavor.

Techniques for Perfecting the Base

mastering base application techniques

To perfect your butter sauce base, you need to focus on a few key techniques.

Start by choosing quality ingredients, as they'll make a noticeable difference in flavor.

Then, pay attention to temperature control, timing, and whisking techniques to guarantee a smooth and rich sauce.

Choosing Quality Ingredients

Choosing the right ingredients is essential for crafting a delicious butter sauce base. Start with high-quality butter; it's the star of your sauce. Look for unsalted butter, as it allows you to control the seasoning better. Opt for European-style butter if you want a richer flavor and creamier texture.

Advertisement

Next, select fresh herbs. Parsley, thyme, or chives can elevate your sauce, adding vibrant flavors. Always use fresh herbs instead of dried ones for maximum impact.

When it comes to aromatics, shallots and garlic are perfect additions. They impart a subtle sweetness and depth, enhancing your sauce's complexity.

Don't forget about acid! A splash of lemon juice or white wine will brighten your sauce and balance the richness of the butter. If you're feeling adventurous, consider adding a hint of Dijon mustard or capers for an extra layer of flavor.

Lastly, pay attention to any additional ingredients, such as cheese or cream. Choose high-quality options, as inferior ingredients can compromise your sauce.

Proper Temperature Control

Mastering proper temperature control is essential for perfecting your butter sauce base. If you want your sauce to achieve that rich, velvety texture without separation or burning, you need to pay attention to the heat.

Advertisement

Here are three key points to keep in mind:

  1. Start Low: Begin by melting your butter over low heat. This allows the butter to soften and separate its milk solids gently without browning or burning.
  2. Increase Gradually: Once melted, you can gradually increase the heat to medium. This stage is vital for developing flavors while ensuring the sauce doesn't cook too quickly, which could lead to undesirable textures.
  3. Monitor Closely: Keep a close eye on the temperature throughout the cooking process. If you notice any bubbling or foaming, it's a sign that the heat is too high. Lower the heat immediately to maintain a smooth consistency.

Timing and Whisking Techniques

When creating a butter sauce base, timing and whisking techniques are critical for achieving the perfect consistency and flavor. Start by melting your butter slowly over medium heat. This guarantees it doesn't brown prematurely.

Once it's melted, you can begin adding your other ingredients, like shallots or garlic. Timing is key here; you want to let them cook just long enough to soften but not burn.

As you incorporate your ingredients, whisk vigorously. Using a whisk instead of a spoon allows you to incorporate air, creating a lighter, more emulsified sauce.

Keep whisking as you gradually add any liquids, like stock or wine. This helps to prevent separation and guarantees a smooth texture.

Pay attention to the sauce's consistency; if it starts to thicken too much, you can add a little warm water or stock to loosen it up.

Advertisement

Balancing Flavors and Acidity

harmonizing taste and tartness

Balancing flavors and acidity in a butter sauce is essential for achieving a harmonious taste that complements your dish. When you create a butter sauce, you want it to enhance your ingredients without overpowering them. Here's how to find that perfect balance:

  1. Add acidity gradually: Start with a small amount of lemon juice, vinegar, or white wine. Taste as you go, and adjust until it brightens the sauce without making it sour.
  2. Incorporate complementary flavors: Consider the main ingredients of your dish. If you're working with seafood, a splash of citrus can elevate the flavors. For meats, a touch of balsamic vinegar can bring richness to the sauce.
  3. Season wisely: Don't forget the role of salt. It enhances flavors and can help tone down too much acidity. Be mindful of your salt levels; you can always add more, but it's tough to fix an overly salty sauce.

Infusing Herbs and Aromatics

herbal and aromatic infusion

Infusing herbs and aromatics into your butter sauce can elevate its flavor profile, bringing depth and complexity to your dishes. Start by choosing fresh herbs like thyme, rosemary, or basil, as they offer vibrant flavors that can transform your sauce. Chop them finely to release their essential oils, and add them to melted butter over low heat. This gentle cooking allows the herbs to infuse their flavors without losing their freshness.

You can also enhance your butter sauce with aromatics like garlic or shallots. Sauté minced garlic in the butter until it's fragrant, but avoid browning it to prevent bitterness. Shallots add a sweet and mild onion flavor that complements the richness of the butter beautifully. Consider adding a sprig of bay leaf or a pinch of crushed red pepper flakes for an extra kick.

Remember to taste as you go; the goal is to achieve a balanced flavor. Once your sauce has reached the desired intensity, strain out any solids if you prefer a smooth finish.

Enjoy your expertly infused butter sauce drizzled over vegetables, pasta, or seafood, and watch as it takes your dish to the next level.

Common Mistakes to Avoid

avoiding common mistakes

Many home cooks overlook some common pitfalls while preparing a butter sauce, which can lead to disappointing results. Avoiding these mistakes will help you create a rich, flavorful sauce that enhances your dishes.

  1. Overheating the Butter: It's essential to keep the heat low when melting butter. High temperatures can cause it to burn, resulting in a bitter taste. Always melt it gently and watch for browning.
  2. Neglecting to Add Seasoning: Butter on its own can be bland. Don't forget to season your sauce adequately. Incorporate salt, pepper, or even a splash of lemon juice to elevate the flavor.
  3. Rushing the Infusion Process: If you're infusing herbs or aromatics, be patient. Let them simmer in the melted butter for several minutes to fully release their flavors. Skipping this step can leave your sauce lacking depth.

Serving Suggestions and Pairings

ideal combinations and recommendations

When it comes to serving butter sauce, there's no shortage of delicious possibilities. You can elevate your dishes by drizzling this rich sauce over perfectly cooked seafood, like lobster or scallops. The creamy texture and savory flavor complement the natural sweetness of the seafood beautifully.

For pasta lovers, tossing your favorite noodles in butter sauce creates a simple yet luxurious dish. Add some grated parmesan and fresh herbs for an extra layer of flavor.

Don't forget about vegetables! Roasted or steamed veggies, like asparagus or broccoli, come alive with a touch of butter sauce, making them irresistible.

Advertisement

You might also consider pairing butter sauce with grilled meats. A drizzle over chicken or steak enhances the dish, providing a velvety finish.

If you're feeling adventurous, try infusing your butter sauce with garlic, lemon, or herbs for a unique twist.

Frequently Asked Questions

Can I Use Margarine Instead of Butter for the Sauce?

Yes, you can use margarine instead of butter for your sauce. Just keep in mind that the flavor and texture might differ slightly. Experimenting will help you find the right balance for your taste.

How Long Does Butter Sauce Last in the Fridge?

When it comes to butter sauce, it's better to be safe than sorry. You can store it in the fridge for about a week. Just make sure to keep it tightly sealed for freshness!

Can I Freeze Butter Sauce for Later Use?

Yes, you can freeze butter sauce for later use. Just let it cool, transfer it to an airtight container, and freeze. When you're ready, thaw it in the fridge before reheating. Enjoy!

Advertisement

Is It Possible to Make a Vegan Butter Sauce?

You might wonder if a vegan butter sauce can truly satisfy your taste buds. Absolutely! By using plant-based ingredients like coconut oil or vegan butter, you can whip up a delicious sauce that's creamy and flavorful.

What Are Some Alternative Thickeners for Butter Sauce?

For thickening your sauce, consider using cornstarch, arrowroot, or even flour. You can also try puréed vegetables or nuts for a unique twist. These alternatives work well to achieve that desired consistency without compromising flavor.

Conclusion

Now that you've mastered the art of creating the perfect butter sauce base, imagine the rich, velvety sauce glistening on your plate, ready to elevate any dish. Picture the aroma of fresh herbs wafting through the air, teasing your senses as you prepare to serve. With every drizzle, you're not just adding flavor; you're crafting an experience. So, what will you pair it with? The possibilities are endless, and your culinary adventure is just beginning.

Continue Reading
Advertisement

Affiliate disclaimer

As an affiliate, we may earn a commission from qualifying purchases. We get commissions for purchases made through links on this website from Amazon and other third parties.

Vetted

crafting perfect cannabutter infusion crafting perfect cannabutter infusion
Vetted13 hours ago

15 Best Cannabutter Makers for Crafting the Perfect Infusion

Discover the top 15 best cannabutter makers for crafting the perfect infusion, starting with the letter 'B' for unbeatable results...

top unsalted butter picks top unsalted butter picks
Vetted13 hours ago

15 Best Unsalted Butter Brands for Baking and Cooking, According to Foodies

Melt-in-your-mouth flavors await as foodies uncover the top 15 unsalted butter brands for baking and cooking.

top st louis bakeries top st louis bakeries
Vetted13 hours ago

11 Best Gooey Butter Cake Bakeries in St. Louis You Must Try

Bite into gooey butter cake perfection at the top 11 St. Louis bakeries, where every slice promises a sweet adventure...

top pickles for sandwiches top pickles for sandwiches
Vetted13 hours ago

15 Best Bread and Butter Pickles for Your Ultimate Sandwich Experience

Yearning for the ultimate sandwich experience? Discover the top 15 bread and butter pickles to elevate your taste buds and...

top unsalted butters 2024 top unsalted butters 2024
Vetted13 hours ago

15 Best Unsalted Butters of 2025: Taste-Tested and Chef-Approved

Just when you thought butter couldn't get better, our expert-tested list of 2025's top 15 unsalted butters will make you...

vegan butter brands list vegan butter brands list
Vetted13 hours ago

15 Best Vegan Butter Brands That Will Make You Forget About Dairy

Discover top vegan butter brands that will make you forget about dairy with delicious alternatives starting with the letter 'D'...

peanut butter maker reviews peanut butter maker reviews
Vetted13 hours ago

15 Best Peanut Butter Makers That Will Transform Your Snacking Game

Liven up your snacking routine with the top 15 peanut butter makers that will change the way you enjoy this...

peanut butter protein powders peanut butter protein powders
Vetted13 hours ago

15 Best Peanut Butter Protein Powders to Boost Your Workouts and Recovery

Jumpstart your fitness journey with the top 15 peanut butter protein powders for enhanced workouts and recovery - discover the...

ultimate pb j sandwich guide ultimate pb j sandwich guide
Vetted13 hours ago

15 Best Breads for Making the Ultimate Peanut Butter and Jelly Sandwiches

Discover the essential bread choices for crafting the perfect peanut butter and jelly sandwich, starting with the letter 'D' -...

healthy butter options list healthy butter options list
Vetted14 hours ago

15 Best Healthy Butter Options for Your Clean Eating Lifestyle

Intrigued by the idea of healthy butter options for clean eating? Explore top picks for delicious and nutritious spreads to...

vegan butter alternatives list vegan butter alternatives list
Vetted14 hours ago

15 Delicious Vegan Butter Alternatives That Will Make You Forget Dairy

Nibble on these 15 mouthwatering vegan butter alternatives that rival dairy in taste and versatility—but which one reigns supreme?

diabetic friendly peanut butter options diabetic friendly peanut butter options
Vetted14 hours ago

15 Best Peanut Butter Options for Diabetics to Enjoy Without Worry

Uncover the top peanut butter choices for diabetics to savor guilt-free, ensuring stable blood sugar levels and delicious satisfaction.

Advertisement

Trending